When you click on links to various merchants on this site and make a purchase, this can result in this site earning a commission. Affiliate programs and affiliations include, but are not limited to, the eBay Partner Network.
For those of us who are slow: windshield surround removal
I recently acquired a second set of windshield surrounds for the car. I recently had these pieces painted black to match the rest of the car. In the next couple of weeks, I will be removing the original silver pieces and replacing them with the newly painted pieces.
So how does this work? I searched and found a couple of thread where the instructions mentioned that you simply need to "pry up" on the surrounds starting with the piece across the windshield. What is the exact process for this? Looking at the newly painted pieces, I see 2 plastic clips on each end and 5 metal clips placed between them. I don't have any special body/trim removal tools and read about using a butter knife, does anyone have any other tools they have used and would recommend? So do I stick the knife between the small gap between the surround and the roof or do I start at the lower part of the surround, towards the windshield? And it just pops off? Do I need to stick the knife anywhere along the surround and just pry in an upwards direction away from the car? I also read about the use of adhesive tape. None of the surround pieces I bought have any sort of tape on them (unlike the chrysler badges I bought), so why do a number of people recommend the use of double sided tape? Is there tape on the factory piece, that in addition to the clips, helps to hold the surround to the body? I assume the removal process for the side surround pieces is the same as how it is done for the surround that runs across the width of the car?
I also checked the 2004 ZH29 Crossfire manual that I downloaded and I couldn't even find any information on how to remove the windshield, let alone the surrounds.
All comments and suggests are encouraged! I don't want to start this and end up breaking something because I wasn't exactly sure how everything comes off.
Re: For those of us who are slow: windshield surround removal
Originally Posted by AllEuro
I recently acquired a second set of windshield surrounds for the car. I recently had these pieces painted black to match the rest of the car. In the next couple of weeks, I will be removing the original silver pieces and replacing them with the newly painted pieces.
So how does this work? I searched and found a couple of thread where the instructions mentioned that you simply need to "pry up" on the surrounds starting with the piece across the windshield. What is the exact process for this? Looking at the newly painted pieces, I see 2 plastic clips on each end and 5 metal clips placed between them. I don't have any special body/trim removal tools and read about using a butter knife, does anyone have any other tools they have used and would recommend? So do I stick the knife between the small gap between the surround and the roof or do I start at the lower part of the surround, towards the windshield? And it just pops off? Do I need to stick the knife anywhere along the surround and just pry in an upwards direction away from the car? I also read about the use of adhesive tape. None of the surround pieces I bought have any sort of tape on them (unlike the chrysler badges I bought), so why do a number of people recommend the use of double sided tape? Is there tape on the factory piece, that in addition to the clips, helps to hold the surround to the body? I assume the removal process for the side surround pieces is the same as how it is done for the surround that runs across the width of the car?
I also checked the 2004 ZH29 Crossfire manual that I downloaded and I couldn't even find any information on how to remove the windshield, let alone the surrounds.
All comments and suggests are encouraged! I don't want to start this and end up breaking something because I wasn't exactly sure how everything comes off.
Tom
The clamps attached to the windshield surround pieces are very difficult to remove based upon the design. I took mine to a windshield replacement shop, and they popped them off in a few minutes. It shouldn't cost much, I lucked out and was not charged. They used a plastic tool to remove them, so it would not crack the windshield. Spend a few bucks, to assure no damage to your windshield. Just my 2 cents.....
Dennis
Re: For those of us who are slow: windshield surround removal
I had a new windshield professionally fitted last week. Happened to look out of the window just as the guy was prying up the centre piece with a flat prying tool, similar to a screwdriver. He just seemed to be prying upwards from the roof side of the surround. I couldn't watch the rest of the procedure after that, but I'm pleased to say everything was put back in place perfectly with no damage!
Seems to be a fairly simple process but for peice of mind may be worth getting a windshield shop to do it for you, as suggested above!
Re: For those of us who are slow: windshield surround removal
Originally Posted by Tim2739
Are you interested in selling the old set? I need the center piece. Thanks!
I probably won't sell the original pieces since I want to keep all the original stuff should I want to go back to stock one day.
I had a new windshield professionally fitted last week. Happened to look out of the window just as the guy was prying up the centre piece with a flat prying tool, similar to a screwdriver. He just seemed to be prying upwards from the roof side of the surround. I couldn't watch the rest of the procedure after that, but I'm pleased to say everything was put back in place perfectly with no damage!
Seems to be a fairly simple process but for peice of mind may be worth getting a windshield shop to do it for you, as suggested above!
GL, Andy.
Thanks Andy, that's actually quite helpful. I may see if I can buy a plastic trim tool online somewhere, since I think it might be handy to have for other projects/cars.
Anybody else have additional recommendations/experiences? How about the A-pillar surrounds?
I appreciate your assistance trying to help me on this. I actually ready those threads however. I did DL a manual for the XF (see my first post in this thread) and the manua I have doesn't even mention how to remove the winshield. The surround is only referenced in the manual in a writeup about body tolerances.
I also saw the pictures in the other thread, but it doesn't help me determine the best way to actually remove the surrounds. I will,however, be buying a set of trim removal tools I saw on amazon for $16.00. I'm especially interested in the steps taken to remove the A pillar covers.
I'm just hoping that someone who removed the trim will see this and respond by saying, "this is how I did it...". I just want to make sure it's as easy as I think it is and whether there is a preferred way of removing the surrounds.
Re: For those of us who are slow: windshield surround removal
Originally Posted by AllEuro
180,
I appreciate your assistance trying to help me on this. I actually ready those threads however. I did DL a manual for the XF (see my first post in this thread) and the manua I have doesn't even mention how to remove the winshield. The surround is only referenced in the manual in a writeup about body tolerances.
I also saw the pictures in the other thread, but it doesn't help me determine the best way to actually remove the surrounds. I will,however, be buying a set of trim removal tools I saw on amazon for $16.00. I'm especially interested in the steps taken to remove the A pillar covers.
I'm just hoping that someone who removed the trim will see this and respond by saying, "this is how I did it...". I just want to make sure it's as easy as I think it is and whether there is a preferred way of removing the surrounds.
There are other posts on this subject. You know the old saying, "If at first you don't succeed, pry, pry, and pry again" Good luck.
Re: For those of us who are slow: windshield surround removal
This is not difficult. I just had mine off for painting. No tools needed.
Start with the center piece first near the junction where it meets a side piece. Begin by pulling up, away from the glass. I suppose you could use something to pry with if you cant get it up far enough to get a good grip on it - I'd suggest prying near the glass because a pry tool is less likley to damage the glass than the paint. I didn't need to pry with a tool but you can if you want.
There are 5 clips under the center section, also 5 matching clips attached to the car. Clips are attached with double-sided mounting tape. When I pulled mine off most of the clips released from each other as they should but a couple of the clips clung to each other and the mounting tape is what released. Don't worry about breaking clips (they're steel) the worst that can happen is the mounting tape will come off. If that happens, clean good and use new mounting tape to put the clip back where it belongs. I don't want anyone adding to the thread about losing surround pieces while going down the road. Once the center section is off you will have the confidence to yank off the side pieces in the same manner.
Re: For those of us who are slow: windshield surround removal
The end pieces are secured with three or four phillips-head screws that you will find if you carefully look under the weatherstripping that seals the door window at the windshield post. The center piece pops out with a slight pull. I took mine off and had it painted to match the body color, it was a 15-minute job.
Re: For those of us who are slow: windshield surround removal
Originally Posted by Rix-xf
This is not difficult. I just had mine off for painting. No tools needed.
Rick, thank you very much! You have been very helpful. It's good to know that these pieces come off fairly easily without much risk of damaging the rest of the car---assuming you take your time and are mindful of what you are doing. They really need a beer glass icon around here!
The end pieces are secured with three or four phillips-head screws that you will find if you carefully look under the weatherstripping that seals the door window at the windshield post. The center piece pops out with a slight pull. I took mine off and had it painted to match the body color, it was a 15-minute job.
Bugle, I looked at the A-pillar pieces that will be replacing what's currently on the car and I don;t see any screw holes that hold these to the car. Rick, can you confirm the existence of these screws? This is the first I've heard about this as nothing I've read has mentioned anything about screws holding any piece of the windshield surrounds together.
I did order some trim removal tools this morning, so hopefully it will things a little easier/safer. If there's a way for me to break something or to make a mess, I will most likely make a mess or break something!
Re: For those of us who are slow: windshield surround removal
There were no screws on any of my surround pieces. My car is a 2004 - I don't know if later models had screws - I hadn't heard of that before.
It's good that you ordered a set of pry tools. They will come in handy for future projects but are not really necessary for this.
I never really liked the silver "racoon mask" look that is standard on all but the base models. So I had mine painted graphite gray to match the rest of the car. I did a chrome wheel exchange and added chrome covers on the strakes. Now the only silver paint is in the interior. Looks much better, in my opinion.
Re: For those of us who are slow: windshield surround removal
Originally Posted by Rix-xf
There were no screws on any of my surround pieces. My car is a 2004 - I don't know if later models had screws - I hadn't heard of that before.
It's good that you ordered a set of pry tools. They will come in handy for future projects but are not really necessary for this.
I never really liked the silver "racoon mask" look that is standard on all but the base models. So I had mine painted graphite gray to match the rest of the car. I did a chrome wheel exchange and added chrome covers on the strakes. Now the only silver paint is in the interior. Looks much better, in my opinion.
Rick
I completely agree with you! I wish chrysler took more of a monochromatic approach to how things were colored on this car. Though I might just leave the silver side strakes and possibly the door handles as well. I always felt that the silver surrounds were some type of reminder that the car is based on a convertible chassis---quite a few convertible cars have silver windshield surrounds. It just ruins the lines of the car, IMO, on the coupes.
Re: For those of us who are slow: windshield surround removal
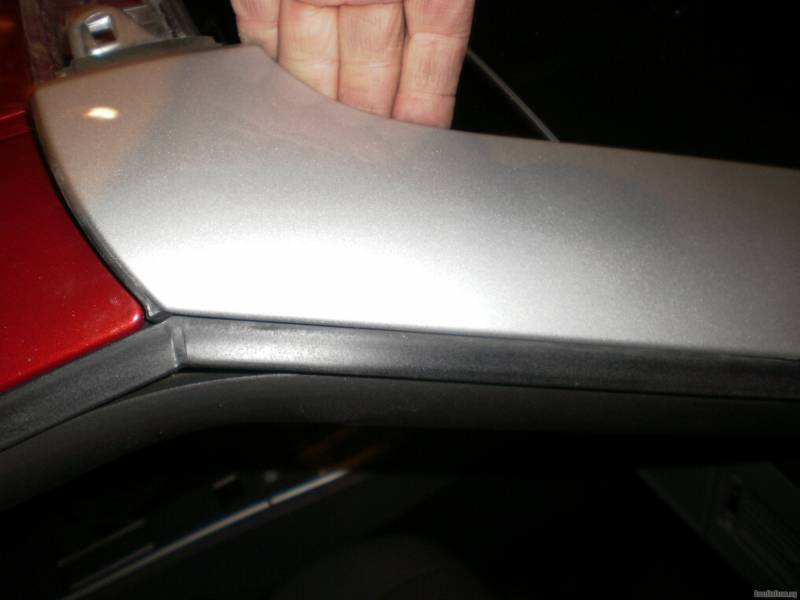
just thought Id bump this old thread as I pulled my surrounf off this morning before work with a PLASTIC SPATULLA Once I got the top corner out it was just a few quick pulls and it was off. The side ones actually slid upwards and off. Here are a few pics and what lays beneath the surround...
Popping the side top and then pull. The clips origionally snap in but also can be slid out of place to reduce risk of breaking
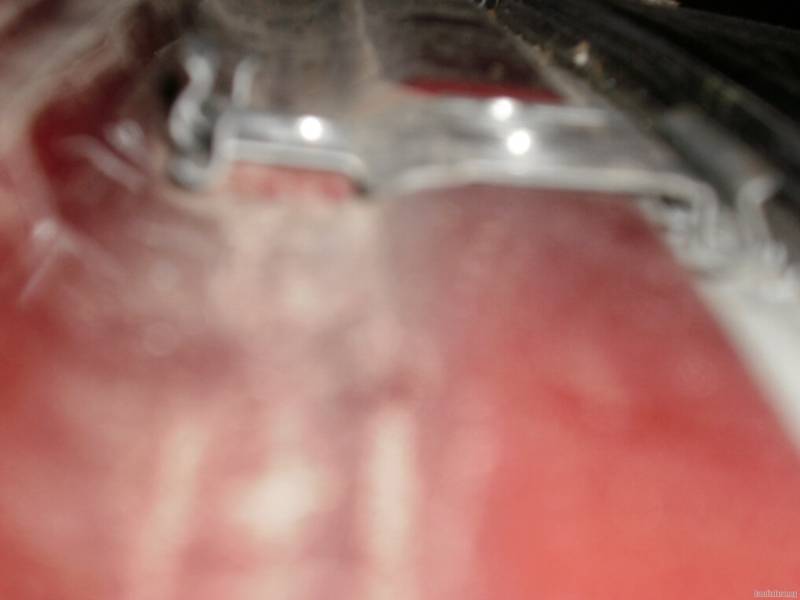
heres a pic of a clip, basic spring clip, looks to be sonic welded to the plastic
A blurry shot of the clips that are on the car, you can see how the above clips would snap/slide in/out of them.
Re: For those of us who are slow: windshield surround removal
Old thread, but I couldn't find a resource for releasing the side clips. They are a pain in the butt.
Used a plastic trim tool from the outside of the car(non glass side) to locate the clips then a screwdriver to depress to release. A plastic trim tool wouldn't release the spring clips in my case. Then once all three are released, pull up and away to remove. 3 clips, middle one is attached with tape.
Re: For those of us who are slow: windshield surround removal
Originally Posted by AllEuro
I recently acquired a second set of windshield surrounds for the car. I recently had these pieces painted black to match the rest of the car. In the next couple of weeks, I will be removing the original silver pieces and replacing them with the newly painted pieces.
So how does this work? I searched and found a couple of thread where the instructions mentioned that you simply need to "pry up" on the surrounds starting with the piece across the windshield. What is the exact process for this? Looking at the newly painted pieces, I see 2 plastic clips on each end and 5 metal clips placed between them. I don't have any special body/trim removal tools and read about using a butter knife, does anyone have any other tools they have used and would recommend? So do I stick the knife between the small gap between the surround and the roof or do I start at the lower part of the surround, towards the windshield? And it just pops off? Do I need to stick the knife anywhere along the surround and just pry in an upwards direction away from the car? I also read about the use of adhesive tape. None of the surround pieces I bought have any sort of tape on them (unlike the chrysler badges I bought), so why do a number of people recommend the use of double sided tape? Is there tape on the factory piece, that in addition to the clips, helps to hold the surround to the body? I assume the removal process for the side surround pieces is the same as how it is done for the surround that runs across the width of the car?
I also checked the 2004 ZH29 Crossfire manual that I downloaded and I couldn't even find any information on how to remove the windshield, let alone the surrounds.
All comments and suggests are encouraged! I don't want to start this and end up breaking something because I wasn't exactly sure how everything comes off.
I use these tools for everything that has to be removed. Interior pieces, wheel center caps, etc... They're cheap but worth every penny! Trim Removal Tools
Re: For those of us who are slow: windshield surround removal
Originally Posted by M60A3Driver
I use these tools for everything that has to be removed. Interior pieces, wheel center caps, etc... They're cheap but worth every penny! Trim Removal Tools


 Once I got the top corner out it was just a few quick pulls and it was off. The side ones actually slid upwards and off. Here are a few pics and what lays beneath the surround...