How to recolor your stereo! (lots of pictures)


Join Date: Jun 2006
Location: San Mateo, CA, USA, Earth, Sol, Milkyway
Age: 55
Posts: 1,943
Likes: 0
Received 17 Likes
on
11 Posts
Hello again and welcome to another part of the ongoing 'Purple Project'.
Today I will be showing you how to recolor both an after market stereo and the factory stereo back lighting.
First I'll show you the after market stereo, an Alpine iDA-X100M in this case.
The ease of doing this stereo lies in the fact that you only have to disassemble the removable face plate and modify it. The rest of the stereo remains stock.
Onward! First, here is the stereo as I received it.

Next the stereo and the faceplate separated.

Front and back of the faceplate. You will have to remove the four screws at the corners. (I recommend a #1 or #0 Phillips precision screwdriver)

Next is removing the 'Enter' button in the center of the dial. If you pull down on the double action ring there is a slot. Use a 1/8" flat head precision screwdriver to pry up on the center button. It will take a bit of force, but do be careful not to damage the ring. I used a small bit of foam to help in that area.

Removing the dual action ring is a little tricky as you have to release the small clips around the inner ring perimeter. Sorry, pictures I had were completely blurry and useless. You can maybe see them in the previous picture at the bottom. Less force than the center button to be sure.
Here is the faceplate apart. You can see lots of surface mount devices.

Here are both the red and blue LEDs lit so you can find them. CRAP they are tiny!

Here I have the board clamped in to my 'third hand' and you can see the switches (Largest SMD devices) and next to them there are actually TWO sizes of LED SMD devices. The red ones are all the same size, so I chose to replace those.

Keep in mind, these are 603 SMD LED devices and are only 0.8mm by 1.6mm in size! I have had lots of experience soldering SMDs and other larger components over the years. If you have no soldering experience, I suggest you find someone who has and make them do this.
Here is a close up of a 603 SMD LED (From a reseller website)

This site ... NiktroniX ... has pretty much any SMD LED size you may need from 603, 805, 1206 and regular package LEDs.
No further pictures on this as I could not get the camera to focus that small. I was using a 3x head mounted magnifier, a 15 watt soldering iron with a 0.5mm chisel tip and 0.022" rosen core solder. The solder was a bit big, so I applied to the iron and just let the tip transfer.
Another thing was that the SMD LEDs come on a piece of what looks like old 8mm film, they are VERY small and easy to loose, so I ordered five extras. (Didn't loose any! YAY!)
Removing the old ones is pretty easy, but takes some patience. Grip the old LED with a pair of precision tweezers or needle nose pliers (when I say precision, I'm NOT kidding). While holding the device, touch the soldering tip to one end and lift or tilt the device away from the pad on that side. Repeat this step for the other side until the device comes loose.
Cleaning the pad is as easy as cleaning the tip of your iron and wiping the excess solder off the pad with the tip of your iron.
I pre-tinned each end of the SMD LEDs prior to setting it on the cleaned pads of the old location, this insured that the only solder there was from the pad and the tinning.
Always verify your LED orientation against the board marking first. If you do NOT have a mark on the board, you should verify the orientation of the old device vs. the new device. A 740 Ohm resistor and 12VDC is enough to do this.
Clip the resistor into one end of your 12VDC and touch the end of it to one side of the LED, then touch the other side of your 12VDC to the other side of the LED, if it lights, then the polarity is correct. Just compare the mark on the old part to the new part. If they are the same, then just duplicate the orientation. If you get any backwards, they will not be damaged, but you WILL have to remove and turn it around.
Setting the new LED in place with precision tweezers and just touching one end for 1/4 of a second is enough to tack it in place. You should wait 15 or 20 seconds for the heat to dissipate, then do the other side.
Next... On to the factory stereo. This one is only PLCC-2 1210 package LEDs, just more of them.
Oh yeah... RESULTS! The first picture is a bit blue due to my camera not being able to see UV. So, I made a slight adjustment on the second one to reflect closer to real life.


Today I will be showing you how to recolor both an after market stereo and the factory stereo back lighting.
First I'll show you the after market stereo, an Alpine iDA-X100M in this case.
The ease of doing this stereo lies in the fact that you only have to disassemble the removable face plate and modify it. The rest of the stereo remains stock.
Onward! First, here is the stereo as I received it.
Next the stereo and the faceplate separated.
Front and back of the faceplate. You will have to remove the four screws at the corners. (I recommend a #1 or #0 Phillips precision screwdriver)
Next is removing the 'Enter' button in the center of the dial. If you pull down on the double action ring there is a slot. Use a 1/8" flat head precision screwdriver to pry up on the center button. It will take a bit of force, but do be careful not to damage the ring. I used a small bit of foam to help in that area.
Removing the dual action ring is a little tricky as you have to release the small clips around the inner ring perimeter. Sorry, pictures I had were completely blurry and useless. You can maybe see them in the previous picture at the bottom. Less force than the center button to be sure.
Here is the faceplate apart. You can see lots of surface mount devices.
Here are both the red and blue LEDs lit so you can find them. CRAP they are tiny!
Here I have the board clamped in to my 'third hand' and you can see the switches (Largest SMD devices) and next to them there are actually TWO sizes of LED SMD devices. The red ones are all the same size, so I chose to replace those.
Keep in mind, these are 603 SMD LED devices and are only 0.8mm by 1.6mm in size! I have had lots of experience soldering SMDs and other larger components over the years. If you have no soldering experience, I suggest you find someone who has and make them do this.
Here is a close up of a 603 SMD LED (From a reseller website)
This site ... NiktroniX ... has pretty much any SMD LED size you may need from 603, 805, 1206 and regular package LEDs.
No further pictures on this as I could not get the camera to focus that small. I was using a 3x head mounted magnifier, a 15 watt soldering iron with a 0.5mm chisel tip and 0.022" rosen core solder. The solder was a bit big, so I applied to the iron and just let the tip transfer.
Another thing was that the SMD LEDs come on a piece of what looks like old 8mm film, they are VERY small and easy to loose, so I ordered five extras. (Didn't loose any! YAY!)
Removing the old ones is pretty easy, but takes some patience. Grip the old LED with a pair of precision tweezers or needle nose pliers (when I say precision, I'm NOT kidding). While holding the device, touch the soldering tip to one end and lift or tilt the device away from the pad on that side. Repeat this step for the other side until the device comes loose.
Cleaning the pad is as easy as cleaning the tip of your iron and wiping the excess solder off the pad with the tip of your iron.
I pre-tinned each end of the SMD LEDs prior to setting it on the cleaned pads of the old location, this insured that the only solder there was from the pad and the tinning.
Always verify your LED orientation against the board marking first. If you do NOT have a mark on the board, you should verify the orientation of the old device vs. the new device. A 740 Ohm resistor and 12VDC is enough to do this.
Clip the resistor into one end of your 12VDC and touch the end of it to one side of the LED, then touch the other side of your 12VDC to the other side of the LED, if it lights, then the polarity is correct. Just compare the mark on the old part to the new part. If they are the same, then just duplicate the orientation. If you get any backwards, they will not be damaged, but you WILL have to remove and turn it around.
Setting the new LED in place with precision tweezers and just touching one end for 1/4 of a second is enough to tack it in place. You should wait 15 or 20 seconds for the heat to dissipate, then do the other side.
Next... On to the factory stereo. This one is only PLCC-2 1210 package LEDs, just more of them.
Oh yeah... RESULTS! The first picture is a bit blue due to my camera not being able to see UV. So, I made a slight adjustment on the second one to reflect closer to real life.
Last edited by MMZ_TimeLord; 04-13-2011 at 11:33 PM.
Join Date: Jun 2006
Location: San Mateo, CA, USA, Earth, Sol, Milkyway
Age: 55
Posts: 1,943
Likes: 0
Received 17 Likes
on
11 Posts
Okay, so next I'll show you how to disassemble the factory stereo and get to it's SMD LEDs.
First, you need to remove your stereo using the stereo removal tools mentioned in this thread.

Once you have the stereo out, you should pry the top plate off through with a small flat head screwdriver. Small gap near the front at the top above the blue retaining clip. The cover should just pop off.

Next, we will have to use a T8x3 Torx screwdriver to remove the two screws near the front face on either side. (Outside ones only).

Now we can spread the two sides slightly and pull off the front face. Don't worry, it does just pull off. The connector is a pressure connector.
Pull off the two ***** and set the ***** and screws aside. I recommend small zip-lock sandwich bags for parts.
Next, we will be removing the four Torx T8x3 screws from the back of the face and drill out the two heat welded tabs. (Circled in green for easy reference).

We can now remove the front face by prying on the side and bottom tabs slightly to release them. In order to release the black frame in the back, we must untwist the three metal tabs (circled again in green) and remove it.
The next two metal tabs are holding on the LCD frame, untwist them and release the metal frame. Be careful and keep the LCD display in place with your fingers as you don't want to damage it. (FRAGILE!)

Lastly, we will pull up on the two lenses around the **** shafts on each side to remove them. They slide off, but may need a bit of force to get them started.
Once they are off, you can see all the PLCC-2 1210 SMD LEDs you need to change. There are 46 in all.
NOTE: You can probably substitute 1206 SMD LEDs for the 1210s as they are nearly the same size physically. Slightly shorter and narrower, but they should still fit on the solder pads.
When you are working on the ones under the LCD, simply fold it back out of the way. It has a VERY flexible connector and, as long as you don't abuse it, should be more than strong enough for several flops back an fourth.
Following the description in the first post, you should be able to replace these pretty easy. Again, magnification, 15 watt soldering iron with a SMALL chisel tip and precision tweezers or needle nose pliers.

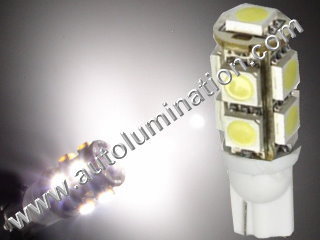
Here's a better couple of pictures of the PLCC-2 1210 SMD LED package that is on the factory stereo. (Same style that comes on the "Super Star" LED bulbs from superlumination.

First, you need to remove your stereo using the stereo removal tools mentioned in this thread.
Once you have the stereo out, you should pry the top plate off through with a small flat head screwdriver. Small gap near the front at the top above the blue retaining clip. The cover should just pop off.
Next, we will have to use a T8x3 Torx screwdriver to remove the two screws near the front face on either side. (Outside ones only).
Now we can spread the two sides slightly and pull off the front face. Don't worry, it does just pull off. The connector is a pressure connector.
Pull off the two ***** and set the ***** and screws aside. I recommend small zip-lock sandwich bags for parts.
Next, we will be removing the four Torx T8x3 screws from the back of the face and drill out the two heat welded tabs. (Circled in green for easy reference).
We can now remove the front face by prying on the side and bottom tabs slightly to release them. In order to release the black frame in the back, we must untwist the three metal tabs (circled again in green) and remove it.
The next two metal tabs are holding on the LCD frame, untwist them and release the metal frame. Be careful and keep the LCD display in place with your fingers as you don't want to damage it. (FRAGILE!)
Lastly, we will pull up on the two lenses around the **** shafts on each side to remove them. They slide off, but may need a bit of force to get them started.
Once they are off, you can see all the PLCC-2 1210 SMD LEDs you need to change. There are 46 in all.
NOTE: You can probably substitute 1206 SMD LEDs for the 1210s as they are nearly the same size physically. Slightly shorter and narrower, but they should still fit on the solder pads.
When you are working on the ones under the LCD, simply fold it back out of the way. It has a VERY flexible connector and, as long as you don't abuse it, should be more than strong enough for several flops back an fourth.
Following the description in the first post, you should be able to replace these pretty easy. Again, magnification, 15 watt soldering iron with a SMALL chisel tip and precision tweezers or needle nose pliers.
Here's a better couple of pictures of the PLCC-2 1210 SMD LED package that is on the factory stereo. (Same style that comes on the "Super Star" LED bulbs from superlumination.
Last edited by MMZ_TimeLord; 04-13-2011 at 06:17 PM.

Join Date: Jun 2006
Location: San Mateo, CA, USA, Earth, Sol, Milkyway
Age: 55
Posts: 1,943
Likes: 0
Received 17 Likes
on
11 Posts

Thread
Thread Starter
Forum
Replies
Last Post
x1xsinisterx1x
Troubleshooting & Technical Questions & Modifications
4
08-24-2015 07:31 PM
Sussudio
Audio, Video and Electronics
2
07-03-2015 10:56 PM
Currently Active Users Viewing This Thread: 1 (0 members and 1 guests)