HID Install Lows and Fogs with Pictures


Originally Posted by Forza1
OK, maybe I'm daft, but I'm having a hard time with these two steps:
Removal of old bulbs
For step two, I can unhook the clip OK, but how do I removed the bulb? Does it go through the clip? Or does the connector first have to be removed(step 1) to get the bulb out?
Removal of old bulbs
- First, and some find difficult, is pulling the connector from the back of the bulbs. If you look closely, you will see an "H" shaped area. I used a medium sized 45 deg bent-nosed needle pliers to grab the center of this "H" and pulled straight back with a little rocking action. DO NOT TWIST! DO NOT PULL ON THE WIRES! It comes off, but can fight a little.
- Next, undoing the bulb retaining clips is for some a bit baffling. On the low beams, the clip clamps at the bottom and swings UP. Press the very bottom of the clip and push to the side to unhook it from the retainer. Remove the bulb. Repeat for other side.
For step two, I can unhook the clip OK, but how do I removed the bulb? Does it go through the clip? Or does the connector first have to be removed(step 1) to get the bulb out?
(A) You have to remove the connector from the back of the old, halogen bulbs. That plug is the source of your 12VDC for the 2 new spade connectors to plug into. Red (+) goes to the single black wire in the connector and the black (-) goes to the double black wire in the connector.
(B) After you have removed the connector from the back of the old, halogen bulb, you unhook the clip and swing it completely out of the way. At this time, the bulb should nearly fall out of it's socket.
The new HID bulbs, with their attached wires are now installed. I found it easiest to thread the wires through the clips first. Then seat the bulb.
Last edited by maxcichon; 02-10-2009 at 07:52 PM.

Originally Posted by maxcichon
(A) You have to remove the connector from the back of the old, halogen bulbs. That plug is the source of your 12VDC for the 2 new spade connectors to plug into. Red (+) goes to the single black wire in the connector and the black (-) goes to the double black wire in the connector.
(B) After you have removed the connector from the back of the old, halogen bulb, you unhook the clip and swing it completely out of the way. At this time, the bulb should nearly fall out of it's socket.
The new HID bulbs, with their attached wires are now installed. I found it easiest to thread the wires through the clips first. Then seat the bulb.
Damn you Max, your thread gets a sticky but mine doesn't! We shall fight to the death over this!
Sorry for the thread jacking!
For once, true genious is recognized!")
I only did mine after reading yours. I used to write technical manuals (years ago) and have a user's-eye view as to how to explain things. Hell, I used yours as a loose guide as I was installing mine!
And judging by this last post, I guess I'm not very good at 'splaining anymore!
And as for the duel, belly up to the bar, sonny. I'll even let you choose weapons. As long as it is single malt.
Last edited by maxcichon; 05-24-2009 at 12:03 PM.
Got them in today. My problem was the connector on the back of the bulb, it was really stuck on there...
Also, my suggestion is to completely remove the springs that hold the bulbs in, and reinstall them when you put the HID bulb in. This is because passing the HID bulbs through the spring while still attached is very difficult and can damage your HID bulb if you are not VERY careful.
I went with a 55w 6000k HID system. I'm hoping the 55w will be even brighter(I've heard 20%) than the standard 35w kits. Now if the sun would just go down...
Originally Posted by Forza1
Got them in today. My problem was the connector on the back of the bulb, it was really stuck on there...
Also, my suggestion is to completely remove the springs that hold the bulbs in, and reinstall them when you put the HID bulb in. This is because passing the HID bulbs through the spring while still attached is very difficult and can damage your HID bulb if you are not VERY careful.
I went with a 55w 6000k HID system. I'm hoping the 55w will be even brighter(I've heard 20%) than the standard 35w kits. Now if the sun would just go down...
Also, my suggestion is to completely remove the springs that hold the bulbs in, and reinstall them when you put the HID bulb in. This is because passing the HID bulbs through the spring while still attached is very difficult and can damage your HID bulb if you are not VERY careful.
I went with a 55w 6000k HID system. I'm hoping the 55w will be even brighter(I've heard 20%) than the standard 35w kits. Now if the sun would just go down...
Why wouldn't you pass the 2 connectors, instead of the bulb, through the spring clip? They are smaller. Usually.

Originally Posted by maxcichon
For once, true genious is recognized!
I only did mine after reading yours. I used to write technical manuals (years ago) and have a users-eye view as to how to explain things. Hell, I used yours as a loose guide as I was installing mine!
And judging by this last post, I guess I'm not very good at 'splaining anymore!
And as for the duel, belly up to the bar, sonny. I'll even let you choose weapons. As long as it is single malt.
Just ask anyone with an Audi.. after they look at my headlights they sure are going to be mad
(Talking about the LED's in them, of course. Pics coming but man they sure do look badass!)
BACK ON TOPIC:
Why the hell (pardon the language) would you put THE BULB through the spring clip? And if you're goign to remove the spring clip you may as well save yourself the trouble and just remove the whole damn headlight.
You onl yneed to pass through the connectors/wires.
Originally Posted by nox1s
The genius idea's always get stolen!
Just ask anyone with an Audi.. after they look at my headlights they sure are going to be mad
(Talking about the LED's in them, of course. Pics coming but man they sure do look badass!)
BACK ON TOPIC:
Why the hell (pardon the language) would you put THE BULB through the spring clip? And if you're goign to remove the spring clip you may as well save yourself the trouble and just remove the whole damn headlight.
You onl yneed to pass through the connectors/wires.
I have been toying with the concept of fiber optics. They're easy to work with, cheap and durable. One central light source, any color and dimmable. Lots of ideas/applications there...
Today I installed some 5000k HIDs that I received from the Ebay vendor linked on the first page.
Installation was relatively smooth but made me wish it was as easy to change bulbs in the Crossfire as it is in my Accord.
I also did not have to move the overflow tank, although it would have made it easier.
Great write-up! Definitely helped me get the job done.
Installation was relatively smooth but made me wish it was as easy to change bulbs in the Crossfire as it is in my Accord.
I also did not have to move the overflow tank, although it would have made it easier.
Great write-up! Definitely helped me get the job done.
Yeah, mine does the same thing. When they are on, no indicator. If you turn them OFF, the bulb out indicator lights up. I don't understand it, but now I just shut off the ignition first if anyone is looking. It's a bit wierd, but I don't give a hoot.
maxcichon:
Did you have any issues with one bulb having more of a blue/purple tint around the edge of the beam than another? I'm not sure if perhaps one of my bulbs is a bit dirty or something, or if it's just plain defective, but the bulb I have installed in the driver's side has more of a blue/purple tint to the edge of the light than the other. Using a 5000k kit...
Did you have any issues with one bulb having more of a blue/purple tint around the edge of the beam than another? I'm not sure if perhaps one of my bulbs is a bit dirty or something, or if it's just plain defective, but the bulb I have installed in the driver's side has more of a blue/purple tint to the edge of the light than the other. Using a 5000k kit...
Senior Member
Join Date: Mar 2009
Location: Easley,South Carolina
Age: 44
Posts: 1,213
Likes: 0
Received 0 Likes
on
0 Posts
Originally Posted by ///SilverSaphRT6
Mine did the same thing but it kept popping the fuse. Turned out that the driver side bulb was burning out. It was very purple compared to the blue one on passenger side. Got new bulbs and problem fixed.
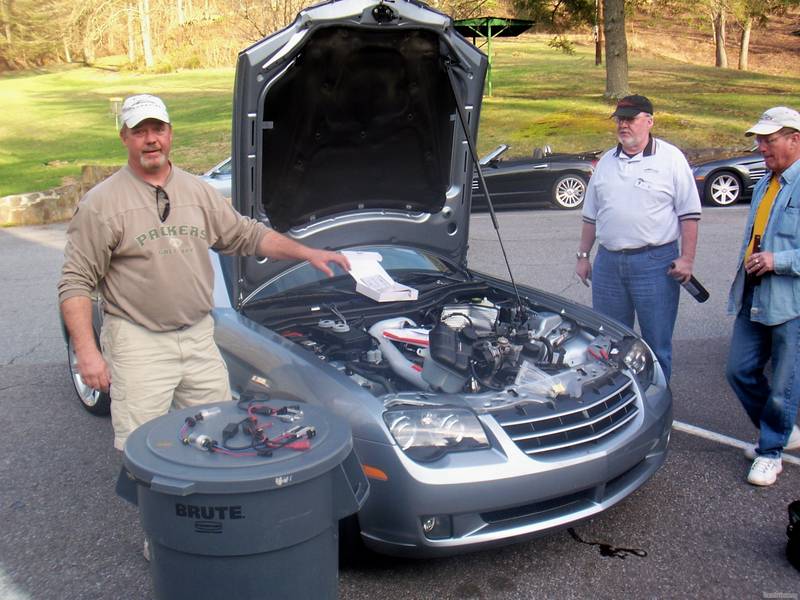
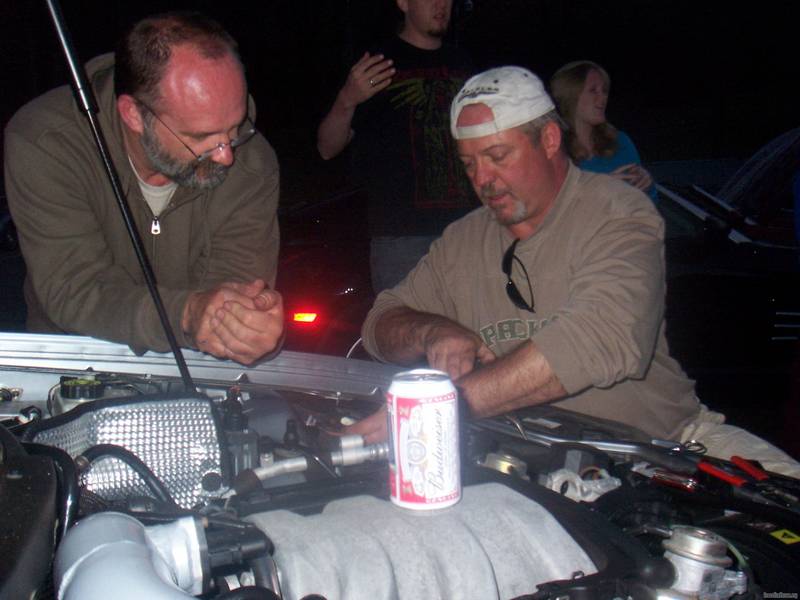
My friend Max (maxcichon) installed my HID headlights at the BBQ Saturday night at the Dragon
Thanks Max !!
Max recommended this ebay seller hidgate for purchase of our HID lights.
This ebay seller worked well for several here.....
See: Great Outdoors Equipment Ebay Store

Thanks Max !!
Max recommended this ebay seller hidgate for purchase of our HID lights.
This ebay seller worked well for several here.....
See: Great Outdoors Equipment Ebay Store
Last edited by Valk; 05-25-2009 at 10:20 AM.
Join Date: Mar 2009
Location: Jacksonville, FL
Age: 52
Posts: 256
Likes: 0
Received 0 Likes
on
0 Posts
How does the beam pattern work out on these conversions? I have read many times that putting HID bulbs into housings designed for halogen bulbs causes glare to oncoming drivers.
I have a Pacifica with the halogen projector setup that I am thinking of doing the HID conversion to. And once I get a Xfire, I'll do it to it also.
Thanks,
I have a Pacifica with the halogen projector setup that I am thinking of doing the HID conversion to. And once I get a Xfire, I'll do it to it also.
Thanks,