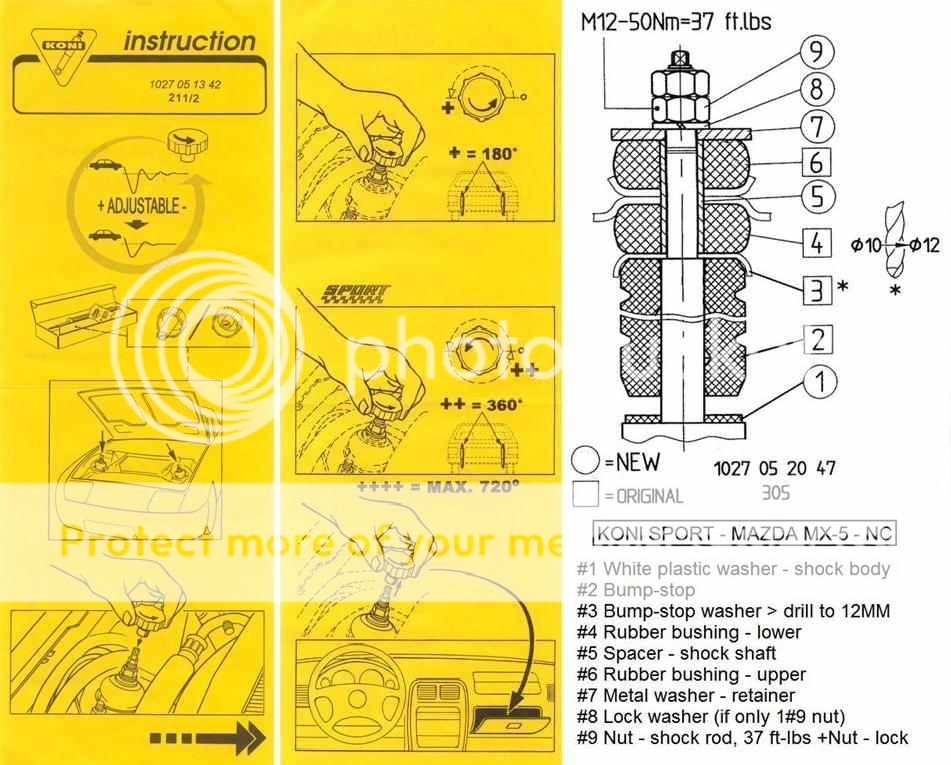
found these instructions that, although say "mazda", are identical to the 1s that come with the shocks. see the right hand side only.
for what i see, we insert the #1 washer on top of shock, then 2-3-4 5 before inserting the shock into the cars body from under,
then from the top, another metal dish shaped part (that is not mentioned) then 6-7-8-9. i have to confirm this when i remove the old shock.
also, mine came with #8 lock washer and not with 2 nuts.
but now i noticed something that is not exactly the same, and that is the #3. here seems a separate piece. it will not be until i disassemble the old shock that will know.
anyway, at the end of the day, what matters is that it needs to be enlarged. as all the others ( like #2, 4, and 6 in the drawing), and you need to know this in advance because you have to be prepared with larger drills. especially the larger (#2). there is nothing as annoying as having something disassembled and having to stop due to the lack of a tool. so beware.