
Final word on headlight restoration please!

Thread Starter
|
Senior Member
Joined: May 2008
Posts: 10,444
Likes: 151
From: Cincinnati ( Delhi )
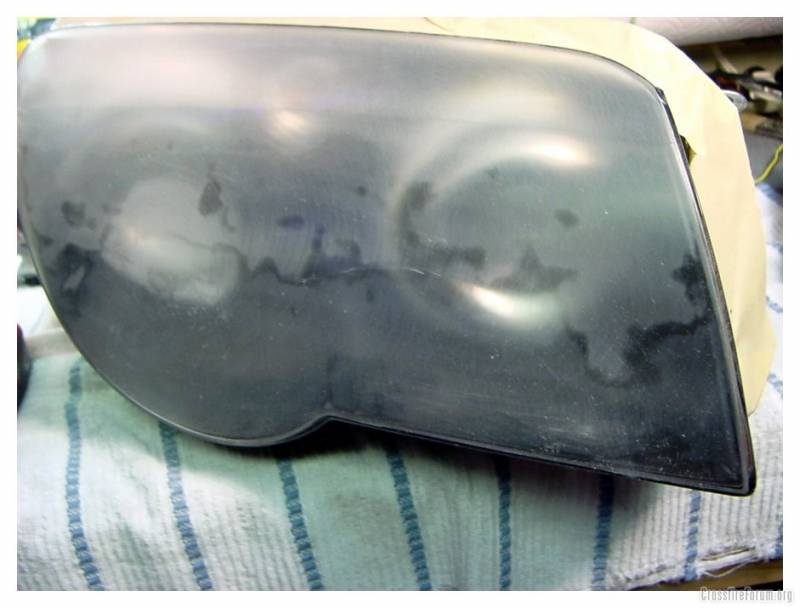
Ok guys I have searched and read dozens of threads about restoring the headlights back to new condtion.
I bought a spare set of lights to cut open that need some help with restoring along the top edge. I picked up the Turtle Wax Restore Kit at Autozone for $8.99. The other two products were $25, but I can return this kit and exchange it for the more expensive if suggested. (Mothers & Mequires)
Other than following the directions, any tips would be greatly appreciated before I try it out.
Thanks, James
I don't know, James, but I've tried the Mequiar's kit & while it works fine I still have better luck with the time-consuming wet sand/polish method than any other.
But even that routine doesn't work well on my fog lights - at least not yet!
But even that routine doesn't work well on my fog lights - at least not yet!
Senior Member
Joined: Sep 2007
Posts: 8,015
Likes: 14
From: MOFN, AL, 70 miles from George

Originally Posted by Kurts
I don't know, James, but I've tried the Mequiar's kit & while it works fine I still have better luck with the time-consuming wet sand/polish method than any other.
But even that routine doesn't work well on my fog lights - at least not yet!
But even that routine doesn't work well on my fog lights - at least not yet!
Meguiars, I am told is coming out with a similar kit. I haven't yet seen a headlight that needed restoration that didn't require sanding to some degree.
I just made my own kit.
Senior Member
Joined: Nov 2007
Posts: 2,374
Likes: 9
From: Lafayette, Indiana

James, I had my brother fix mine 2 years ago. He does that kind of thing for a living. He wet sanded them with progressively finer paper, polished them, cleaned them. Then applied a clear epoxy finish to them. It has been 2 years and other than road debris scratches look fine.

Senior Member
Joined: Jul 2007
Posts: 2,710
Likes: 6
Go with either the 3M or Meguiar's HD kit (not the regular Meguiar's kit - look for the Heavy Duty in the yellow box) as both use sand paper and a polishing attachment for a drill. Absolutely the best way to go for someone who doesn't otherwise own a buffer (and knows how to use it).
Thread Starter
|
Senior Member
Joined: May 2008
Posts: 10,444
Likes: 151
From: Cincinnati ( Delhi )
Thanks guys for your advice. I returned the Turtle Wax Product and ended up with the 3M. These worn out spare headlights will look better than the ones in my car! And the ones in my car look fine. I did one tonight. Working on the assy on the bench was a pain, but no leaning over. I am absolutley satisfied with the results of the 3M kit. I plan to get the Plastx and buff a couple coats on them once installed on the car. Thanks again guys!
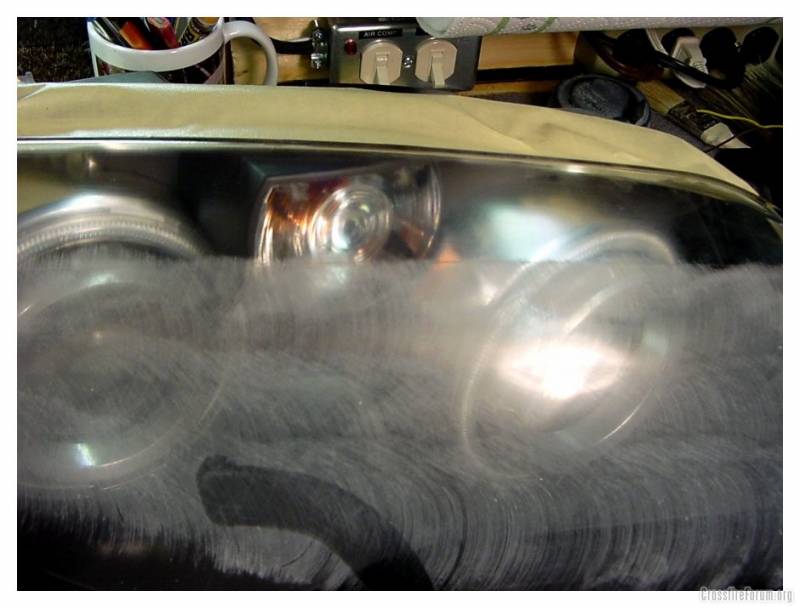
First Step ^
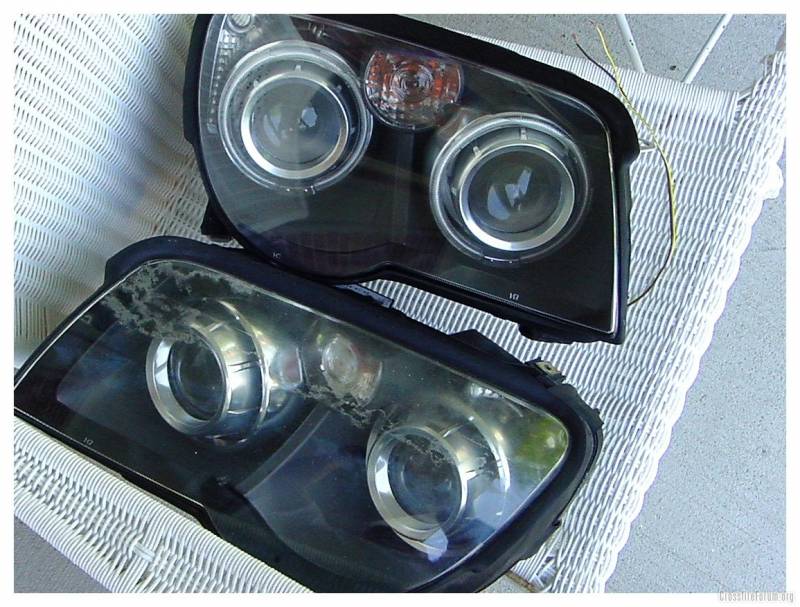
At this point, I realized it would take more than the first grit pad to get the job finished. So I hand sanded the rest of the lens with a Scotch Brite Pad. Worked very effective, then finished off the first step with appropriate pad.
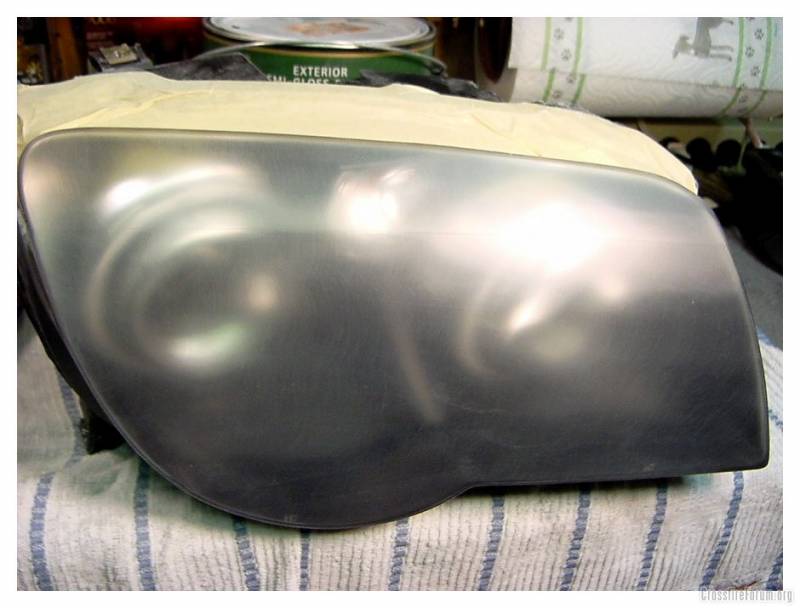
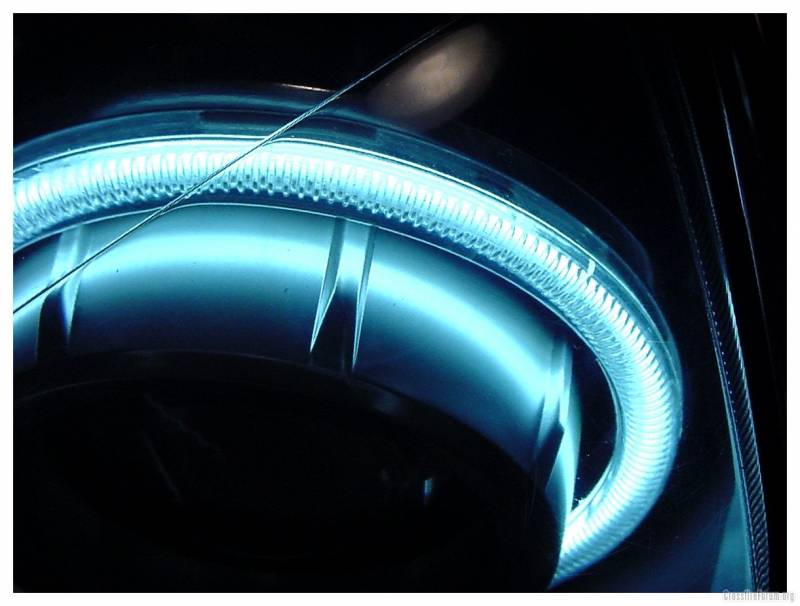
Sand until the entire surface is the same color/finish.
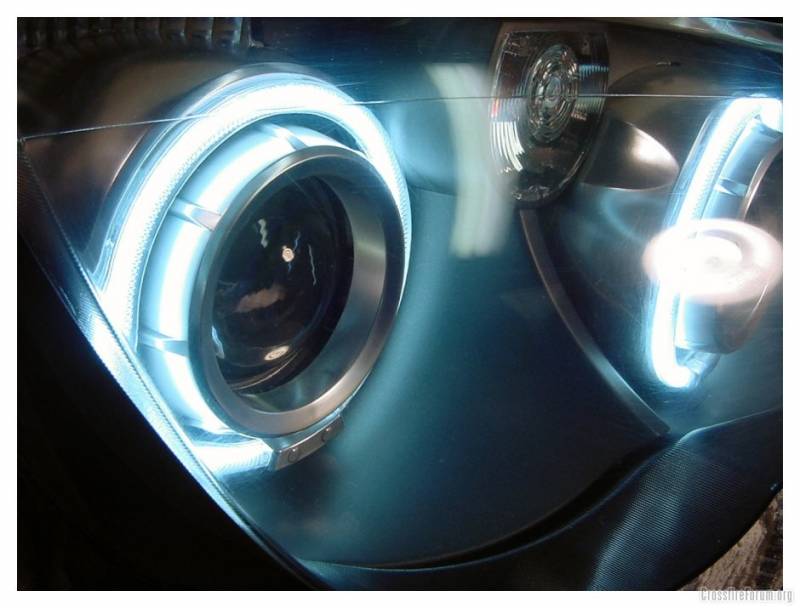
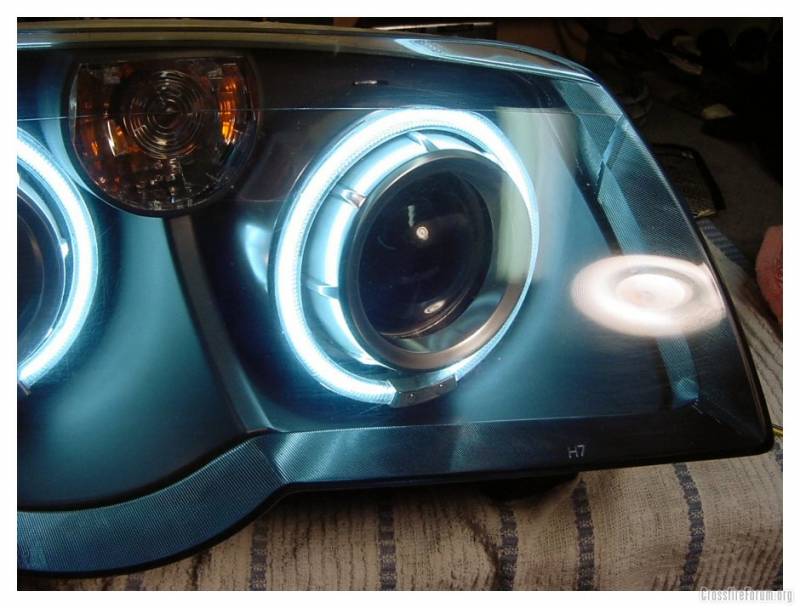
The lens is nearly invisible. The lights are white, but the camera shows them as blue .
First Step ^
At this point, I realized it would take more than the first grit pad to get the job finished. So I hand sanded the rest of the lens with a Scotch Brite Pad. Worked very effective, then finished off the first step with appropriate pad.
Sand until the entire surface is the same color/finish.
The lens is nearly invisible. The lights are white, but the camera shows them as blue .


Joined: May 2011
Posts: 161
Likes: 1
Originally Posted by dtinker
where and how much to do the HALO lights, they really look good. The restore turned out excellent, job well done!!!!
Thread Starter
|
Senior Member
Joined: May 2008
Posts: 10,444
Likes: 151
From: Cincinnati ( Delhi )
Originally Posted by chrisificti0n
Hate to revive an old thread.. but.... what he said!
I went with bright white because they were in stock. I wanted orange like amber bulbs, but they were on a 4 week back order, and I just couldn't wait.
Oracle also sells them but at a much higher price and they look exactly same.
Any questions, give me a shout. James
Senior Member
Joined: Feb 2008
Posts: 4,084
Likes: 4
From: Tennessee
BTW, great job on the headlights James! The 3M kit is great. I will be working on my roadster here this summer.
Also, how hard is it to pull the headlights out? I think that is definitely the best way to restore them.
Also, how hard is it to pull the headlights out? I think that is definitely the best way to restore them.
Thread Starter
|
Senior Member
Joined: May 2008
Posts: 10,444
Likes: 151
From: Cincinnati ( Delhi )
Originally Posted by itsky
BTW, great job on the headlights James! The 3M kit is great. I will be working on my roadster here this summer.
Also, how hard is it to pull the headlights out? I think that is definitely the best way to restore them.
Also, how hard is it to pull the headlights out? I think that is definitely the best way to restore them.
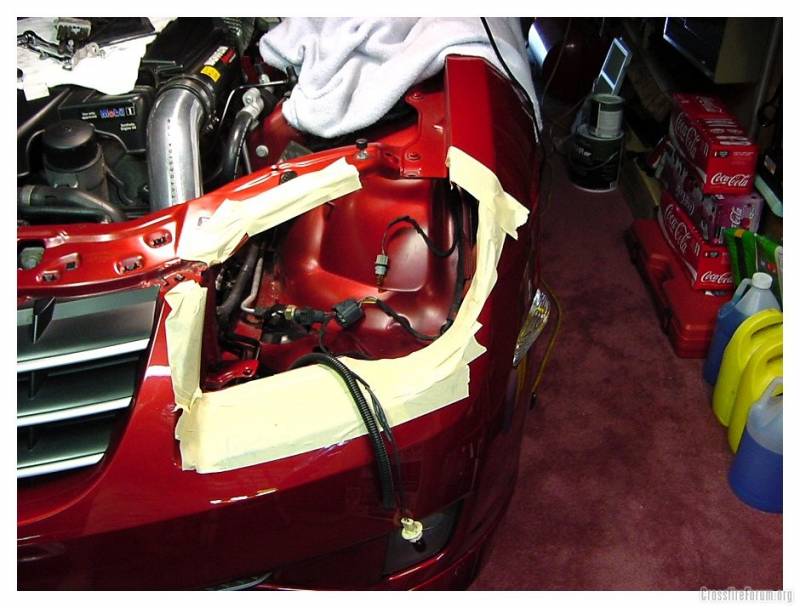
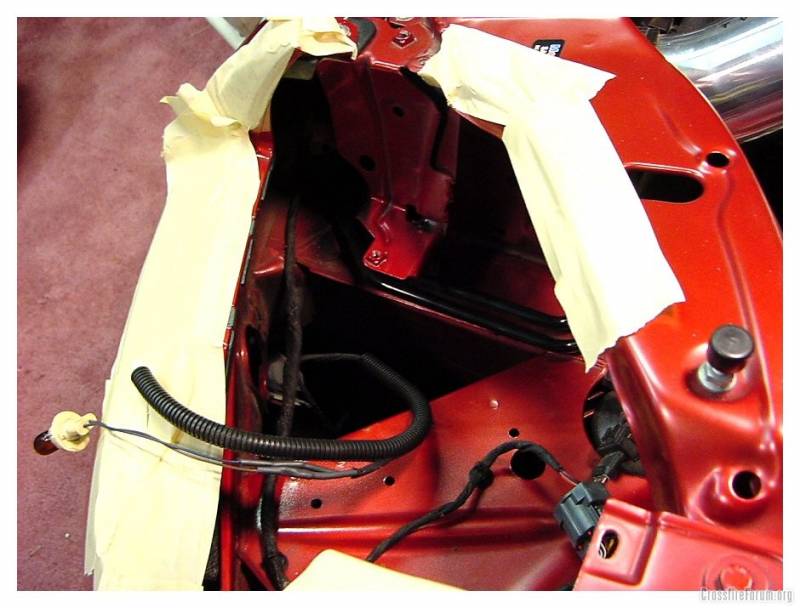
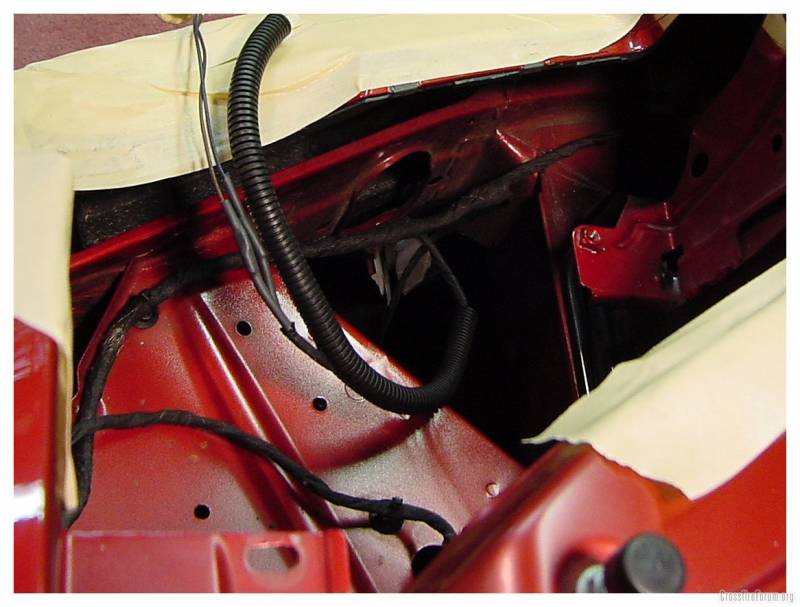
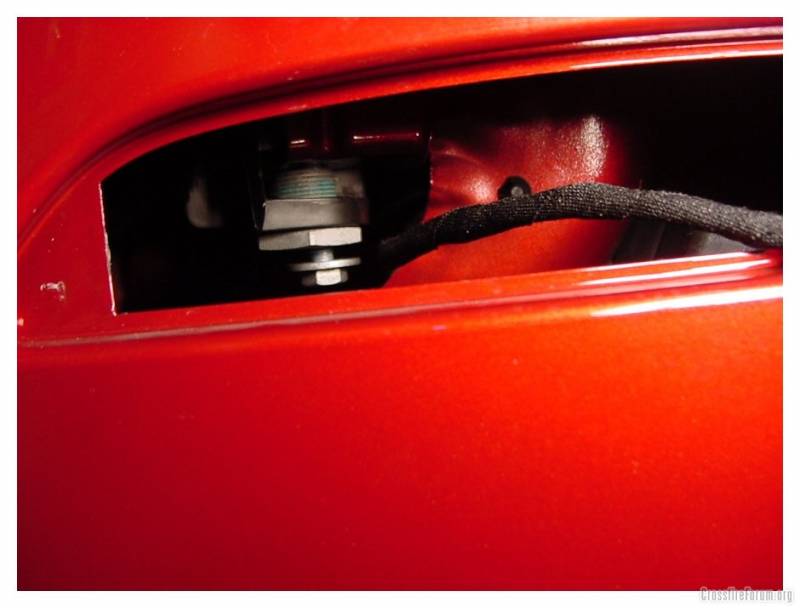
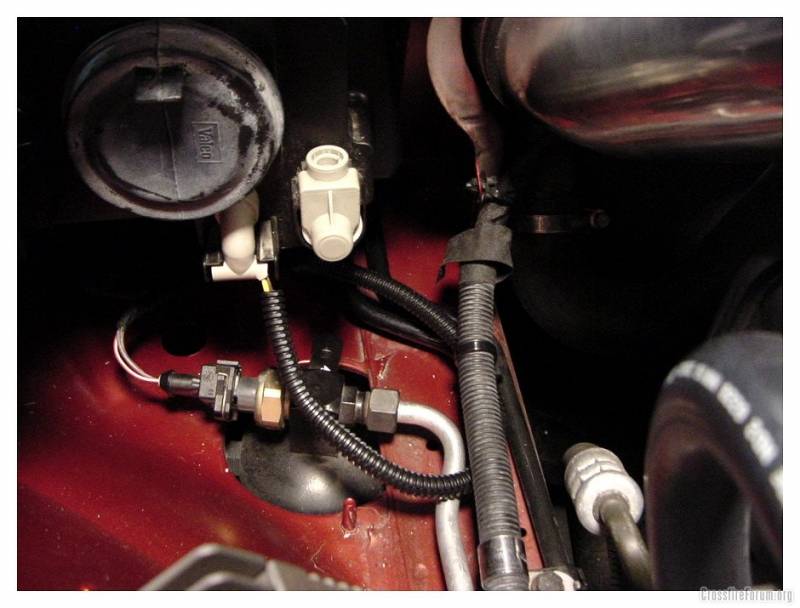
Removing the headlights are a pain the first time. It is much easier if you remove the grille, and the one bolt on each side of it that holds the upper front bumper to the core support. That way, you can gently pull out on the bumper cover to give you plenty clearance for the headlights to tilt back and swivel out of their opening. Even doing this, I would tape off any painted areas with 2 layers of masking tape for added protection.
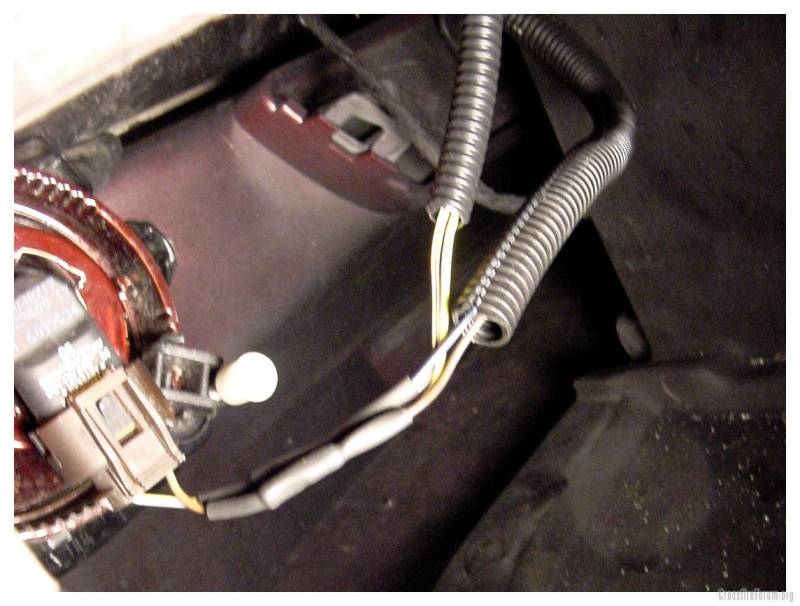
Also with the grille out, you can remove the bottom inboard bolts really easy. The outboard bottom bolt can be seen through the side marker hole, but accessed through the fog light door in the wheel housing.
James

Joined: Nov 2010
Posts: 44
Likes: 0
From: Fitchburg Wisconsin
I restored my lamp units. I tried the polishes but in the end I had to break out the sandpaper. I have worked with plastics in industry and when the ploycarb starts to breakdown it looks like a fog and not repairable. once I got them as good as they could ever be (some milky-ness) I polished them as smooth as possable.
The real cure was not applying any clear sealer or clear coat but installing a clear impact cover like that from RVinyl or the like. I chose the clear rather than a tint due to the reduced light on the road however higher power light gear address that issue but the clear impact covers sealed the lens for keeps.
Try them, they are cheap and can be removed without any issues. I did install high out blue LED lamps inplace of the 194's in light housing, try that before you invest in the whole bake-and-brake for the Halo mod, you might just stand back and say COOL, I'm done.
As far as the Halo mod, my Yellow Roadster is problem enough. I have a baby blue 1955 Thunderbird that I thought attracted attention but this Yellow ZH Roadster with some chrome and after market wheels is outragious. It stops traffic, my wife causes accidents when she drive it (she's a blond fox). I could not imagine what would happen if I added the Halo lights. Seriously, its a ***** driving this yellow ZH without being a spectical, you guys with the yellow ZH's know the issue (never thought I would ever talk like this).
Joined: Nov 2010
Posts: 44
Likes: 0
From: Fitchburg Wisconsin
Originally Posted by maxcichon
OK, I'll bite:
What is a "ZH"?
What is a "ZH"?
The erraly Ford Mustang was built on the "Fox" platform and called the F-Mustang.
The crossfire was built on the "ZH" platform while the SLK was built on the "SLK" platform.
It did not have anything to do with options or configuration simply the manufacturing tooling, equipment and the assembly line configuration.
Kraft makes bacon and balogna and the bacon is made on the bacon line while the balogna ia made on the CLSP line but still meat with resources directed acording to line disagnation.
Senior Member
Joined: Sep 2007
Posts: 8,015
Likes: 14
From: MOFN, AL, 70 miles from George
Thanks.
I just never, in 4 years, heard anyone actually refer to the Crossfire using the manufacturing nomenclature!
I just never, in 4 years, heard anyone actually refer to the Crossfire using the manufacturing nomenclature!

