When you click on links to various merchants on this site and make a purchase, this can result in this site earning a commission. Affiliate programs and affiliations include, but are not limited to, the eBay Partner Network.
This is the second pair of sub woofers I've rebuilt. It is not difficult and the 13 year old sub woofers work and sound like new again . . .
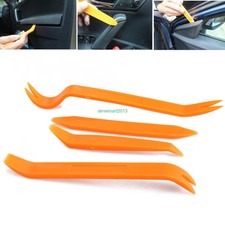
An inexpensive fix for this inevitable problem on all Crossfire subwoofers . . .
I also found this YouTube video made by Crossfire Guru Paul Diguer. I suggest it will be helpful to watch this video before you start this project!
I should have taken photos and posted a step by step . . . Sorry I didn't do the photos but here is the step by step procedure:
1) Move the seats all the way forward and tilt the seat back forward.
2) GENTLY pry off the plastic speaker grille from the top (it clips in at the top and bottom area of the grille). Note: these grilles become brittle with age. I suggest you use a putty knife (to help distribute the prying pressure on the brittle plastic grille) or if you have a curved "pry tool" that can be helpful.
3) Remove the plastic screw "cap" at the lower center area of the carpet near the console (it unscrews).
4) Remove the screw cap at the upper outside corner of the carpet area (it unscrews).
5) Removed the door sill plate (grab it from the back side with two hands and pull it upwards . . . it will pop off.
6) Pull the carpet from the lower outside corner and peel it upward and toward the upper center of the car (try not to break the rectangular plastic support piece attached to the carpet).
7) Remove the subwoofer speaker (three 10mm nuts). Disconnect the wiring connector (press on the little release clip and pull).
8) Repeat the procedure on the other side of the car.
9) Vacuum out the subwoofer enclosure area . . . It will have bits of the deteriorated foam speaker surround material in there.
10) Take the subwoofer(s) in the house and lay them on a work area with a padding (I just used a folded towel).
11) Disassemble the subwoofer plastic pieces (back piece unsnaps - speaker side has four torx head screws that allow you to remove the mounting ring and then the speaker itself.
12) Clean off the outside of the speaker mount area AND the outside edge of the speaker cone itself. I used rubbing alcohol, some "Goo-Be-Gone and a scrapper tool to remove all the old adhesive residue and the deteriorated foam. BE CAREFUL NOT TO DAMAGE THE SPEAKER CONE!
13) Apply a bead of new adhesive (from your repair kit) on the outside mounting area of the speaker mount (put the bead around the INSIDE edge of the mount area. Carefully place the new rubber from the repair kit onto the adhesive bead of the speaker mounting area being sure to "center" it. It will partially cover the screw holes (you will trim those little bits of rubber out later after the adhesive sets up), put the mounting ring in place (but don't screw it on. Put something across the mount ring to even out the pressure and and put a weight on it. Leave it to set up overnight.
(Note that if the speaker cone may have separated from that lower beige color fiber "spring" piece where the cone mounts, you can use the kit's adhesive to reattach the cone there. ONLY apply adhesive to the top lip area of the cone and reattach it to that fiber spring piece)
14) After your adhesive has set up securing the outside of the new rubber piece to the speaker mount area, insert the speaker into it's basket so you can use the adhesive to attach the speaker cone to the inside area of the new rubber piece. I used kleenex tissue gently stuffed onto each of the holes in the metal frame around the speaker to "raise up" the cone a bit. Then apply a bead of adhesive around the outside ring of the speaker cone (you can lift the edge of rubber piece as you go around applying the bead of adhesive onto the speaker cone).
15) Now . . . find an old CD disc and place the CD on top of the rubber piece and speaker cone . . . It is the perfect size to press the rubber onto the speaker cone. Put a light weight on the CD and let everything set up overnight.
16) Put everything back together and enjoy your rebuilt subwoffers!
Last edited by RED DOG; Oct 17, 2018 at 05:50 PM.
Reason: Added step by step from post #5 now deleted
Thanks for the link RedDog..Pizzaguy told me to rebuild them instead of buying used ones....2 sets later , I'm going to take good advice an use it....this time!.....
I wish I had that write up when I redid mine a few months ago. Mine work but they are rattling. It sounds like something is rattling or rubbing. I think one if them is shot.
From: Key Largo FL . . . The fabulous Florida Keys
Re: Rebuilding the Crossfire Subwoofers . . .
I ordered another kit to rebuild the rear subwoofers on my newly purchased SRT6 roadster. I will take photos this time and will add them to post #1. Should be a couple of weeks.
Well just contacted Local dealer for the rear speaker enclosure and the wiring harness. They are not sold separately and only the right side with speaker and harness is available for $260+tax. The left is no longer available.
From: Key Largo FL . . . The fabulous Florida Keys
Re: Rebuilding the Crossfire Subwoofers . . .
Originally Posted by mariontr
Well just contacted Local dealer for the rear speaker enclosure and the wiring harness. They are not sold separately and only the right side with speaker and harness is available for $260+tax. The left is no longer available.
What are you trying to accomplish? Trying to add subwoofers in a base Crossfire or a SE Crossfire?
One thing to be aware of when doing this job is to make sure the speaker cone remains perfectly centred when its glued up. If not, the voice coil will rub on the magnet causing a rattling sound and eventually burn out the voicecoil. You can test this by very lightly pushing down on the centre of the dust cap. The speaker should move down and back up without any scraping. if you feel or hear scraping, make sure you are pressing straight down and evenly. If still scraping, then re-align the rubber surround on the edge of the cone before the glue sets.
Last edited by UnderTheSouthernCross; May 22, 2023 at 03:17 AM.
I have the new foam glued to the cones and waiting until tomorrow to attach the foam to the frames. Seems fairly straightforward. My question is if the foam has to be glued to the frame? The plate with the 4 screws should hold the foam in place quite well without glue. Just trying to make it easier for the next time.
I am in the process of doing this repair. Under heavy bass I could tell that there was an issue but during normal operation they sounded fine to me. Upon removal of both sides, neither had even a shred of rubber left. Looking forward to how it sounds once it�s fixed


") ..
..


