When you click on links to various merchants on this site and make a purchase, this can result in this site earning a commission. Affiliate programs and affiliations include, but are not limited to, the eBay Partner Network.
Hello all. I have used Dupli Color�s Chrysler silver for my Kenwood install (radio surround trim). It�s appears to be an identical match when silver base coat and clear coat are used together. Only let down was it being an acrylic vs enamel paint.
Are you going to be able, to keep the ears for mounting the ashtray assembly, into the console? Just looking, it seems close, or can you, use them to help support the bottom of the insert? It's looking good! Eliminating the ashtray light will give you a voltage supply from the multi switch ; maybe an interior glow...lol.
Are you going to be able, to keep the ears for mounting the ashtray assembly, into the console? Just looking, it seems close, or can you, use them to help support the bottom of the insert? It's looking good! Eliminating the ashtray light will give you a voltage supply from the multi switch ; maybe an interior glow...lol.
The ears will not not touching anything that they should not be touching if the ash tray case is carefully cut just behind the right hand ear and the ear trimmed a little. The case will then pass beside the right hand ear.The case hits the ash tray assembly just after the right hand ear and that is why it has to be sawed off at that point.
The weight of the unit will be carried by the top shelf of the single DIN opening. The case of the unit will be screwed to the top shelf and the unit slid into the case and locking itself in place in the usual manner requiring the keys provided to unlock the latches.
Two U-speed nuts will clip to the rear of the shelf for two screws, and two screws at the front will hold the case in place of the case. These nuts will be bonded to the top face of the shelf.
Last edited by onehundred80; Nov 28, 2017 at 11:26 PM.
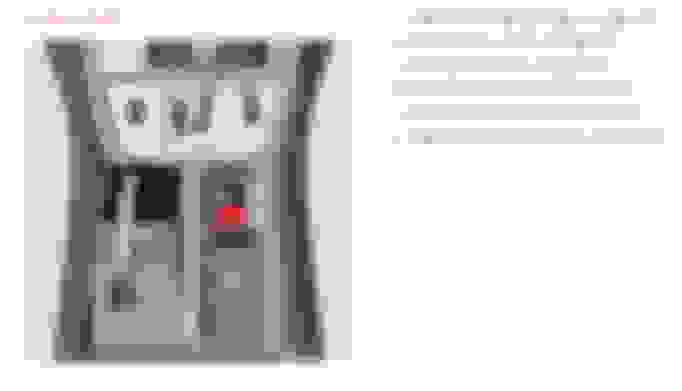
Trial fit of the switches in the center console, the corner rads are being blended in as can be seen by the red Bondo filler. The wires to these switches are being lengthened with #16 and #18 gauge wire.The joints will be crimp fittings under the dash, and solder joints in the center console. I took UrbanE's tip, but I did not want to take a hot soldering iron into the car, I'm just to clumsy.
Last edited by onehundred80; Dec 10, 2017 at 07:17 PM.
Reason: Taking UrbanE's to heart.
After all of the time you have invested, Take a few more minutes and solder the connection and apply heat shrink, done forever. You don�t want to take everything apart every time a switch stops working as a result of a loose crimp connection.
After all of the time you have invested, Take a few more minutes and solder the connection and apply heat shrink, done forever. You don�t want to take everything apart every time a switch stops working as a result of a loose crimp connection.
Looks great
I did not want to take a soldering iron into the car because of any dropped molten solder, I guess I could solder the switch end and crimp the other. I had planned to solder all joints but changed my plans. This crimp tool does a real nice joint as it is long and strong, not like some of those wimpy ones.
After all of the time you have invested, Take a few more minutes and solder the connection and apply heat shrink, done forever. You don�t want to take everything apart every time a switch stops working as a result of a loose crimp connection.
Originally Posted by UrbanE
Looks great
I did both methods, on the bench I did solder/shrink joints and it will be crimp joints under the dash. I did not want to take a soldering iron into the car and have an accident.
My previous post has been updated to reflect the partial change.
I hadn't thought of the hot iron in the car. I had drop cloths and cardboard over everything and I still had the original NA Seats. To do it over, I might rethink it, now that I've wrapped it all up with all of the new interior Stuff.
Great work on the Double din, you'll enjoy the nav and other features
Regards,
Peter
My middle name is clumsy, I'll end burning myself, someone else or the car. LOL
You can get a nice pocket sized nav unit, a phone or whatever, but I fancied doing this as a project to see how difficult it would be so I did. I may make another one with the switches where the ash tray sits, relocating the lighter and passenger air bag light and making it all a one peice unit below the heater vents. I first have to settle on the paint. The PPG looks the likeliest so far.
Last edited by onehundred80; Dec 6, 2017 at 07:02 PM.
I am going to start making a face plate setup similar to the one UrbanE shows in post #16 in this thread.
It just goes to show I have too much time on my hands. As with this design, the weight of the double din unit will be taken by the upper single din shelf.
Cut out the existing faceplates (that have the lighter and seat belt light). This will sound dumb but you cut them out to reuse the holes for the lighter and seat belt light.
Once you�ve cut up the existing faceplates, tape the cutout squares over the desired location on shifter plate, mark them and cut the square hole that you�ll mount the Lighter and seatbelt light into.
JB weld them into place, body filler, sanding and filler primer.
Just a thought but the R170 SLK (same chassis and similar dash as Crossfire) has the cigarette lighter and some controls (mirror adjustment is same) where the Crossie cup holder goes. Airbag light is already in the lower console. Since SLK production began 20 years ago, should be some in yards.