LOG IN
REGISTER
Forums
Crossfire Forum
New Member Introductions
Crossfire Events and Meets
Members who have passed away
Site News
Cars
All Crossfires
Crossfire Coupe
Crossfire Roadster
Crossfire SRT6
Crossfire V8 conversions
MB SLK/SL/SLC
Car Shows
Technical
TSBs and How-To Articles
Crossfire build section
Troubleshooting & Technical Questions & Modifications
Engine, Exhaust, Transmission and Differential
Audio, Video and Electronics
Exterior & Lighting
Interior
Wheels, Brakes, Tires and Suspension
Detail Shop
Competition
Crossfire Awards and Trophies
Racing
Marketplace
Crossfire Marketplace
Commercial Sponsor Classifieds
Off Topic
General
Other Cars Etc
Other Vehicles
Regional Forums
North America
Other Regions
****Forum Functions**** / Test / Troubles / Suggestions etc
**WEBSITE** Functions / Questions/ Suggestions Etc
Testing Section Only
Marketplace
Vendor Directory
Become a Vendor
The Crossfire Marketplace
New Posts
Tools
Car Payment Calculator
Tire Rim Calculator
Recalls
Technical Service Bulletins (TSBs)
Members List
Live Feed
Gallery
View Dark Mode
Please register or login to enable Dark Mode.
Log In
Register
Threads
Google
Threads
Posts
Advanced
Dark Mode
Please register or login to enable Dark Mode.
Log In
Forgot your Password?
By logging into your account, you agree to our
Terms of Use
and
Privacy Policy
, and to the use of cookies as described therein.
Recent
Commented
Albums
My Pictures
waldig's Photos
View Profile
Sort:
Most Recent
Most Recent
Most Comments
Albums
Photos
The beginning of installation of my third ROTARY LIFT, yeah the garage will be whole soon
0
2015/08/04 13:03:19
waldig
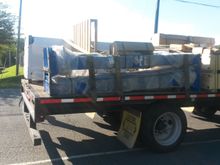
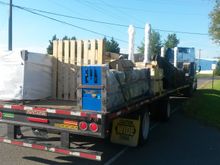
This package weighs 1750 pounds and is a bit for an old guy to install and unload by myself
0
2015/08/04 13:03:19
waldig
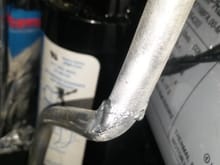
Here is the air discharge line on my air compressor, repaired with a propane torch and that aluminum solder in stick form, works....
1
2015/08/04 13:03:19
waldig
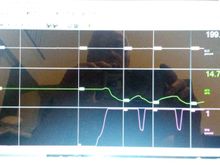
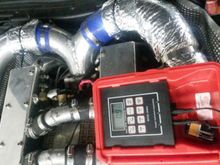
wot 1-2-3. A/F at 14.7 until power added, tic marks are at 14.7, 11.1, 10.7, and 10.5 at 3rd gear. Can not load file only photos and then have to photo screen, email to account, down load photo, then upload photo to forum gallery.......yawn.
0
2015/09/12 05:17:51
waldig
Revising the intake and adding R6 layer of thermal wrap to the pipes.Going for more as usual. WOODY
0
2015/08/22 04:31:50
waldig
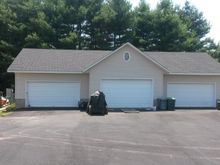
14 months of work at 67 yrs of age, but its got 12 foot ceilings. Woof WW
0
2015/07/29 10:11:50
waldig
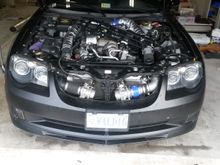
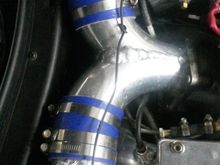
Relocated TBs to allow them to be cool = not pick up underhood heat,
0
2015/07/29 03:50:49
waldig
Raw data of testing TBs in front of radiator
0
2015/07/29 03:50:49
waldig
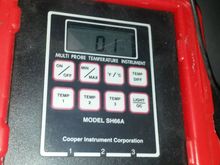
Temp meter with the probes under the aluminum tape spots on manifolds, just before the supercharger inlet throat,
0
2015/07/19 17:49:55
waldig
sitting overnight the temps show readings within 0.1 degree of one another left to right intake manifold
0
2015/07/19 17:49:55
waldig
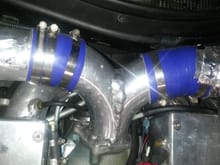
Thermal testing of intake pipes with surface mounted sensors.
1
2015/07/19 17:21:10
waldig
sensors mounted on intake pipes, passenger side not insulated , Driver side insulated for testing, with dual throttle bodies
0
2015/07/19 17:21:10
waldig
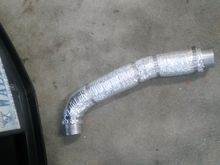
Insulated intake pipe ready for installation.
0
2015/07/19 17:21:10
waldig
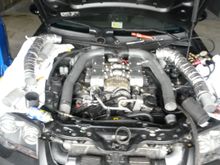
Overall test set-up and how it looks in my car at this time. Dual throttle bodies now working after 3 years of piddeling around with them. 7/19/2015 YEAH at last.
0
2015/07/19 17:21:10
waldig
20150713 194657
1
2015/07/13 17:15:41
waldig
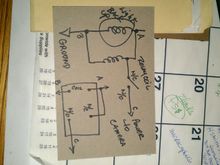
relay wiring
0
2012/12/22 08:03:38
waldig
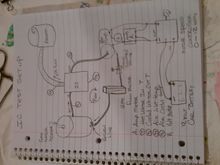
IC test bed
0
2012/12/19 18:09:57
waldig
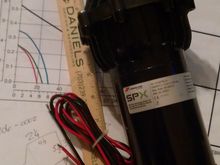
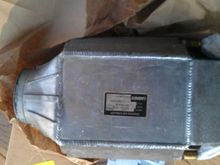
90 series pump
0
2012/11/25 16:52:13
waldig
Sectioned IC for testing of pressure capacity of water side. Will be used for testing of single pass water restriction in a real SRT.
0
2012/11/16 13:21:27
waldig
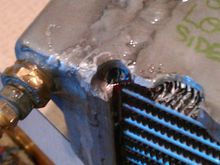
Leak at corner
0
2012/11/16 13:21:27
waldig
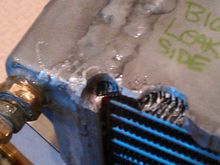
Leak found at the factory weld line of case
0
2012/11/16 13:21:27
waldig
Location of casting fault
0
2012/11/16 13:21:27
waldig
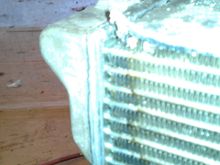
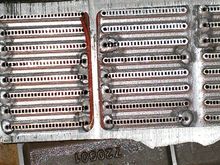
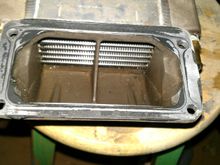
Washed 4 times, soap n water, chemical cleaner, lacquer thinner twice, acetone rinsed.
0
2012/11/12 14:12:12
waldig
washed core shiny fins
0
2012/11/12 14:12:12
waldig
vacuuming heat out of welded core after reassembly..
0
2012/11/12 14:12:12
waldig
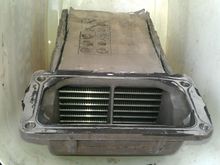
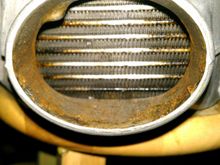
IC inlet dirty
0
2012/11/03 10:50:23
waldig
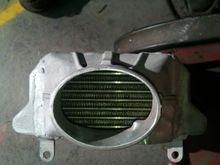
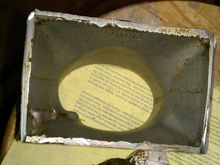
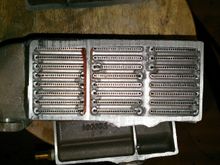
IC opening 3
0
2012/11/03 10:25:03
waldig
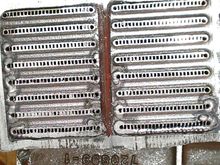
washed core
0
2012/11/03 10:25:03
waldig
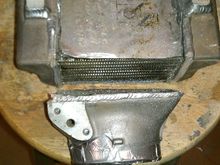
rewelding cleaned case back together
0
2012/11/03 10:25:03
waldig
dirty outlet section seen from IC's point of view
0
2012/11/03 10:22:17
waldig
IC sawn open 2
0
2012/11/03 10:22:17
waldig
IC as received 2
0
2012/11/03 10:22:17
waldig
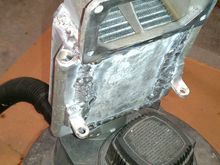
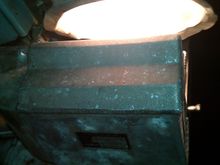
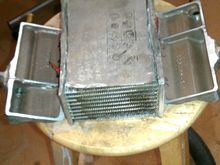
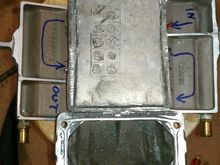
Open kimona of a heat exchanger, the I/C. Take a look see.
0
2012/10/29 10:34:51
waldig
NASTY, this is in our cars, but I have a plan and will test a fix.
0
2012/10/29 10:34:51
waldig
Another view of the heat exchanger pipes in the I/C - brutal mess...
0
2012/10/29 10:34:51
waldig
More ugly rework at the factory. DO NOT become concerned with the closed ports, the cutting process left flashings on the ends of the tubes where the blades hit the tubing, they were all open, cutting did the mushing of the ends, flashing picks off easily. Woody
0
2012/10/29 10:31:13
waldig
Note the cold water enters the top right and exits on the bottom left pipe.
0
2012/10/29 10:31:13
waldig
Please note the flow of water in the intercooler, it is serial on three passes or loops thru the air path
0
2012/10/29 10:31:13
waldig
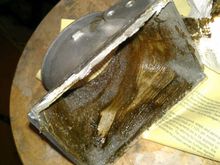
Outlet contamination due to leak in core.
0
2012/10/28 18:15:04
waldig
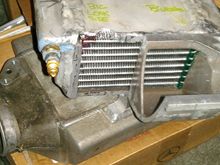
Inlet view of I/C
0
2012/10/28 18:15:04
waldig
First
Page
19 of 29
Last
Go To
Page
1
...
17
18
19
20
21
...
29
19 of 29
Go To
GO
Go to page
of 29
pages
1
...
17
18
19
20
21
...
29