LOG IN
REGISTER
Forums
Crossfire Forum
New Member Introductions
Crossfire Events and Meets
Members who have passed away
Site News
Cars
All Crossfires
Crossfire Coupe
Crossfire Roadster
Crossfire SRT6
Crossfire V8 conversions
MB SLK/SL/SLC
Car Shows
Technical
TSBs and How-To Articles
Crossfire build section
Troubleshooting & Technical Questions & Modifications
Engine, Exhaust, Transmission and Differential
Audio, Video and Electronics
Exterior & Lighting
Interior
Wheels, Brakes, Tires and Suspension
Detail Shop
Competition
Crossfire Awards and Trophies
Racing
Marketplace
Crossfire Marketplace
Commercial Sponsor Classifieds
Off Topic
General
Other Cars Etc
Other Vehicles
Regional Forums
North America
Other Regions
****Forum Functions**** / Test / Troubles / Suggestions etc
**WEBSITE** Functions / Questions/ Suggestions Etc
Testing Section Only
Marketplace
Vendor Directory
Become a Vendor
The Crossfire Marketplace
New Posts
Tools
Car Payment Calculator
Tire Rim Calculator
Recalls
Technical Service Bulletins (TSBs)
Members List
Live Feed
Gallery
View Dark Mode
Please register or login to enable Dark Mode.
Log In
Register
Threads
Google
Threads
Posts
Advanced
Dark Mode
Please register or login to enable Dark Mode.
Log In
Forgot your Password?
By logging into your account, you agree to our
Terms of Use
and
Privacy Policy
, and to the use of cookies as described therein.
Recent
Commented
Albums
My Pictures
waldig's Photos
View Profile
Sort:
Most Recent
Most Recent
Most Comments
Albums
Photos
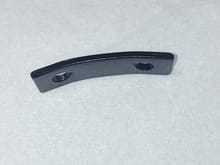
ar formed to allow installation on seat frame
0
2022/08/20 06:29:45
waldig
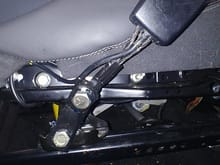
Side view showing raised position
0
2022/08/20 06:28:41
waldig
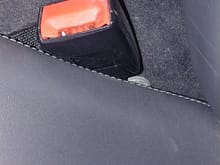
Offensive low socket thats hard to make use of, bugging me.....
0
2022/08/20 06:28:31
waldig
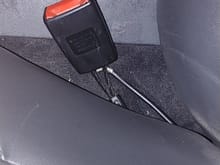
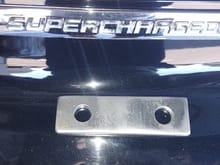
Success raised seat belt receptacle
0
2022/08/20 06:28:22
waldig
Extension bar, 1" wide x 5/32" steel bar
0
2022/08/20 06:28:11
waldig
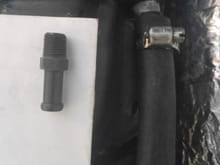
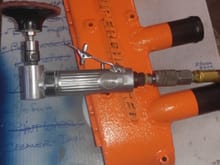
1/8th" fitting threaded into the tank and secured with JB Weld. TAAAA DAAAA
0
2018/11/01 04:57:59
waldig
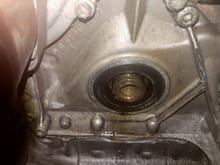
Lots of chips to pick up!
0
2018/10/12 13:43:48
waldig
Was throwing pieced all over the place, UGLY and not the first one to do it!!!!!!!!!!
0
2018/10/12 13:43:34
waldig
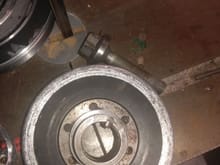
Sounded like I was dragging something till I got out and heard the sound from motor.
0
2018/10/12 13:43:15
waldig
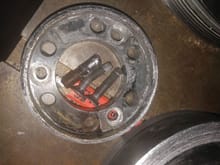
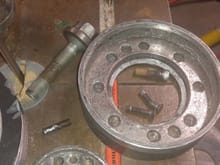
Total destruction at 25 MPH in city traffic
0
2018/10/12 13:42:48
waldig
5 of 6 bolts snapped off in the hub!!!!
0
2018/10/12 13:42:33
waldig
0
2018/10/12 13:42:22
waldig
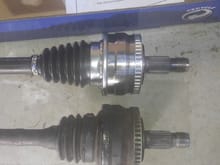
You can see that the length is the same and the fittings are the same size, install was easy, Taaaaa Daaaaa
0
2018/07/16 13:11:20
waldig
Matches up and went right in eazzy peazzy, for an old guy. FYI, Enjoy
0
2018/07/16 12:43:59
waldig
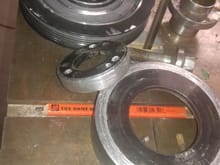
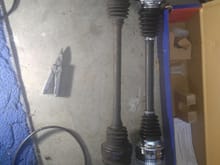
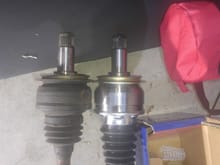
83$ from ebay, fit right in and is 0.1" larger diameter. Replacement outer grease seals are not available !!!!
0
2018/07/16 12:43:41
waldig
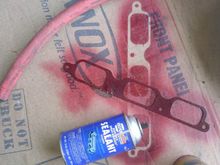
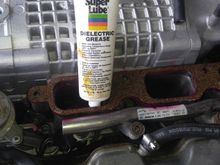
I like to use gasket glue to hold the motor side of gaskets and then grease the opposite side to allow disassembly. I often reuse gaskets this way, works for me over the last 50 years .
0
2018/06/07 11:05:04
waldig
0
2018/06/07 10:55:37
waldig
Trick is to warm paint after last coat has hardened up about 1/2 hour. I PAINT the surface with heat lamps moving as needed to SPREAD the wrinkle effect. Its interesting to watch.
0
2018/06/07 10:41:08
waldig
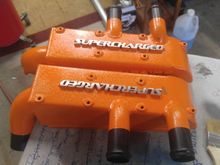
I cleaned the manifolds and then added 3 coats of paint about 15 minutes apart - temp dependent. But before the last coat dries, just tacks up, avoid runs but add heavy coats, you can paint lightly every 10 minutes if warm.
0
2018/06/07 10:40:52
waldig
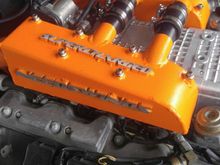
TAAAAA DAAAA its done and after a day or so of drying and heating-to speed up the hardning, its ready to strip off the lettering. Dont rush it, touch the lettering to see if the paint is soft or not. I also masked the outlets to allow the hoses to slip on for a leak proof finish.
0
2018/06/07 10:40:16
waldig
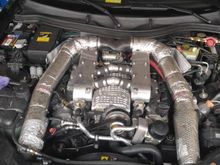
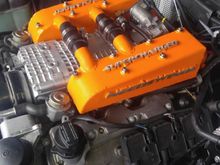
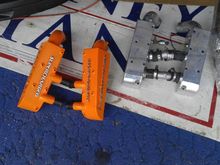
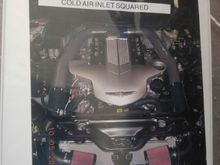
THis is the beginning shot of my original prototypes showing the crossover piping. Swap took me one hour start to testing on road.
0
2018/06/07 10:27:57
waldig
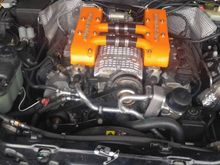
I tried several colors and chose this one as it works for ME. You can pick and choose your own
0
2018/06/07 10:27:30
waldig
EYE CANDY and a bit more performance with the straighter crossover pipes
0
2018/06/07 10:27:17
waldig
Installed in engine bay and ready for a road test. CAI pipes are off as I TEST TEST everything before adding the piping, saves time and helps prevent rework
0
2018/06/07 10:27:04
waldig
I glue the gaskets to the engine and add grease to the manifold side, I can remove the intake and re use the gaskets this way. I also coat the piping and rubber hoses on the inside to allow easier assembly and removal
0
2018/06/07 10:26:08
waldig
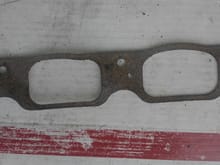
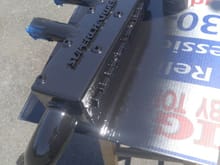
I took off the other set as one piece and you can compare them here
0
2018/06/07 10:25:52
waldig
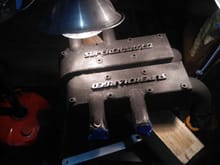
How they look prior to installation. I added wrinkle paint and then overpainted the color.
0
2018/06/07 10:25:40
waldig
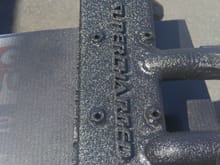
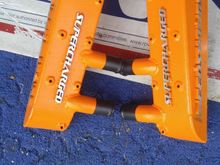
The beauty comes thru after buffing the lettering
0
2018/06/07 10:25:10
waldig
After painting the wrinkle paint, I added orange for some flare...and then cleaned off the paint on the lettering with a wizzer pad.
0
2018/06/07 10:24:48
waldig
0
2017/09/09 07:04:27
waldig
Coil wire blue soldered to board where it is convenient
0
2017/09/09 07:03:45
waldig
Finished installation with resistor mounting shown
0
2017/09/09 07:03:22
waldig
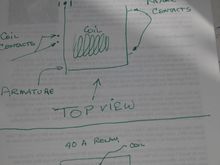
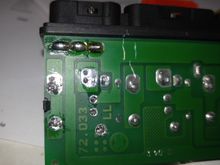
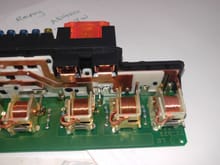
Presoldered yellow - bare wire for #87 and Red lead for #86. NOTE RIGHT COPPER STRIP ON EXTREME RIGHT. This is where #30 is soldered, note #85 has blue coil wire on it prewired.
0
2017/09/09 07:02:56
waldig
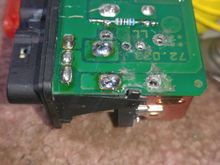
Close up of board showing snubber resistor and board without relay - removed
0
2017/09/09 07:02:29
waldig
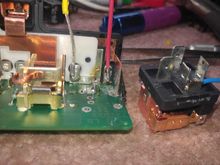
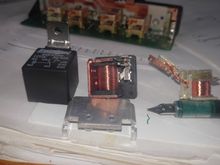
Showing the FET transistor heat sink ( wont work) under the new relay and on the right the old relay for comparison
0
2017/09/09 07:02:01
waldig
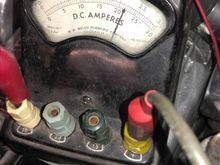
HUBBA HUBBA look at the running current of the air pump and this is LOW, engine is off - battery only 12.5v
0
2017/09/09 07:01:48
waldig
Removed relay, see the burned contact
0
2017/09/09 07:01:21
waldig
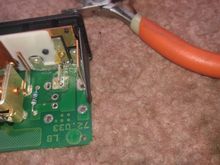
Unsoldering the board connections
0
2017/09/09 07:00:50
waldig
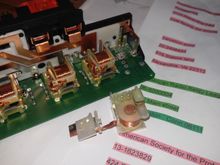
Relay board with the burnt air pump relay on end - right end
0
2017/09/09 06:59:58
waldig
THis is the album I showed at Fontana When I met you for the fall meet years ago. Woody
0
2017/07/29 12:21:41
waldig
First
Page
1 of 29
Last
Go To
Page
1
2
3
4
5
6
7
...
29
1 of 29
Go To
GO
Go to page
of 29
pages
1
2
3
4
5
6
7
...
29