LOG IN
REGISTER
Forums
Crossfire Forum
New Member Introductions
Crossfire Events and Meets
Members who have passed away
Site News
Cars
All Crossfires
Crossfire Coupe
Crossfire Roadster
Crossfire SRT6
Crossfire V8 conversions
MB SLK/SL/SLC
Car Shows
Technical
TSBs and How-To Articles
Crossfire build section
Troubleshooting & Technical Questions & Modifications
Engine, Exhaust, Transmission and Differential
Audio, Video and Electronics
Exterior & Lighting
Interior
Wheels, Brakes, Tires and Suspension
Detail Shop
Competition
Crossfire Awards and Trophies
Racing
Marketplace
Crossfire Marketplace
Commercial Sponsor Classifieds
Off Topic
General
Other Cars Etc
Other Vehicles
Regional Forums
North America
Other Regions
****Forum Functions**** / Test / Troubles / Suggestions etc
**WEBSITE** Functions / Questions/ Suggestions Etc
Testing Section Only
Marketplace
Vendor Directory
Become a Vendor
The Crossfire Marketplace
New Posts
Tools
Car Payment Calculator
Tire Rim Calculator
Recalls
Technical Service Bulletins (TSBs)
Members List
Live Feed
Gallery
View Dark Mode
Please register or login to enable Dark Mode.
Log In
Register
Threads
Google
Threads
Posts
Advanced
Dark Mode
Please register or login to enable Dark Mode.
Log In
Forgot your Password?
By logging into your account, you agree to our
Terms of Use
and
Privacy Policy
, and to the use of cookies as described therein.
Recent
Commented
Albums
My Pictures
waldig's Photos
View Profile
Sort:
Most Recent
Most Recent
Most Comments
Albums
Photos
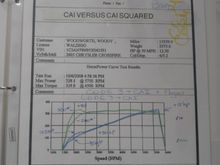
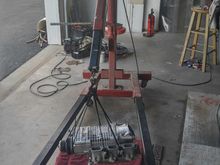
Original testing and dyno of my design for Rob at needswings
0
2017/07/29 12:21:28
waldig
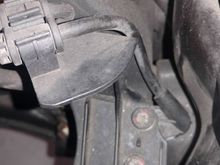
THis is a shot of the speed sensor in the front om my srt-6. The cable is well supported and sensor has the hood over it for protection, Mercedes was most complete.
0
2017/07/29 11:28:26
waldig
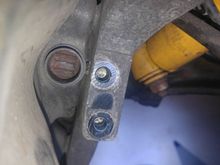
Different view of sensor mounting pad.
0
2017/07/29 11:28:13
waldig
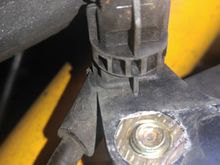
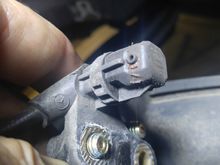
Close up of the speed sensor assy
0
2017/07/29 11:27:55
waldig
View of the tone ring thru the sensor hole, note the TEETH on ring.
0
2017/07/29 11:27:39
waldig
This is the magnetic effect sensor that picks up the metallic proximity of the "tone ring"
0
2017/07/29 11:27:24
waldig
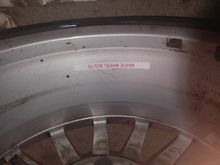
With 4 sets of wheels for road and autocrossing, it is useful to keep track of the bolts to match the length and wheel THE FIRST TIME!!!!!! sAVES THE PARKING BRAKE FOR SURE...
0
2017/07/29 11:27:07
waldig
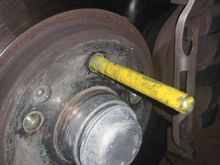
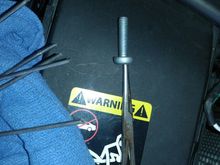
Another view of my earliest idea. A 12 x 1.5 mm bolt with the head cut off to assist the mounting of the wheels. This is a massive assist= front and back.
0
2017/07/29 11:26:45
waldig
Just finished replacing my 275s after checking wheel and brake system on a rainy day.
0
2017/07/29 11:26:32
waldig
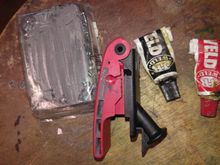
Used about 6" of the pair of J-B weld to fill the handle-- for strength. Hope this helps others.
0
2017/07/11 15:40:27
waldig
My repair was easy and seems to be better than new, solid epoxy fill made the handle stronger
0
2017/07/11 15:40:05
waldig
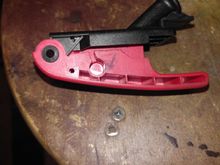
Plastic support cracked and allowed the PIN to flip out when hood latch was pulled STRONGLY- jambed hood
0
2017/07/11 15:39:53
waldig
Hood latch with the crack located with an arrow.
1
2017/07/11 15:39:45
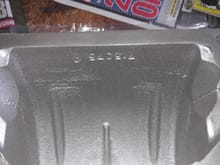
waldig
THe only casting ID # that I could find on the entire unit. Minimalist documentation overall.
0
2017/03/31 10:16:26
waldig
Looks good here, and with a 1000+ Pka rating should last in our usage for a very long time
0
2017/03/31 10:16:13
waldig
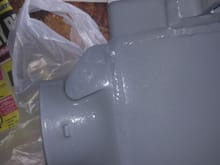
There is no AMG logo as if it was just a copy that removed it from casting
0
2017/03/31 10:15:57
waldig
Bottom view does not show anything special, looks to be similar in design
0
2017/03/31 10:15:38
waldig
Pressure port is not drillled out but the mounting boss is similar to my old one, sould be drillout easy.
0
2017/03/31 10:15:24
waldig
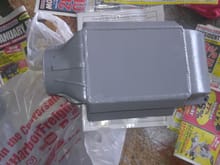
Another harbar frieght bargan??? Too soon to know
0
2017/03/31 08:02:29
waldig
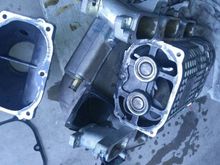
The business end of the SC with the inlet housing off showing the bearing assemblies.
0
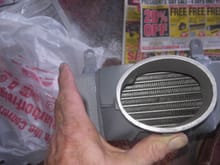
2016/09/22 18:28:31
waldig
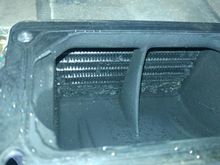
Crud in the inlet of the IC restricting cooling and AIRFLOW>>>>
0
2016/09/22 18:28:30
waldig
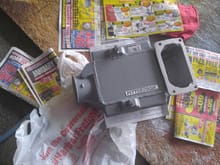
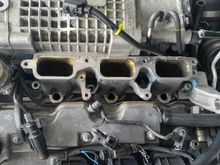
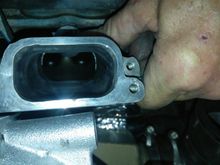
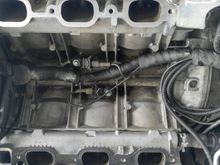
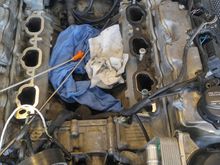
Intake manifold off looking into head ports. TB is off also
0
2016/09/22 18:28:29
waldig
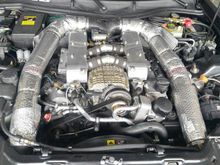
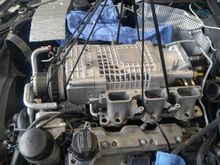
Here is the insulated CROSSFED intake manifold assembled again
1
2016/09/22 18:28:29
waldig
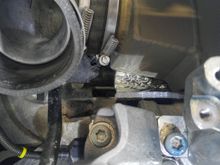
Hemostats allow bolts in SC to be inserted without dropping into the head !!. Some bolts are located deep inside. LOOK and see nothing is in the head or valves when you finish.
0
2016/09/22 17:14:17
waldig
Here I adjusted the SC a bit to allow best match up. There is a little bit of slop - use it to get best fit.
0
2016/09/22 17:14:16
waldig
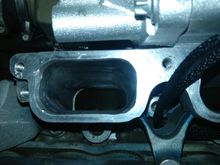
See the lip between the head and SC passage
0
2016/09/22 17:14:15
waldig
Down port view after being WOODIEZED note flow passage
0
2016/09/22 17:14:14
waldig
Sensor moved to new IC !!
0
2016/09/22 17:14:13
waldig
Rear is tight fitting and there all kind of bolts to fit in proper order
0
2016/09/22 17:14:12
waldig
Almost done and ready to bolt up works, no grass or youll loose immediate memory and your screwed
0
2016/09/22 17:14:11
waldig
Balanced lift made all so easy, gotta get a lift to do it, had to test fit IC 5 - 6 times to be sure all hoses and lines were out of harms way, its tight
0
2016/09/22 17:14:10
waldig
Valley cleaned up before reassembly see knock sensors
0
2016/09/22 17:14:08
waldig
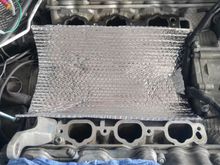
Wanted to do something better and added a layer of insulation under IC. ONE LAYER THICK ONLY about 1/3" not more room available
0
2016/09/22 17:14:07
waldig
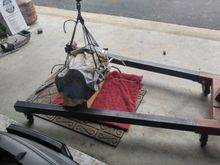
Iam old and wanted to do this well w/o killing my self or pinching something. This idea was great with some rope to suspend SC
0
2016/09/22 17:14:06
waldig
Tried to make use of having engine apart
0
2016/09/22 17:14:05
waldig
Porting polishing shown
0
2016/09/22 17:14:04
waldig
Gaskets glued and positioned using bolts to align gasket
0
2016/09/22 17:14:03
waldig
Gluing the gaskets on ONE side to position them for installation so they wont walk
0
2016/09/22 17:14:02
waldig
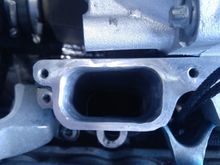
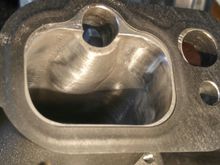
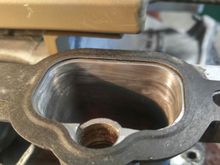
Matching ports to gaskets for more flow and less turbulence
0
2016/09/22 17:14:01
waldig
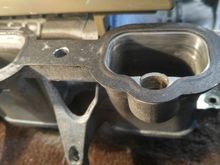
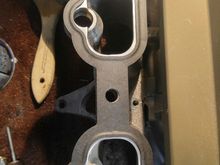
Inlet ports of the heads with valley exposed
0
2016/09/22 17:14:00
waldig
First
Page
2 of 29
Last
Go To
Page
1
2
3
4
5
6
7
...
29
2 of 29
Go To
GO
Go to page
of 29
pages
1
2
3
4
5
6
7
...
29