When you click on links to various merchants on this site and make a purchase, this can result in this site earning a commission. Affiliate programs and affiliations include, but are not limited to, the eBay Partner Network.
Starting this thread to chronicle my adventure in swapping an M113K into a Crossfire. This has been done before, but this is here, so that someone might glean some tidbit of information that they will need to do their own swap. Perhaps something will be posted that was not mentioned in another thread. In the second post of this thread, part numbers and links will be posted where possible, so that there is a reference. Keep in mind that this project is just now getting off the ground, and that it is not complete. The intention is to document many (but not all) aspects of it until completion.
I'll begin by saying that I had intended to swap an engine into our 2004 SSB Crossfire since the beginning of our ownership of this car. We had four other Crossfires at the time, including two SRT-6's. This Crossfire joined our fleet at 98k miles, as a non-running vehicle. The previous owner had it worked on by several shops, none of whom could diagnose the failed RCM that was causing most of its issues. Replacing two bad relays inside of it gave us a running, driving car. Later, every suspension piece in the car was replaced, upgraded to Bilstein B6 shocks all the way around, and SRT-6 springs were added. At the same time, SRT-6 brakes and wheels were swapped in. A few upgrades to the interior, mainly with the radio, and other niceties, but aside from that, the car is pretty well stock, and just maintained it to be a good driver. That is all about to change
Charleston, SC, June 2021
The plan had been to swap in a completely different engine. The original intent was to put a Chrysler 2.4L Turbo engine in. I have a very built up 2.4 from a SRT-4, that makes right at 600whp on 93 pump gas (not a joke!). An adapter plate was acquired, which allowed a 5.7L Hemi version of the 722.6/NAG1 transmission to bolt up it. The 2.4/722.6 was mocked up in a SRT6 parts car, and was just about midway through the process of fabricating the oil pan and engine mounts. Then, while cruising Craigslist one morning, I came across someone parting out a CL55 AMG, and suffice it to say, a deal was struck, and the powertrain and most of the computers from that car are now in the shop.
So, course change, and now we are heading into a swap we all know works. This thread will be split up into a few sections, as far as the swap is concerned. First will be the transmission, as this portion was completed first. Second will be the engine, and everything it needs to be happy, including fueling, cooling, electronics, etc. Lastly, will be the rear axle setup. There is also another thread, detailing technical aspects of the rear axle.
The second post will be reserved for links, part numbers and otherwise useful information about how to get parts to do this swap. It will be sparse at first, but it will be filled up before long. Part II of this series in the third post.
This post will be reserved for part numbers, links and other useful acquisition information. It will be edited as I get information to post into it.
Most everyone knows, but since I referenced it, find good deals on cars and parts from Craigslist. You'll be amazed at how many Crossfire related things you will find!
Many parts from RockAuto <- if you're not shopping there already, great prices on a ton of stuff for our cars. There are discount codes for 5% off everyday, so search for the codes (they expire periodically, but there's always a new one).
Air Filters HASTINGS / BALDWINAF1290
Supercharger belt GATESK080507RPM
Accessory Belt GATESK060970
Spark Plugs NGK93893
Idler Pulley DAYCO89161
Belt Tensioner �RO PARTS1122000970
Intake Manifold Gasket MAHLEMS19439
Water Pump �RO PARTS1132000101
Exhaust Manifold Gaskets MAHLEMS19393 Actually a set of 6 for SRT6, but the same. They were not in stock for the M113K, so I ordered these
A/C Filter Drier FOUR SEASONS83093A Crossfire part that I will replace, as I will have the system evacuated, and recharged, anyway
The first part tackled in this project was the transmission. Since I already had the NAG1 from a 2009 Dodge Charger 5.7L Hemi for the 2.4L project, this would become the basis for the M113K swap, as well. The stock Crossfire transmission is a W5A330 unit, meaning it is a 722.6 transmission, rated at 330NM torque. The Charger's unit is a W5A580, meaning it is rated at 580NM torque. Externally, they are very similar, save for the bellhousing, which is distinctly Crossfire. My plan is to use the main casing from the 5.7, all of the internals from the 5.7, and the bellhousing, rear mount, shift lever and pan from the Crossfire (Crossfires have a drain plug in the pan. Very handy!)
It makes sense to put in the best bolt in improvements that could be easily made to the transmission since it was all going to be apart, anyway. A call to Whatever It Takes Transmission Parts had a pile of stuff on its way. Also ordered was a torque converter, conductor plate, standard rebuild seal kit, an Alto red band/Kolene steel plate set (high performance!), a TransGo shift improvement kit, and separately the coveted Blue Top Solenoids from Mercedes Benz. More on each of these as we go.
The first task was disassembly of the 5.7L transmission, and separately disassembly of a badly slipping Crossfire transmission to harvest the bellhousing, pan, shift lever, and rear mount plate. The rest was pretty much discarded. On the 5.7L trans (which will be the only one I am talking about from here on out), discarded was the bellhousing, pan, rear mount and the shift lever. Stock Crossfire trans, sans Bellhousing
Everything was taken apart, run through the parts washer, and then the main case, bellhousing, and rear mount plate, and spent several hours in the bead blaster. Once done, everything was thoroughly cleaned, dried and masked off for powder coating. I'm a big believer in powder coating. A powder coated SRT4 transmission in another project car has lasted 15 years ago, despite being in and out of the car several times, driven daily on dirt roads, snow, rain, you name it, it still looks really nice. Powder does a great job at being easy to clean up, and resisting corrosion. Main casing blasted, cleaned, masked, and ready to apply powder. Main casing blasted, cleaned, masked, and ready to apply powder.
Sharp readers will see the very Chrysler part/casting number on top, along with some extra screw bosses and other minor changes. This being a 2009 model casing, the thought process was that the casting will have received all of the improvements that production fleshed out over the 5 year difference from the Crossfire transmission. After blasting, powder was applied. I don't have any pics of what it looked like before it went into the oven, as one tends to not waste time once the powder is on, risking something happening to the powder that is only sticking to the parts by shear static electricity at this point. A two stage powder was applied, which is color and then clear. More info after some pics:
One thing I wish I would have taken the time to do was to grind/sand the casing to get rid of the bulk of the surface casting roughness. I didn't, but wish I had. The base color powder is Reflective Chrome with a clear coating afterwards on all parts. If you look closely, though, the rear bracket looks almost chrome, but the rest does not. There is a good reason for that. I wanted a slightly darker grey metallic look, much like it found on some high end cars and industrial equipment. To achieve the regular chrome, you apply the chrome powder, bake it, let it cool, apply clear. That was done on the rear mount. To get the grey, you have to work fast! The casing and bellhousing were pulled from the oven from the chrome powder portion (stage 1), and when the parts cooled only to about 240�, the clear (stage 2) is immediately applied, which began to "flash" right away. It takes several heavy coats, and then put in the oven for a full cure. This gives an interesting effect, and I am happy with the results. The finish is very glossy, but not so bright as to look like a rattle can job. Next post, the build is done!
Whether through eBay, or other means, go get the ATSG brand 722.6 transmission manual, if you are going to ever go through a rebuild on your trans. It is very informative, and tells you many caveats that the OE manuals just will not tell you. It is very detailed. Second, spend the money, and get the Alto Friction/Steel Module kit. It increases the number of clutch discs and steels by 50% in most cases. It uprates the 722.6 to handle 750hp, and will handle more. A good friend runs these in his very wild Challenger (~1000hp), and that trans has been holding up fine. While apart, a few other items were added. First, the TransGo shift improvement kit. This is not a shift kit in the traditional sense, as it will do precisely nothing for making this trans shift harder, or change the dynamics of when and how the shifts occur. Instead, it addresses reliability concerns in the trans, and prevents things like shudders or flare ups between gears, and will allow gear changes to happen more quickly. Second, upon recommendation, MB Blue Top solenoids were installed. There is a ton of debate out there about these, but the general consensus is that these will allow better control of the trans, and much, much faster shifts. The more modern, high end AMG cars all got these, while the more pedestrian MB products got the same "Brown Top" solenoids that the Crossfire received. The Hemi guys swap to the Blue Tops with very favorable results. Downside is that they are pricey. You are looking at about $370 for the pair. Ouch. I am having Josh Chase do the ECU and TCM tuning, and he recommended them for this build. Enough said.
The trans was completed this evening, and here are some final pics of the outcome.
One last thing about the trans. The dipstick. The 5.7L apparently uses a different dipstick arrangement, as the placement of the hole for it is larger in diameter, and higher up on the case than the Crossfire trans. I am going to need to get ahold of a dipstick of the Hemi, and try to make it work. It appeared that there were a few ways to get the Crossfire dipstick tube to work, but it looked like a hack, and would probably wind up leaking. For now, the trans is done, and ready to go into the car. It sits on the dolly, and will now be pushed to the side, and start on the next task. In the next episode, work begins on the engine.
Last edited by nemiro; Jul 10, 2021 at 10:50 AM.
Reason: Grammar
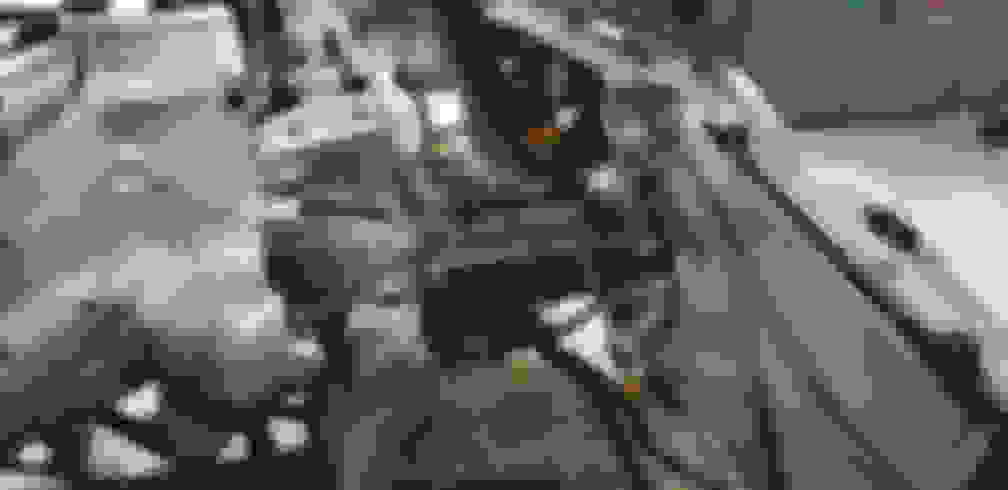
It was a busy weekend! Most of the work accomplished in the last few days was important, but tedious and time consuming. It was time to turn attention to the engine, and that meant tackling a lot of little jobs, along with the obvious changes, such as the exhaust manifolds and the accessories. I have to say that overall, the exhaust manifolds went smoothly, but it seems stressful, whenever you take an air cutoff wheel to hard to find parts! Despite knowing what I was getting in to, the manifolds are still the craziest design I have ever seen! The "double hull" likely provides a hedge against thermal cracking and warping.
Let's begin. In the shop, I have not only this M113K, but also an M112K from a wrecked SRT-6. That engine is a good running engine. After removing it from the wrecked car, I pulled a plug on each cylinder, and dumped some oil into each one, turning the engine over several times to distribute it. What I didn't think about, nor realize was that the oil would wind up inside both "hulls" of the exhaust manifold. When I removed the manifolds from the M112K for this project, I dumped a little oil out of them. As I was cutting them open, oil began leaking out all over the place! Just a little cautionary tale, when trying to pickle one of these engines!
Measuring the mid point between cylinder 2 & 3 and 6 & 7, I then moved about 0.150" towards the rear, and made a cut all the way around. One the M112K manifolds (same as M112, BTW), I did a similar thing, but offset towards the front of the engine, cutting the front port off of each one. Doing this left me with way too much material. It was tedious, but I ground on them for a long time, getting a nice even fit. I paid a lot of attention to where the manifold to cylinder studs were lining up, trying to keep them centered, and without any side loading. After completion, I bead blasted all of the parts. The necessary 'hybrid' exhaust manifold for the V8 swap
Next it was time to weld them. I must preface this by saying that I am an engineer by day, and not a welder. It shows. The first attempt involved a recently acquired TIG welder, and some 308L rod. Practicing on the scraps of the manifolds, I thought I had a handle on it, so began work on the actual pieces. Boy! Was I wrong! It was coming out horrible, and nothing seemed to work right. Lots of reading online commenced, attempting to figure out what settings on the welder were wrong, and reattempting. Started to sort of work, but seemed to take more effort than any of the aluminum I had previously welded with it. And then, near disaster! A burn through. At this point, hours had been wasted on the TIG attempt. Time for Plan B! Getting out the trusty Lincoln MIG, and loading it with some 316L .030" wire, it went along as well as could be! Filled in the rather larger burn through, and stitched the rest up. Now, please, be gentle! I know almost anyone else with a welder is better at this than me. I thought about calling a half dozen people I know who will actually call themselves a welder. Nah! Push through. Results are what they are, but I think they are sealed up, and will hold together. (They were tacked together bolted to the engine, BTW)
Literally, the most stressful part of the project is now out of the way!
Next it was time to address the accessories and the front of the engine. The first thing I did this weekend was to strip everything down, plug up all the critical holes and pathways, and then give the engine its second washing. This got rid of the remaining hidden grease and grime, and left me with this fairly clean front section.
The rust stain matched the much nastier looking water pump, and gave the tell tale sign that water was sitting in this engine for a while. Further cleaning and detailing occurred until it was time to begin reassembly. The plan was to replace the water pump, thermostat, accessory idler, and the accessory tensioner. The power steering pump on this M113K is an extended one for the ABC adjustable suspension that the CL55 had. This necessitated a Crossfire power steering pump. The A/C compressor looked identical, so the decision was made to stick with the M113K's, as it is lower mileage than the one in the car. The alternator from the CL55 appears to be both larger, more robust, and better quality. We'll go with that one.
First up was the thermostat. Opening the box, despite being the correct part number, yielded a thermostat housing for a non-"K" engine. Upon inspection, it appeared that the thermostat itself was the same, so the M113K thermostat was disassembled, bead blasted, and the guts of the thermostats were swapped. Problem solved! Onto the water pump. OK, what a pain! This was a correct part number for the M113K. Still, there were three holes in the casting that are needed, but were not threaded. I read about this problem in Jared's V8 swap THREAD, and thought I was on top of it. Nope. The "K" engine has two more needed holes for the supercharger belt tensioner. Fortunately, the tools for the job were on hand, but still... I digress.
If you swap a V8 into your car, or even just replace the water pump at all, carefully compare the new one to the old one, checking for untapped holes.
Once past this, the rest went well. All of the attachment points needed are there on the M113K, even thought they are not used. For instance, there is a hook and a tapped hold, specifically for the tank of a power steering pump that other engines (like the M112/M112K) have. It's almost like MB was thinking people might swap engines!
I hit one other minor snag. The power steering pump came from the wrecked SRT-6. The pulley from that engine is an 8 rib pulley, as one drive belt runs everything, including the supercharger. The M113K has a separate accessory belt drive, and supercharger belt drive. The ABC pump pulley would probably fit, but it has a large 'hat' on it that appears to be there to add mass. Perhaps to dampen vibration or noise? Anyway, the SRT-6 pulley allows a good mock up, to be sure everything is OK. When the project car goes under the knife later this week, the M112 type pulley will be swapped in.
Next up, the intake manifolds and valve covers will be removed, bead blasted and powder coated. Spark plug change time, and a fuel rail modification to "loop" the rail, ending fuel starvation problems at the front of the engine. After that, mating of the engine and trans, and then we are just about ready to bring the Crossfire into the shop to remove the engine. Stay tuned!
I've been pretty busy with work lately, and have just a smaller update today. That has to do with the fuel rail. The fuel rail on these engines is "U" shaped, with fuel flowing in just behind the injector for cylinder #8. #8 winds up having the bulk of any problems in these engines, and the thought is that it goes lean under high loads, for some unknown reason related to the U shape starving it. Personally, I do not subscribe to that theory (I believe it is coolant flow related). However, it's fairly easy to see where #1 & #5 could have problems. The solution is known as 'looping the fuel rail'. What this means is to add fittings to the end of the legs of the "U", and make a piece of fuel line to tie the two sides together. This makes a big loop, rather than a U. There are two basics ways to get this done. First, shell out $600-1100 for a modified fuel rail, or do it yourself. Choosing the latter, but still lacking an measurable TIG welding skills, I set to work. On the shelf was another stainless steel fuel rail for a Dodge SRT-4, and so it became the guinea pig. After gaining reasonable enough proficiency in the practice of ruining a fuel rail with a torch, I got the hack saw out, and in a few minutes, the ends were lopped off the M113K fuel rail, and the stainless steel flat bungs to -6 AN fittings were positioned in their place. After an excruciating amount of time, and not so pretty looking welds, it was complete. I built a temporary fuel line using "normal" AN line, but there is some PTFE type line coming, and will build a replacement with those fittings soon. Real Welders: Please be kind, K? Thx.
I measured the line length for reference, and am placing it here for posterity.
This same day, the intake "tanks" or plenums, and the valve covers were powdercoated. The powder on one valve cover came out terribly. Bad enough that the chemical powder stripper (read: REALLY nasty acid stuff) was broken out, and the valve cover was stripped, re-blasted, and re-coated. This last sentence was about a 5 hour ordeal. Interesting side note is that the acid seems almost benign when working with aluminum, but it reacts fairly aggressively with the magnesium of these valve covers. They got hot!
Today it was also realized that RockAuto sent me valve cover gaskets for a V6. An Advance Auto Parts 45 minutes away had the right ones, so those have been picked up. The hope for tomorrow is to have the engine bolted to the trans, and everything dressed out.
While you've got the fuel rail off, drill out the inlet hole (probably one or two drill sizes bigger) as it's a bit restrictive. You can make it larger and still have plenty of surface to seal against.
Made a little more progress today. Completed was final assembly of the engine, and mating of the transmission to the engine. It took most of the day to complete that last sentence, but it's done, and more or less ready to be put into the car, save some small hardware and that power steering pulley. Have other chores to do tomorrow, but I am hoping to begin disassembly of the car itself tomorrow night, with the goal of having the old engine out and the engine bay pressure washed by Tuesday night. We'll see what actually gets done!
Today attention shifted to the car itself. Before disassembly, it seemed like a good idea to find out exactly what the car weighed before the swap. Setting up a set of Intercomp corner scales, this is what the car weighed before taking anything apart. Before the swap weight
Now a few notes on these numbers. This car is mostly, but not completely stock. It does have SRT-6 brakes, which do weigh a little more than stock Limited brakes. It does have SRT-6 wheels, but not sure they weigh any different than regular Crossfire wheels. If I were to hazard a guess, 40# total is probably a decent number. The car has other minor changes, but nothing that would impact these numbers by more than 20-25#. There is a little over 1/4 tank of fuel onboard. All other fluids are at their proper levels. OK! We have a starting point.
Disassembly then began in earnest, removing the entire stock Crossfire exhaust, driveshaft, ancillary items, and finally the engine was out.
I need to pause here and say a few words about the M112. It truly is a wonderful engine! It is responsive, smooth, and sounds very nice. This one here has now gone 109k miles, and was running perfectly when removed. It will not sit idle for long, though. My son's black 04 has not lived the kindest life, and the powertrain is tired. This engine and trans will be cleaned up a bit, and then dropped whole into his 04 within a few weeks.
While everything is apart, it is a good time to get the engine bay cleaned up. The car was set back on the ground, and pushed outside for a degreasing, and a general cleanup of the engine bay.
Car is now back up in the air, and will drip dry until tomorrow afternoon. Goal for tomorrow will be to simply bolt the M113K into the car. Can't wait!
It always seems like you are within reaching distance of putting an engine into a car, and then you realize that there are a myriad of small parts, hoses, fittings, etc that should be taken care of before the engine goes in. So it was here, today. Approaching the engine install, it appeared that all was ready, but in reality, there was still about 3 hours of minor nit-noy stuff that had to be taken care of. Eventually, the moment had arrived, it was go time! Load leveler installed, attached to the hoist, time for that nerve wracking time of a swaying 1000# weight hanging over your pretty car, ready to bump, scratch, tip or even crush your work, and if you're really unlucky, maybe even yourself! OK, being dramatic. On with it.
It was just about this time that I realized I had a problem. Those who have swapped V8's in probably already spotted it. I used the engine mount brackets from the V8. Specifically, for a V8 in a CL55. Yeah, they won't work in the tiny R170 platform. Grrrrrr.
Here's a comparison of the CL55 mount on the left, and the Crossfire mount on the right. These are both from the right side of the engine. Slight difference, eh? Swapping the right side was a non-issue (just time consuming), but the left side was a different matter. The engine mount bracket has a provision for supporting the rear of the A/C compressor. The V8 bracket fits this bill easily, but the smaller V6 bracket doesn't reach. I should have taken a pic, but didn't (was in a hurry/frustrated), but the solution was to simply take a hack saw to the V8 bracket, and cut that ear off the end of the bracket, bolt it to the block, and the A/C compressor to it. Crude, but effective. After the bracket swap was complete, things went much more smoothly. At last, here is the result:
Looks so big in there! Working on this engine is definitely going to be more of a challenge than the M112. It almost looked like the hood wouldn't quite make it, but alas, it does!
There's still tons of work left to be done. All of the usual parts need to be reinstalled. Exhaust system will be a mix of stock SRT6, and fabricated portions. There's wiring, hoses, and the usual items associated with the engine, plus a bigger fuel pump (and I will be adding a pressure regulator and return line), cooling fans, oil cooler, intercooler cooling circuit, and more. On top of that, work has not even begun yet on the rear axle and differential portion. Unfortunately, I have to take a little break from this project, and turn my attention elsewhere, but I will return to it in about two weeks. Until then, Happy Motoring!
I have done some work in the past week, but neglected to take any useful pics. The 3.27:1 differential has been swapped out for a 3.07:1 unit from an SRT-6. This will keep the MercedesSwapShop TCU happy. Installation of the SRT-6 exhaust began, but quickly ran into a problem of a missing mounting point for the resonator. The 2004 rear subframe not only does not have the two tapped holes to bolt the mount bracket, but it is also shaped slightly differently, so that it is not practical to drill and tap the holes. Breaking out the trusty MIG welder made quick work of the bracket, albeit, the solution is somewhat permanent. The exhaust is mounted up, and the left side mid-pipe is installed. The right side uses a very odd sealing arrangement, and a search of the parts catalog and many parts stores yielded no results. Needswings has a kit that includes this seal, and it will arrive tomorrow.
Left to do is a myriad of small items. The transmission cooling lines, torque converter bolts, and then all of the specific bits on the engine need to be hooked up. Tomorrow fabrication of the oil cooler solution, charge air cooler system, and wiring will begin. Finally, the last major hurdle is the power steering and cooling system. The SRT-6 power steering pump interferes with the upper radiator hose. It seems that the outlet on the radiator points down at a roughly 45 degree angle, and pushes the hose directly into the pulley. The pump will be swapped out for the 2004 N/A style pump, which has a lower profile pulley. Unfortunately, it also means that the power steering pressure line needs to be swapped, as the line is specific to each pump. Access to the steering box went from hard to ridiculous with this swap. I haven't quite figured out how I will get that line swapped out, without unbolting engine mounts, and lifting the engine up.
Depending on progress, the hope is to at least fire the engine this weekend, but significant hurdles remain before that can happen.
More progress this evening, but no pics. This is due to the fact that the work was largely routine. M112K type power steering pump was removed, to be replaced with a standard M112 pump, which has a slimmer front profile for clearance. I need to acquire a set of crows feet type sockets to get at the power steering pressure line, which is pump specific. That will get done tomorrow. Under the car, torque converter bolts were installed, transmission electrical and cooling lines installed, and lastly a dipstick for the transmission. This is a 5.7L Hemi version of the NAG1, and it uses a different dipstick tube than the M112/M112K/M113K setups used. Unfortunately, the 5.7 tube put the end point right at the "Y" for the air intake. After some time in the vise, and several trips to the bench grinder, the tube has been modified (while retaining original length), and bent towards the passenger side, exiting just above the #4 ignition coil. This setup will allow the use of a standard B&M brand dipstick, made specifically for the Hemi version of the NAG1, which means a real filling tube, with a real functioning dipstick. Definitely happy about this one!
Tomorrow, there is some cleanup work with the transmission shields for the electrical plugs, the right side exhaust downpipe, and then back to the power steering pump. Saturday looks clear to be a full day in the shop. Hopefully some major progress will happen then!
I had hoped to make major progress this weekend, but sometimes the little things just take much longer than anyone would guess. Case in point would be the heat exchanger, pump, radiator fans and oil cooler. If I was inclined to put in the work it would take to shift the entire powertrain back 3", like it really should be, then all of the rest up front would be elementary. The choice was made pretty early on to not do any of that, so suffering is the word of the day. The heat exchanger was purchased in a previous parts deal, but the mounts, pump bracket, hoses and more all came from the wrecked SRT-6 that has been slowly donating itself to this project. The wrecked car took a hard hit to the front right corner, and resulted in everything up front being turned into pretzels, including the heat exchanger brackets. After spending much time with a hammer and the vise, they were straightened enough to do the job. All of the needed mounting holes were already in the 04 Crossfire.
One item of note here was the transmission cooler line that mounts to the top fitting (ie, the longer one). It is shaped different to clear this bracket. It could be bent, but in this case, I just grabbed the one from the parts car, and it fit fine.
Next up was the intercooler pump. The upper hole was in the car already, but the two lower ones were not. I chose to add them by adding nutserts, as these really make life easier when it comes to maintenance. After that, the heat exchanger was added, but then removed for access to the A/C condenser. This is where the real challenges began. Clearance between the engine and the radiator is now just about nil. Gone are the days of servicing the radiator by unclipping it, leaning it back and pulling it out easily. The solution was to cut two access notches into the upper core support. This allows the radiator to angle only slightly, but come out. Also trimmed the lower locating pegs on the radiator by about 1/4", which makes this process 10x easier in the future. Now, you're thinking, but why are you taking the radiator out? Glad you asked. Up until now, the radiator never has come out of the car - even throughout engine removal and replacement. The plan was to use some sort of OEM fan package. The extraordinarily tight clearance between the engine and radiator changed all of that, however. The new solution was to use two 12" fans out in front of the A/C condenser, and then a large oil cooler (M113K does not have an integral oil cooler), and a 14" fan next to it on the back side of the radiator. Using standard fan/cooler mounts (read: glorified zip ties), access to the condenser and the radiator separately was needed. Sparing the reader all the gory details, the zip ties would have to be cut to remove the radiator in the future. However, once those are cut, and the 14" fan and oil cooler are also removed, the radiator can be removed, without disassembling large portions of the engine. The big question will be if these three fans and the large oil cooler will be enough to keep the engine cool. Soliciting opinions from folks who have swapped V8's into their Crossfires yielded a very wide range of creative solutions for keeping the car cool. If this doesn't work, then I will look into some other way of running the oil cooler, and supplementing the 14" fan with another. The other lingering question will be if the MB PWM based fan controller will run these. I have about a 50/50 mix of results from those who messaged me on it. I'd like to use it, but if it will not keep the car cool, then an aftermarket fan controller will be added in.
Many other smaller items were also accomplished, such as swapping in the 04 V6 power steering pump and pressure line, completing the exhaust, transmission cooling lines, transmission wiring, swapping in the programmed SKREEM, TCU, and a huge list of nit-noy items. Tomorrow was supposed to be a regular work day, but as Tropical Storm Fred approaches, work has shut down, handing me some more shop time Tomorrow the intercooler plumbing will be completed, along with all of the upper radiator plumbing, and then moving on to the wiring. At that point the car should be ready to start, save one item. The oil cooler lines. Those are -10 AN, but the vendor shipped -6 line along with all of the shiny new -10 fittings. Looks like we will be waiting a little longer to fire this thing up.
Unfortunately, there's no accomplishing a project of this magnitude, without problems. No check engine light, but there is an ever so slight fuel leak from one of the fittings that was welded to the fuel rail. Already have that back off the car, cleaned all the fuel our if it with water, blown dry, and now sitting overnight.
Another issue is fuel pressure. The pump was upgraded to a unit from an SL55/65, but the Crossfire regulator/filter assembly remains. According to the parts manual, the 2003 CL55 AMG uses the same unit, and that unit sets the pressure at 55psi. The tuner tells me that it needs to be 86psi. When everything was apart, one thing not mentioned here was that the full fuel feed line was removed from the SRT6 parts car and added to this car. Not replacing the existing - adding. The reason for this was to add the capability of putting an adjustable fuel pressure regulator up in the engine bay, and use this additional feed line as a fuel return. The factory regulator/filter assembly will be replaced with a Ford type filter, as it should fit the stock location nicely, but eliminate the built in regulator. This will be accomplished tomorrow. Using the new fittings for the fuel rail loop, each side of the tail will now plumb over to the new adjustable regulator. I should have just set that up from the beginning, but the fuel rail wound up having to come off the car, anyway.
I thought I'd have video tonight, but it will have to wait until tomorrow.
More research on this, this morning says that there should be 72-86psi at idle. This is a very wide range! After the welding is done on the fuel rail this morning, installation of the external fuel pressure regulator, return line, and "straight through" style fuel filter will begin. It shouldn't be too difficult since the fuel rails are already setup with the fuel rail loop fittings, and the actual return line is already in the car.
The big question is how the OEM setup regulated pressure. I am reading conflicting information on the subject. Later cars seemed to have gone to dual in tank pumps with a regulator. Earlier cars had a fuel system setup more akin to the Crossfire, but the actual pressure regulator appears to not be there, ie, the pump ran wide open to the engine, without regulation. It is amazing to me how little true technical data is out there for the MB cars. It's as if the whole setup is a mystery, and people are just used to operating in the dark. This is the only series of cars I have worked on where hard data seems to be so elusive. I digress.
Sorry for the lack of updates. Been battling fuel leaks and setup issues. The OE filter/regulator has been replaced with a straight through SL55 AMG type filter, and the return line attached. Up front the new adjustable regulator has been plumbed in. Unfortunately, one of the -6AN fittings on the fuel rail got a nick in it, and proceeded to leak. Many attempts at cleaning up the nick slowed it down slightly, but any fuel leak is a no-go. A set of Koul Tools fitting fixer tools was ordered, and using the tool got the leak under control quickly and painlessly. In the process now of assembling the OE air filter boxes. Some interference on the driver's side with the return line from the front of the rail, but that will be addressed in a week or two. Using Car-Part.com, another M113K rail was purchased, and the plan is to use that, but also modify the fuel feed point to the center rear of the assembly, to eliminate the low pressure spot for #8 that is caused by the stock fuel feed location. FWIW, it would appear that the M112K should suffer from this same issue.
A very knowledgeable individual stepped up, and helped me with fuel pressure setup numbers. For reference, the really high numbers are not correct. 60psi at idle is the correct number.
Next will be the cooling fans. Currently, they are wired off of the original PWM type fan controller, but as has been noted by others, it does not run the fans fast enough. The car hasn't been driven yet, but it already wants to run fairly warm while sitting still. Based on that, one could guess that sitting in traffic in Florida summer heat with the A/C on is not going to go well. Likely, the fans will be wired to be full on for the time being, and an aftermarket controller wired in soon.


 Tomorrow the intercooler plumbing will be completed, along with all of the upper radiator plumbing, and then moving on to the wiring. At that point the car should be ready to start, save one item. The oil cooler lines. Those are -10 AN, but the vendor shipped -6 line along with all of the shiny new -10 fittings. Looks like we will be waiting a little longer to fire this thing up.


