
How to recolor your gauges! (lots of pictures)

I did NOT have to actually remove the lower console assembly. I did have to unbolt/unscrew most of it's anchors so I could drop it down and remove the upper part located just below the gauges and steering wheel column.
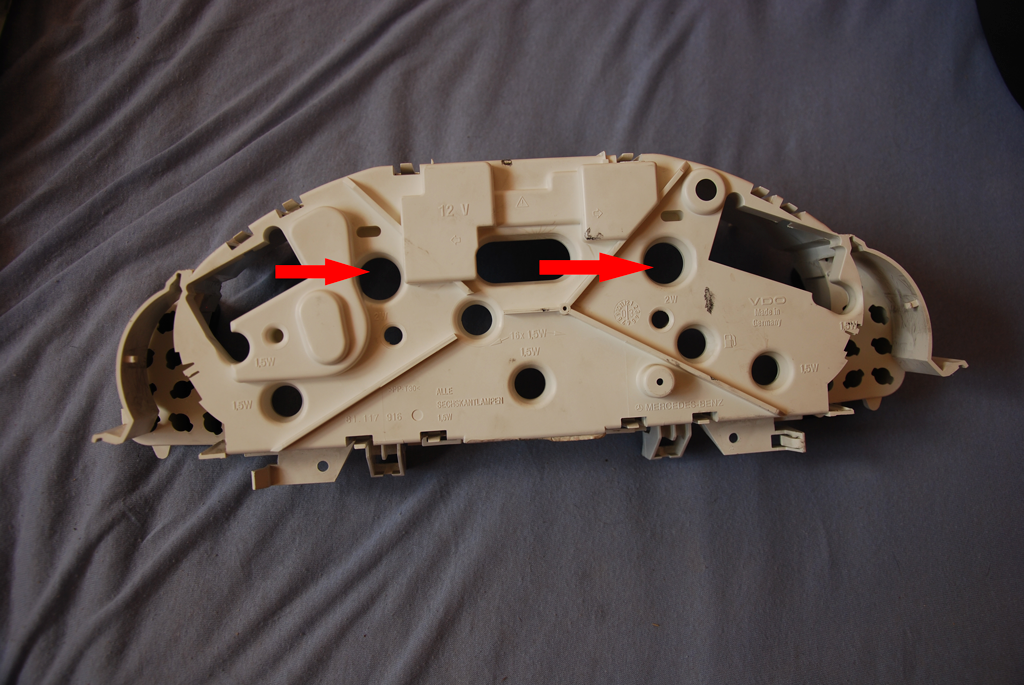
I updated the OP with this information. Hopefully it's a little clearer. I found a picture to post here to show what I had removed.

Hope that helps.
I updated the OP with this information. Hopefully it's a little clearer. I found a picture to post here to show what I had removed.
Hope that helps.
Today, I started to dismantle Instrument Panel.
You wrote I don't have to take out steering wheel, but I cannot pull put the control panel without taking out the steering wheel.
Or did you take out the glass from the control panel first?
and what key is needed to remove the steering wheel?
Thanks!
Last edited by BuDeNy; Jul 7, 2013 at 03:50 PM.
Thread Starter
|
Senior Member
Joined: Jun 2006
Posts: 1,945
Likes: 23
From: San Mateo, CA, USA, Earth, Sol, Milkyway
BuDeNy,
Hopefully, this helps.
1. My vehicle is the Left Hand Drive American model.
2. I DID have to disassemble the lower half of the dash panels.
3. I found later that I did NOT have to loosen the actual steering wheel or it's column.
4. I have had my gauge cluster out and back in half a dozen times since this original posting for other modifications and I have not had to remove or loosen the steering wheel or it's column.
The cluster DOES require you to lift the top dash panel slightly to clear the upper clips/corners of the gauge cluster to tip it out and pulling the steering wheel out as far as it will go on it's adjustment also makes things easier.
I do have a bit more detailed instructions on how to remove the steering wheel than the service manual provides. For the steering wheel center bolt use a 10mm Allen wrench (Socket style).
1) Disconnect negative terminal of battery.
2) Remove the airbag.
Unbolt airbag using the T25 or T27 Torx driver.
Carefully remove electrical connector and set airbag aside in a cool dry location facing up.
3) Remove the steering wheel. Check that alignment mark on steering shaft is accurate and clear before removing wheel (clarify as necessary). Unplug horn wires, feed horn and air bag wires through relief in wheel as it is removed, and take care not to rotate clock-spring while wheel is off.
These instructions are courtesy of the paddle shift kit installation document developed by member latemodel21. (Awesome kit by the way!)
I hope that helps.
Thread Starter
|
Senior Member
Joined: Jun 2006
Posts: 1,945
Likes: 23
From: San Mateo, CA, USA, Earth, Sol, Milkyway
From post #2... it was added at the stage where you can get at the lens covers.
UPDATE: At this point you CAN remove the bezel assembly from around the LCD displays and simply remove the green lenses. Take care to tip out the LCD screens from the top and just lift out the lenses and rest the LCD screens back.

Joined: Jul 2012
Posts: 21
Likes: 0
Hi;
I have a 2004 Coupe. One of the lights that lights my fuel gage area is very dim...maybe out. I am looking for a very clear, paint-by-numbers, how to get at the cluster so I can either change the bulb - is this possible?? or find out why that particular gage area is so dim.
Are there actual 'bulbs' (LED's) that can burn out? In my older, American cars I've owned, it was always a fairly simple process - unscrew a few screws and the cluster gage just tipped out. Even true on my VW Golf.
Can I access my XF gage the same way?
Thank you,
Brendan

Joined: May 2012
Posts: 159
Likes: 0
From: Arcadia, FL
Hi;
I have a 2004 Coupe. One of the lights that lights my fuel gage area is very dim...maybe out. I am looking for a very clear, paint-by-numbers, how to get at the cluster so I can either change the bulb - is this possible?? or find out why that particular gage area is so dim.
Are there actual 'bulbs' (LED's) that can burn out? In my older, American cars I've owned, it was always a fairly simple process - unscrew a few screws and the cluster gage just tipped out. Even true on my VW Golf.
Can I access my XF gage the same way?
Thank you,
Brendan
I have a 2004 Coupe. One of the lights that lights my fuel gage area is very dim...maybe out. I am looking for a very clear, paint-by-numbers, how to get at the cluster so I can either change the bulb - is this possible?? or find out why that particular gage area is so dim.
Are there actual 'bulbs' (LED's) that can burn out? In my older, American cars I've owned, it was always a fairly simple process - unscrew a few screws and the cluster gage just tipped out. Even true on my VW Golf.
Can I access my XF gage the same way?
Thank you,
Brendan
Thread Starter
|
Senior Member
Joined: Jun 2006
Posts: 1,945
Likes: 23
From: San Mateo, CA, USA, Earth, Sol, Milkyway
Guys,
Stock lighting is in fact incandescent bulbs NOT LED lights. I was converting to LED lights in order to customize the colors.
I am sorry, but I don't have "Step-by-step" directions on how to dismantle the lower dash in order to get the cluster out. The service manual covers it, but pretty large steps that are somewhat vague.
Basically at each major step, take out the screws that you need to get that section, loose, or out. I got in from work late and have no inclination to go step-by-step with my camera and or video camera to record every step.
Sorry...
Senior Member
Joined: Dec 2010
Posts: 12,780
Likes: 184
From: Lineville, AL
Those bulbs are MB part # A 001 544 55 94 ( 2 watt )
https://importecautoparts.com/parts/...44%2055%2094/3
or
http://www.pelicanparts.com/cgi-bin/...g_description=
https://importecautoparts.com/parts/...44%2055%2094/3
or
http://www.pelicanparts.com/cgi-bin/...g_description=
Last edited by ala_xfire; Aug 5, 2013 at 07:39 PM.
Those bulbs are MB part # A 001 544 55 94 ( 2 watt )
https://importecautoparts.com/parts/...44%2055%2094/3
or
Pelican Parts - Product Information: 001-544-55-94-M615
https://importecautoparts.com/parts/...44%2055%2094/3
or
Pelican Parts - Product Information: 001-544-55-94-M615
What type of SOCKET this lamp?
I purchased on ebay this bulbs
2X B8 4 2 SMD 3528 LED White Lights Cluster Gauges Dashboard 12V Bulbs for Car | eBay
socket B8.4

Joined: Apr 2013
Posts: 25
Likes: 0
please advise which pins powers the illumination on cluster connector? need this to test the result without putting it back to vehicle.
and in addition did anybody do recolor of the light switch? How to disassemble it?
and in addition did anybody do recolor of the light switch? How to disassemble it?
Last edited by kai1; Oct 18, 2013 at 04:12 AM.
Thread Starter
|
Senior Member
Joined: Jun 2006
Posts: 1,945
Likes: 23
From: San Mateo, CA, USA, Earth, Sol, Milkyway
For my 2005 SRT6, Pin 3A is Ground and 13A is power to the Instrument Cluster Lighting. The actual connector pin-out listing is on page 8W - 80 - 37 (page 1855 of the pdf) of the SRT Service Manual. This may or may not be the same for your year/model. Verify pin-outs in your applicable services manual. I plugged mine back in for EVERY test. The pins are small and you risk damage to your cluster by tapping the pins directly.
You can find the service manuals here...
Crossfire Documentation Collection
You can find the service manuals here...
Crossfire Documentation Collection
Thread Starter
|
Senior Member
Joined: Jun 2006
Posts: 1,945
Likes: 23
From: San Mateo, CA, USA, Earth, Sol, Milkyway
Just take your time disassembling it. I had mine apart, but felt it was not necessary to recolor as I don't really see it, nor can the passenger.
Senior Member
Joined: Oct 2013
Posts: 2,152
Likes: 37
From: Orlando
Thanks, have the MB part now A 001 544 55 94 but two questions:
1) How many are there ? (no sense buying one)
2) Does it cross to anything US (like a 194).
Thank you,
1) How many are there ? (no sense buying one)
2) Does it cross to anything US (like a 194).
Thank you,

Joined: Jun 2011
Posts: 158
Likes: 0
From: Castle Rock, Colorado
I looked through this thread and your exellent photographic tutorial. It would appear that it is possible to remove the clear plastic lense, the bezel and the gauge overlay (and requisite needles) from the cluster without actually completely removing/disconnecting it. Is this true? I don't necessairily need to change or access any bulbs, but would like to attempt to do the green removal to the overlay and would prefer to disassemble as little as possible.
Thread Starter
|
Senior Member
Joined: Jun 2006
Posts: 1,945
Likes: 23
From: San Mateo, CA, USA, Earth, Sol, Milkyway
FriendlyFire,
I think it MAY be possible, BUT, it would be more difficult to do so that way. You are welcome to try. If it happens to be much easier, please post your results and procedure here for all to absorb.
Cheers!
I think it MAY be possible, BUT, it would be more difficult to do so that way. You are welcome to try. If it happens to be much easier, please post your results and procedure here for all to absorb.
Cheers!

Joined: Feb 2009
Posts: 274
Likes: 10
From: Clinton, Michigan
Great write up.
I just peeled the gauge face graphic off and removing all the bulbs and flipping up those side door flap things was not necessary to do so.
Also there is a dedicated low fuel bulb location which did not have a bulb installed. The corresponding area on the lowest arc of the fuel gauge is colored red (and would be lit if a bulb were in place) but the red area was painted black behind the red to block this!
Does anybody have a single bulb holder and bulb they want to sell?
Or know of a source for them besides the dealer?
Senior Member
Joined: Apr 2006
Posts: 25,432
Likes: 647
From: Ontario
Great write up.
I just peeled the gauge face graphic off and removing all the bulbs and flipping up those side door flap things was not necessary to do so.
Also there is a dedicated low fuel bulb location which did not have a bulb installed. The corresponding area on the lowest arc of the fuel gauge is colored red (and would be lit if a bulb were in place) but the red area was painted black behind the red to block this!
Does anybody have a single bulb holder and bulb they want to sell?
Or know of a source for them besides the dealer?
I just peeled the gauge face graphic off and removing all the bulbs and flipping up those side door flap things was not necessary to do so.
Also there is a dedicated low fuel bulb location which did not have a bulb installed. The corresponding area on the lowest arc of the fuel gauge is colored red (and would be lit if a bulb were in place) but the red area was painted black behind the red to block this!
Does anybody have a single bulb holder and bulb they want to sell?
Or know of a source for them besides the dealer?
Maybe maybe not.
Maybe it could be tied to the other low fuel light, do you relly need both?