
How to Repair Relay Control Module (RCM) - (Mystery no Start)

Joined: Dec 2014
Posts: 217
Likes: 4
From: SW Ohio

I read tighed1's post and it appears that I have a RCM problem. I replaced the battery and my car still will not crank. All of the electronic works. Does anyone know if tighed1 is still repairing these boards? I have a 2005 base model crossfire.
I think I can do this, but do not feel comfortable doing it. I an not sure what type of solder or soldering iron to use. Also, other than visually checking the solder joints, how can I tell which ones are bad? Should all the joints be resoldered while I have the board out?
Any help would be appreciated.
jrd1074
I redid all on my new spare one just to be safe. Only did the big 3 on my original as the others look good. (See post 746 for pics) I just used cheap $6 iron and solder from auto zone.
Last edited by GregWork; Feb 20, 2015 at 11:10 PM.

Joined: Apr 2006
Posts: 38
Likes: 0
From: Jacksonville Beach, FL
Thanks for the info. I took it out today and decided to ship it to tighed1. Will post once I get back and up and running.

Joined: Jan 2015
Posts: 27
Likes: 0
From: Texas
Id like to take it out so i can bring it to someone. Battery is disconnected. Cover is off....how to you unplug the RCM board? Too much pulling is making me nervous
Senior Member
Joined: Dec 2010
Posts: 12,780
Likes: 185
From: Lineville, AL
If you pull it up and out of it's slot using the wires, then it's much easier to remove each connector.
Don't worry about order or location, each connector is unique ( like me ).
Don't worry about order or location, each connector is unique ( like me ).
Senior Member
Joined: Mar 2010
Posts: 1,157
Likes: 1
From: midwest
Yes they are hard to pull off I was like I don't want to break this or pull the wires off but you won't just give them a good pull they will come off & only go back on one way don't have to worry about mixing them up
Joined: Jan 2015
Posts: 27
Likes: 0
From: Texas
... obviously the tony little lids need to be open then...
Senior Member
Joined: Dec 2010
Posts: 12,780
Likes: 185
From: Lineville, AL
obviously the tony little lids need to be open then
There are NO lids that need to be open, if you are referring to the little caps on top of the wires in all the connectors,
LEAVE THEM ALONE !
Joined: Dec 2014
Posts: 217
Likes: 4
From: SW Ohio
"pull by the wires" means to pull the assembly up out of the big plastic box by grabbing the whole assembly wires and all to get it free, then disconnect the connectors to free the RCM from the harness.
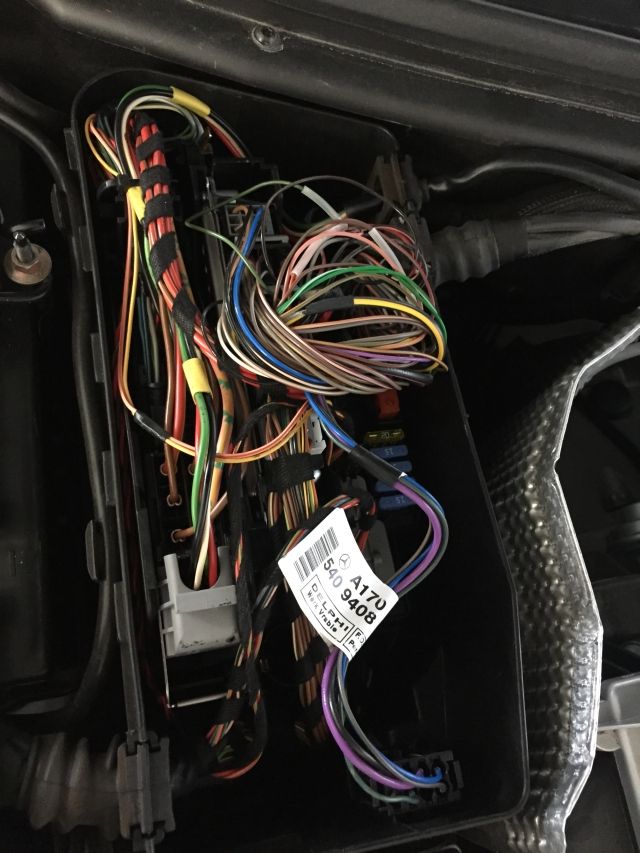
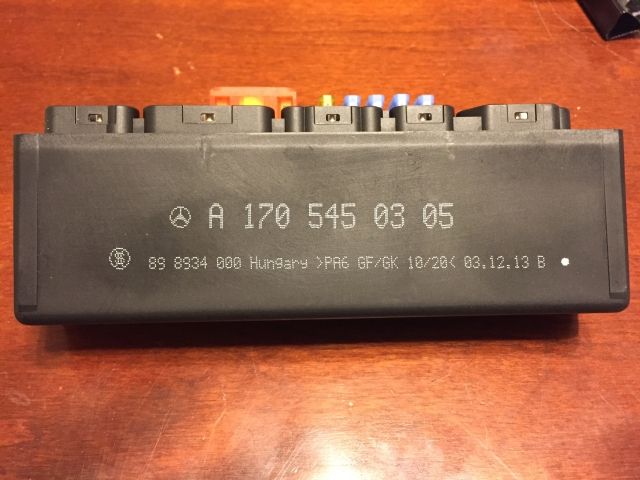
1) Open the Control Module container box.
IMG_7017sm.jpg
2) Push any wires on top of the RCM aside to access the RCM.
IMG_7018sm.jpg
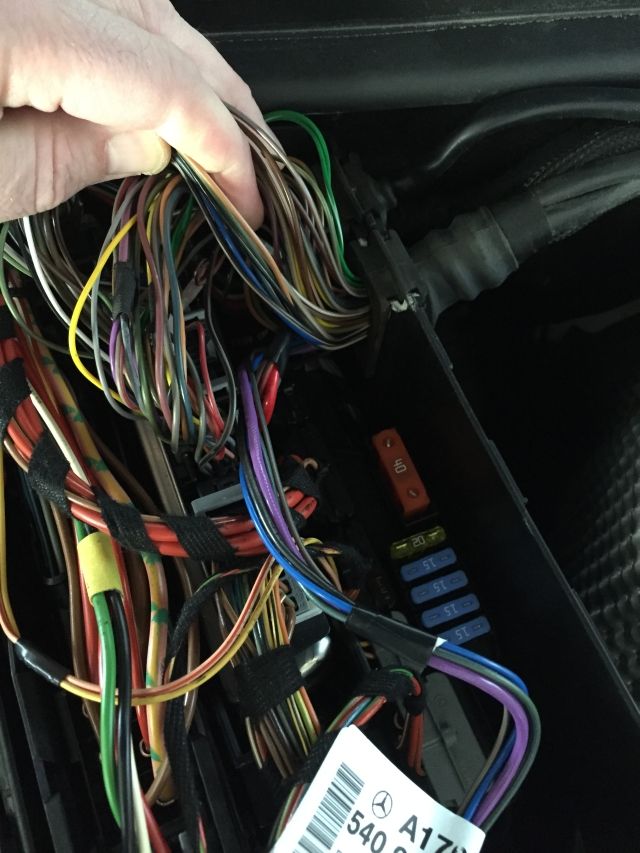
3) Grab the RCM wire loom and gently lift the complete assembly out of its nesting hole, tilting the front side up first.
IMG_7019sm.jpg
IMG_7020sm.jpg
4) Pull the RCM assembly free of the box and other wire harnesses.
IMG_7021sm.jpg
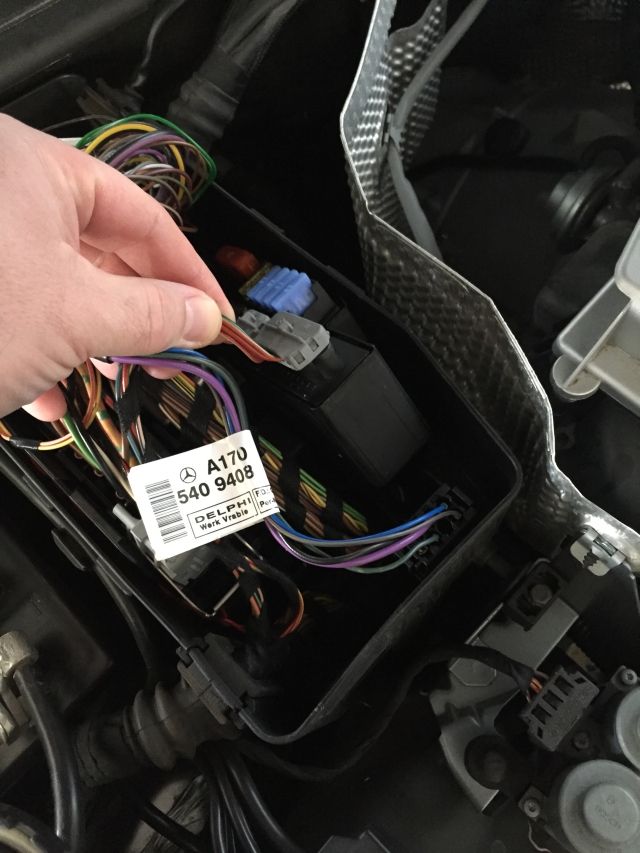
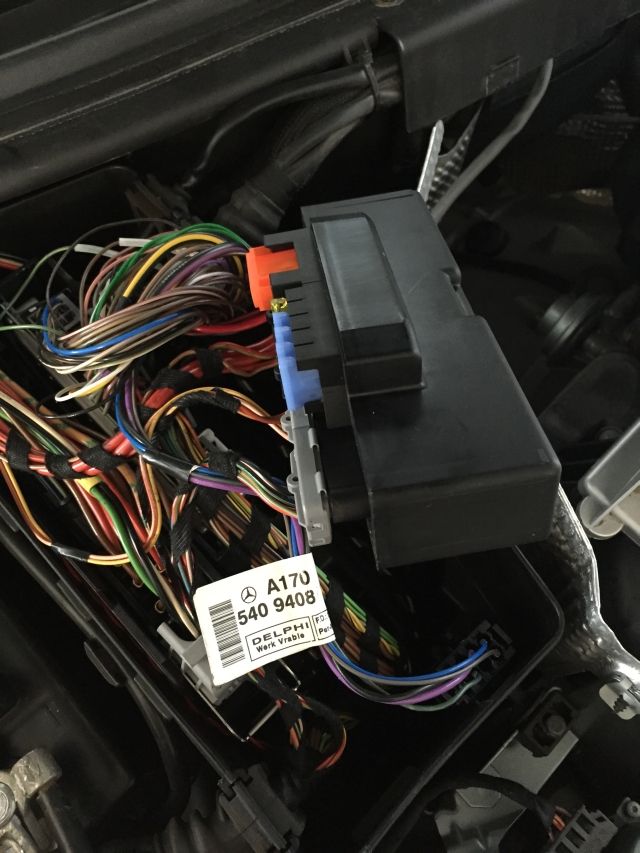
5) Disconnect the wire connectors from the RCM. (all are unique, order of disconnect not important)
IMG_6297sm.jpg
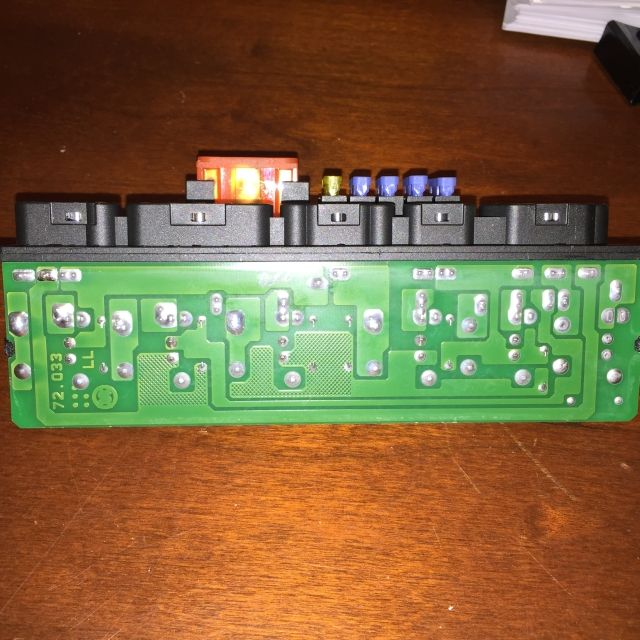
6) Open and repair the RCM
IMG_6304sm.jpg
IMG_6459c.jpg
7) Install in reverse order #5 - #1
Last edited by GregWork; Feb 28, 2015 at 04:33 PM.
Joined: Jan 2015
Posts: 27
Likes: 0
From: Texas
NO, not the "wires" but the wire "connectors" are to be removed.
"pull by the wires" means to pull the assembly up out of the big plastic box by grabbing the whole assembly wires and all to get it free, then disconnect the connectors to free the RCM from the harness.
1) Open the Control Module container box.
2) Push any wires on top of the RCM aside to access the RCM.
3) Grab the RCM wire loom and gently lift the complete assembly out of its nesting hole, tilting the front side up first.

4) Pull the RCM assembly free of the box and other wire harnesses.
5) Disconnect the wire connectors from the RCM. (all are unique, order of disconnect not important)
6) Open and repair the RCM

7) Install in reverse order #5 - #1
"pull by the wires" means to pull the assembly up out of the big plastic box by grabbing the whole assembly wires and all to get it free, then disconnect the connectors to free the RCM from the harness.
1) Open the Control Module container box.
2) Push any wires on top of the RCM aside to access the RCM.
3) Grab the RCM wire loom and gently lift the complete assembly out of its nesting hole, tilting the front side up first.
4) Pull the RCM assembly free of the box and other wire harnesses.
5) Disconnect the wire connectors from the RCM. (all are unique, order of disconnect not important)
6) Open and repair the RCM
7) Install in reverse order #5 - #1
Joined: Dec 2014
Posts: 217
Likes: 4
From: SW Ohio
Use irfanview to resize (free) and photobucket to host if too big for attachment.
IrfanView - Official Homepage - one of the most popular viewers worldwide
Photo and image hosting, free photo galleries, photo editing
IrfanView - Official Homepage - one of the most popular viewers worldwide
Photo and image hosting, free photo galleries, photo editing
Joined: Apr 2006
Posts: 38
Likes: 0
From: Jacksonville Beach, FL
The wire ends are hard to get off, just take your time and pull hard rocking from side to side if possible.
I took mine out and sent it to Tighed1. Got it back yesterday; will install tomorrow. Will post.
I took mine out and sent it to Tighed1. Got it back yesterday; will install tomorrow. Will post.
Joined: Jan 2015
Posts: 27
Likes: 0
From: Texas
Lets see if i can follow instructions. Pics below...hopefully
http:// 20150228_163158_zpswnupkizw.jpg
http:// 20150228_163206_zps9l0jqmkt.jpg
http:// 20150228_163232_zpshf7unzfq.jpg
http:// 20150228_163158_zpswnupkizw.jpg
http:// 20150228_163206_zps9l0jqmkt.jpg
http:// 20150228_163232_zpshf7unzfq.jpg
Joined: Jan 2015
Posts: 27
Likes: 0
From: Texas
Ive never been so happy to hear someone tell me i have a problem !! Thanks!!
Joined: Jan 2015
Posts: 27
Likes: 0
From: Texas
Haha, right. I still dont see it...they look like all the other little solder things to me, but someone is gonna do 'em up today and HOPEFULLY i can get this car to stay on long enough to drive it to a mechanic for the immobile top/spoiler issue!! i just had to fix it so ot could be fixed. Makes sense right? 
Joined: Dec 2014
Posts: 217
Likes: 4
From: SW Ohio
ireland.jpg
https://learn.adafruit.com/adafruit-...ommon-problems

Joined: Apr 2006
Posts: 38
Likes: 0
From: Jacksonville Beach, FL
I got my PCM back from tighed1 Friday and installed it today. It took about 5 minutes. I am still having the same problem. The car started up and shut off in about 1 second. It did this about 3 times. After about 24 hours I will be able to start up and it will again shut off.
Now that I know my PCM is not the problem, my starter is good and I have a new battery, what is the next step in the elimination process to determine the cause of the problem?
If anybody needs their PCM resoldered, tighed1 is the guy. I shipped mine from Florida on Sunday and got
it back on Friday.
tighed1 keep up the good work.
Senior Member
Joined: Dec 2010
Posts: 12,780
Likes: 185
From: Lineville, AL
Replace the CPS ( Crankshaft Position Sensor ) with a Bosch one,
if that doesn't resolve the issue, then next step is to borrow a fuel pressure gauge from Advance or Autozone and ensure you have 50-60 lbs of pressure at startup.
The test point is at the end of the fuel rail at the passenger side front of the engine.
Possible problems : fuel pump, fuel filter.
if that doesn't resolve the issue, then next step is to borrow a fuel pressure gauge from Advance or Autozone and ensure you have 50-60 lbs of pressure at startup.
The test point is at the end of the fuel rail at the passenger side front of the engine.
Possible problems : fuel pump, fuel filter.