When you click on links to various merchants on this site and make a purchase, this can result in this site earning a commission. Affiliate programs and affiliations include, but are not limited to, the eBay Partner Network.
This is how you do it yourself. Only other way is with a flush machine @ the dealer or indie shop, which many have criticized for it's habit of dislodging chunks and clogging lines and valve bodies.. This requires 12-14 quarts of fluid in order to completely flush out the torque converter. Draining/flushing is done through the cooling return line from the tranny @ the radiator connector.
In a nut shell....
In order to perform a correct flush (Actual MB Procedure):
Remove the fill tube cap.
Remove and replace the pan filter
Fill pan with 5 liters of fluid.
Remove banjo bolt on fluid return (Pax side of transmission, route line to bucket)
Start car, count 3 liters of fluid, shut car off.
Add 3 liters of fluid.
Start car, count 3 liters of fluid, shut car off.
Add 3 liters of fluid.
Start car, count 3 liters of fluid, shut car off.
Re-install Banjo bolt.
Check sump level using dipstick tool (Factory tool), add as required with sump at 80C.
Thats a 100% fluid flush and should be accomplished every 30,000 miles on the 5 speed transmissions.
Anything less and you are just wasting fluid or delaying a worn out transmission valve controller.
Hey guys. I noticed 2 or 3 odd shifts the last 2 weeks where the car clunked into gear when I was going either up or down a steep hill. I checked the ATF fluid-level and it is quite low. At full-temperature (80c) it only came up to the position where I placed the tire-valve-cap on the dipstick, at the point where the cap is closest to the 25-degree marks. I parked the car and will do a drain & fill & filter tomorrow. Does anyone know how low my ATF fluid is based on the dipstick position? I'll also install a new pilot bushing as the old one has been slowly leaking for a long time. And oh yeah, the car has 41K miles and I dare say the fluid has NEVER BEEN SERVICED.
Instead of the "standard" ATF drain & fill where about 5 Liters (out of what, 8.5L?) are replaced I decided to take a shot at replacing 100% of the ATF as outlined in the procedure by SYFI in the 1st post of this thread.. I have 15 liters of ATF now, even though 14 should suffice because, why take a chance? And you can buy this German-made & Mercedes-approved ATF on EBAY for less than half what the genuine Mercedes fluid costs. I thought I'd have to soak the ATF-cooler-return-line in penetrating-fluid overnight but nope. You can see my flare-nut wrenches around the union of the return-line and it came apart very easily, no doubt because of my He-Man level of strength, right? Oh Hell, I might as well say the real reason... my superior manliness. There. It feels good to speak the truth at last! I left the drain-bolt off the pan so it can continue to drip until I can get back to it. The liters that came out still looked nice & red and didn't have any kind of odd smell. Here's some pictures to tickle your fancy...
This is how you do it yourself. Only other way is with a flush machine @ the dealer or indie shop, which many have criticized for it's habit of dislodging chunks and clogging lines and valve bodies.. This requires 12-14 quarts of fluid in order to completely flush out the torque converter. Draining/flushing is done through the cooling return line from the tranny @ the radiator connector.
In a nut shell....
In order to perform a correct flush (Actual MB Procedure):
Remove the fill tube cap.
Remove and replace the pan filter
Fill pan with 5 liters of fluid.
Remove banjo bolt on fluid return (Pax side of transmission, route line to bucket)
Start car, count 3 liters of fluid, shut car off.
Add 3 liters of fluid.
Start car, count 3 liters of fluid, shut car off.
Add 3 liters of fluid.
Start car, count 3 liters of fluid, shut car off.
Re-install Banjo bolt.
Check sump level using dipstick tool (Factory tool), add as required with sump at 80C.
Thats a 100% fluid flush and should be accomplished every 30,000 miles on the 5 speed transmissions.
Anything less and you are just wasting fluid or delaying a worn out transmission valve controller.
Originally Posted by WD40
Instead of the "standard" ATF drain & fill where about 5 Liters (out of what, 8.5L?) are replaced I decided to take a shot at replacing 100% of the ATF as outlined in the procedure by SYFI in the 1st post of this thread.. I have 15 liters of ATF now, even though 14 should suffice because, why take a chance? And you can buy this German-made & Mercedes-approved ATF on EBAY for less than half what the genuine Mercedes fluid costs. I thought I'd have to soak the ATF-cooler-return-line in penetrating-fluid overnight but nope. You can see my flare-nut wrenches around the union of the return-line and it came apart very easily, no doubt because of my He-Man level of strength, right? Oh Hell, I might as well say the real reason... my superior manliness. There. It feels good to speak the truth at last! I left the drain-bolt off the pan so it can continue to drip until I can get back to it. The liters that came out still looked nice & red and didn't have any kind of odd smell. Here's some pictures to tickle your fancy...
Very informative, thank you gents. I am at 41,000 miles and I am tempted to do this in the spring. All I need is the gasket, oil, filter and to get off my ****.
Last edited by onehundred80; Jan 8, 2022 at 01:05 PM.
Ditto that! I saved this in my Crossfire Forum Help library as a PDF file. Only have 28,000 or so on the ODO, but it has been nearly 15 years since the car was manufactured. Probably wil use the Shell 134 transmission fluid that's readily available. Maybe a complete transmssion kit like these: CLICK. Don't know if anyone else has used the Blauparts.com website, but some of their pricing is attractive compared to other M-B focused websites.
I'll have several system flush & fills to do in the next couple of years or so.
Last edited by dedwards0323; Jan 10, 2022 at 08:53 AM.
Only have 28,000 or so on the ODO, but it has been nearly 15 years since the car was manufactured. Probably wil use the Shell 134 transmission fluid that's readily available. Maybe a complete transmssion kit like these: CLICK. Don't know if anyone else has used the Blauparts.com website, but some of their pricing is attractive compared to other M-B focused websites.
I had bought 6 liters of 236.10 ATF when my intention was to remove only 5 liters. 236.10 is the original fluid and you are not supposed to mix different versions of Mercedes ATF. So when I changed my plan I still bought more 236.10 as I was committed to it by then. If you are CERTAIN you can get ALL the old stuff out then sure, buy 236.14.
Well call me lazy, but I've only worked on the car on Friday & Sunday night! I'm not in a race and I always do car work in a therapeutic way, meaning I use it to take away my stress, not add to it. So where am I? The pan's off. I polished the bottom of it but only cleaned-up the inside. The brand-NEW pan gasket in my eyes was closer to NOS than new, and it came from a Mercedes dealer! I spent a half-hour rubbing it with microfiber cloths soaked in rubber-cleaner until I stopped getting dark-black residue off it. Then I spent another 15 minutes rubbing it down with AT-205 RESEAL... one of those "miracle chemicals" that's supposed to swell-up & rejuvenate rubber seals.
The only "fights" I've encountered have all been with the pilot bushing that the transmission's electrical connector attaches to. That is the "trouble part" which always ends up leaking, as it did in my case. And although some videos have recommended making it part of any ATF drain & fill it is not part of the normal Mercedes service, even though it has been such a failure that there have been 3 different versions of it!!! The one I removed was the factory original with clear/opaque O-rings. The current version has black O-rings and I've no idea what version #2 looked like. So to remove it there were all sorts of on-line suggestions of what tool to use but none of them worked for me. I used the claw-portion of a claw-hammer to get extra purchase on the rotating-tab of the pilot bushing, and that allowed me to apply enough pressure to move it after 17 years of being stationary. I carefully marked with white-paint the locations of the electrical-connector & the pilot-bushing so I'd know exactly where to put them back in. But... I tried over and over to get the new bushing back in but it just would not seat properly. I'll get back to it tonight with some new ideas:
Those ideas are...
key advice: Use CELL PHONE to see inside hole & ENSURE PINS ALIGN! (Although I might use a hand-mirror)
If all that fails I can always reinsert the old one and slink up to the local Mercedes specialist in defeat. But never once in my time repairing cars have I ever done that! Not a good time to start now either!
Last edited by WD40; Jan 11, 2022 at 01:43 PM.
Reason: spelling
I had bought 6 liters of 236.10 ATF when my intention was to remove only 5 liters. 236.10 is the original fluid and you are not supposed to mix different versions of Mercedes ATF. So when I changed my plan I still bought more 236.10 as I was committed to it by then. If you are CERTAIN you can get ALL the old stuff out then sure, buy 236.14.
Well call me lazy, but I've only worked on the car on Friday & Sunday night! I'm not in a race and I always do car work in a therapeutic way, meaning I use it to take away my stress, not add to it. So where am I? The pan's off. I polished the bottom of it but only cleaned-up the inside. The brand-NEW pan gasket in my eyes was closer to NOS than new, and it came from a Mercedes dealer! I spent a half-hour rubbing it with microfiber cloths soaked in rubber-cleaner until I stopped getting dark-black residue off it. Then I spent another 15 minutes rubbing it down with AT-205 RESEAL... one of those "miracle chemicals" that's supposed to swell-up & rejuvenate rubber seals.
The only "fights" I've encountered have all been with the pilot bushing that the transmission's electrical connector attaches to. That is the "trouble part" which always ends up leaking, as it did in my case. And although some videos have recommended making it part of any ATF drain & fill it is not part of the normal Mercedes service, even though it has been such a failure that there have been 3 different versions of it!!! The one I removed was the factory original with clear/opaque O-rings. The current version has black O-rings and I've no idea what version #2 looked like. So to remove it there were all sorts of on-line suggestions of what tool to use but none of them worked for me. I used the claw-portion of a claw-hammer to get extra purchase on the rotating-tab of the pilot bushing, and that allowed me to apply enough pressure to move it after 17 years of being stationary. I carefully marked with white-paint the locations of the electrical-connector & the pilot-bushing so I'd know exactly where to put them back in. But... I tried over and over to get the new bushing back in but it just would not seat properly. I'll get back to it tonight with some new ideas:
Those ideas are... https://youtu.be/QvwxeCy8xRQ?t=165https://youtu.be/QvwxeCy8xRQ?t=240 (key advice: PUSH HARD to seat new bushing!) https://youtu.be/5Nv3c_TcAmQ?t=302 key advice: LUBRICATE O-rings with ATF! Or perhaps something even more slippery! (BTW I used silicone spray before, but no dice) https://youtu.be/PHbyFrbsaTk?t=210 key advice: Use CELL PHONE to see inside hole & ENSURE PINS ALIGN! (Although I might use a hand-mirror)
If all that fails I can always reinsert the old one and slink up to the local Mercedes specialist in defeat. But never once in my time repairing cars have I ever done that! Not a good time to start now either!
GREAT post! Loved the vids, on my computer I believe the first 2 vids are the same? Glad you did that because it was worth mentioning! The two vids after that first 2, the best was #3 (who knows why?), and the worst one was #4. Glad you ran the gambit of good, to better (or best for who knows why), and worst (if you like a clean quality job, I am not too sure that ANY fluid made it's way to the TCM that was in/through that connector, but maybe it should have been cleaned like the first 2 vids). Again, GREAT POST!
GREAT post! Loved the vids, on my computer I believe the first 2 vids are the same? Glad you did that because it was worth mentioning! The two vids after that first 2, the best was #3 (who knows why?), and the worst one was #4. Glad you ran the gambit of good, to better (or best for who knows why), and worst (if you like a clean quality job, I am not too sure that ANY fluid made it's way to the TCM that was in/through that connector, but maybe it should have been cleaned like the first 2 vids). Again, GREAT POST!
Thanks!!! I had 2 different time-stamps on that 1st vid, but you're right. It's confusing so I removed the 2nd time-stamp.
Thanks!!! I had 2 different time-stamps on that 1st vid, but you're right. It's confusing so I removed the 2nd time-stamp.
Hey you didn't have to do that (mostly because it was so worth watching for the second time). I know I watch quite a few help vids (or read quite a few topics) before delving into something I never did before. Heck, there are even a few tutorials herew in the forum that suggest reading (them) a few times before doing the dirty. I was highly appreciative of you taking the time to post. Keep em coming, not every reply is a critique! Having fun here during our goal of 'screwing' chrysler maintenence shops, is why we are all here (besides our LOVE of our crossfires) right?
This is how you do it yourself. Only other way is with a flush machine @ the dealer or indie shop, which many have criticized for it's habit of dislodging chunks and clogging lines and valve bodies.. This requires 12-14 quarts of fluid in order to completely flush out the torque converter. Draining/flushing is done through the cooling return line from the tranny @ the radiator connector.
In a nut shell....
In order to perform a correct flush (Actual MB Procedure):
Remove the fill tube cap.
Remove and replace the pan filter
Fill pan with 5 liters of fluid.
Remove banjo bolt on fluid return (Pax side of transmission, route line to bucket)
Start car, count 3 liters of fluid, shut car off.
Add 3 liters of fluid.
Start car, count 3 liters of fluid, shut car off.
Add 3 liters of fluid.
Start car, count 3 liters of fluid, shut car off.
Re-install Banjo bolt.
Check sump level using dipstick tool (Factory tool), add as required with sump at 80C.
Thats a 100% fluid flush and should be accomplished every 30,000 miles on the 5 speed transmissions.
Anything less and you are just wasting fluid or delaying a worn out transmission valve controller.
I think your WRITTEN instructions missed the LAST FILL with 3 liters of ATF he does at...
I'm about to go out and do this soon (today) so I'll let you know. I've got a jerry-rigged set of drainage tubing (all salvaged material from a plumbing project!) hooked-up that I had to let sit for 24 hours to allow the super glue to cure that had to be long enough to run to a collection jug within eye-sight of me sitting in the driver's seat. That's the cost of using leftover (I.E. free) materials!
"All wish to possess knowledge, but few are willing to pay the price." --Juvenal (Decimus Junius Juvenalis)
I'm extremely happy with the outcome of this job. Only because the results are SO GOOD it makes the hardships I had to go through seem irrelevant now. Those hardships were ALL because of the quality of the replacement parts I purchased. In the ~40 years that I've been doing my own maintenance I've never purchased such a COMPLETE LOT of shoddy parts. I don't say that lightly, as it almost never occurs. But as the saying goes, "Over a long enough period of time even extremely unlikely events will likely happen." You already know about the AT pan gasket. I'll explain in my following posts (as I have the time to write them) the problems I had with the transmission filter and the pilot bushing. When I'm finished I'll write 'END OF REPORT' or something, to let you know I'm done.
My SRT6 has just over 10,000 miles and developed this leak at the electrical connector. Using Mercedes part number 2035400253 (which is a new updated number) I could not get the new pilot bushing to insert into the socket. The white ring which rotates was in the wrong position to allow insertion when the rear notches were aligned with the fingers in the socket on the transmission. I removed the O rings from the new pilot bushing I purchased from FCP Euro, installed them on the original pilot bushing and inserted that into the socket on the transmission. So far so good, but haven't put any miles on it, just test ran it after topping off the fluid in my shop. Following is an email I sent to FCP Euro:
Concerning Mercedes Transmission connector part number 203540023. This is a pilot bushing for electric connector on the 722.6 transmission on my 2005 SRT6 Chrysler Crossfire = 2004 SLK 32 AMG. The part you sent me in the mail would not insert into the transmission socket. On the back of the pilot bushing there are three cuts which must line up with fingers in the socket; This alignment allows the pilot bushing to fully seat in the socket. When I aligned the bushing to the socket the white ring on the pilot bushing was in the five o'clock position. On the original connector which was leaking that white ring was at the eight o'clock position after it was rotated to release the pilot bushing from the socket (In the locked position it is at one o'clock). I could not get the part you sent me to fully insert into the socket because the white ring at the five o'clock position prevented insertion. I removed the O-rings from the new part you sent me, placed them on the original pilot bushing and inserted that into the transmission socket. That seems to work. Time will tell. The part number 203540023 has replaced 9 previous Mercedes part numbers for a multitude of years/models. It appears something has been lost in the process of adaptation. Hope that makes sense.
Their response was can't be sure of my problem without a Mercedes VIN number to cross check their data.
I realize most people have long ago corrected this problem on their cars, but should it reoccur as the poster above, I hope this info will be helpful.
Additional up date: It has been a year and a half since I made this repair and a few thousand miles and the old connector with the new o-rings remains leak free. It seems to be working fine. The original post can be found here at post 140 click: Transmission leak repair
I need to inspect this electrical connector on my 2007 Coupe, which is just shy of 29k on the ODO. Once weather warms up, I'll crawl under the car & take a look. If leakage is starting to occur, I'll perform the full transmission fluid replacement & replace this connector before traveling to Eureka Springs event in June.
Last edited by dedwards0323; Jan 17, 2022 at 02:29 PM.
Yeah I'm slower to post about this than I was to do the work!!! I transferred all the photos from my phone to my laptop so I'll try to post this weekend. I guess I'll start with the new electrical connector (I.E., pilot bushing) not fitting, since zip439 also posted his experience about that. Anyway, sorry for not getting to this sooner.
OK, so where to begin? First, the car just shifts SOOO smoothly now. I thought I'd stop noticing that feeling of smoothness but if anything it's gotten even smoother as the new fluid (full of new additives) has had more time to work it's magic on the transmission. Remember my situation though. At 41K miles my old fluid didn't come out looking like something had died and turned brown in the tranny! It was still undeniably red, but it had gotten to the point where it was 1.7 liters low. I had probably experienced an unnoticeably slow degradation in performance until, like I said, a couple of "clunk" rough shifts when the tranny was under load caused me to take action.
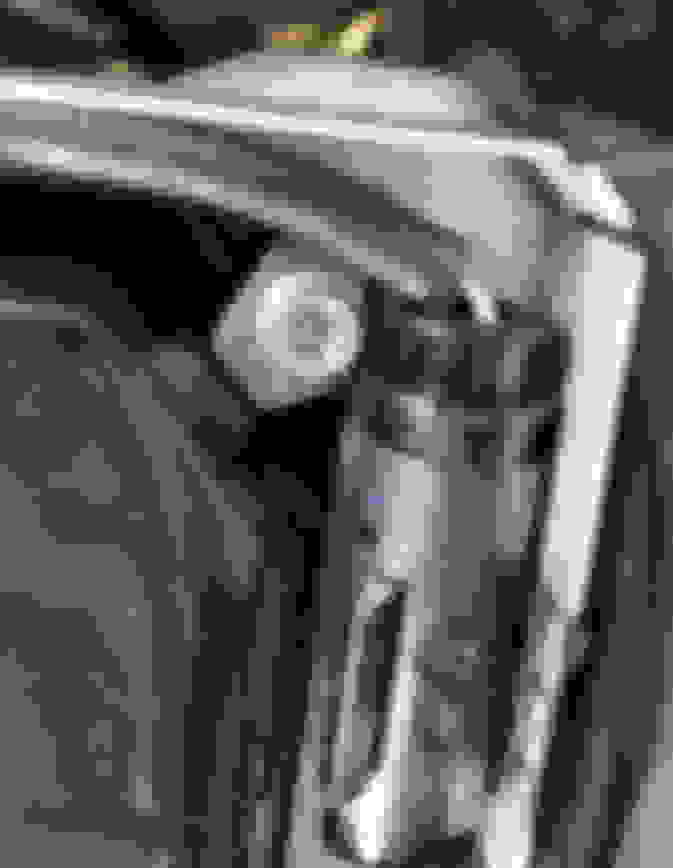
Here's a view of the electrical housing in the conductor plate which the pilot bushing goes into. You'll NEVER GET THIS VIEW with the naked eye. This is only thanks to holding my cell phone up! There are 13 electrical pins and 3 hard to see 'locators' cast into the plastic. Just as zip439 experienced, I also could not get the NEW pilot bushing to fully seat into this housing. No suggestion I found online helped at all.
Notice below that there are 3 rims or ledges where the pilot bushing necks-down to a smaller inside-diameter. In a bid to apply more force inserting this (go to next picture)
I found that a 1" long/extension socket was a perfect fit on to the lowest ledge inside the bushing. I attached several socket extensions to the end until I had a few precious inches, perhaps 3", with which to whack this contraption with a hammer, and finally I did get the bushing to fully seat. However at that point the screw was off by the tiniest amount and did not sufficiently align with the threads for it to screw in. The only thing I can figure is that the 13 holes drilled for the electrical pins plus the 3 holes for the raised plastic locators were not properly cast into the plastic part by just the smallest amount. This caused a tug/pull tension situation where nothing was truly in 100% alignment even though it looked close enough to the naked eye. The NEW pilot-bushing was at this point a 'press-fit' part! It probably was seated with enough tension & tightness that it would have remained in place and done its intended job. But that just did not meet with my personal idea of a job well done. So I took it out.
To test my theory of the new part being of inferior tolerances, I decided to see if the old pilot bushing would go back in place. It did. There was no resistance AT ALL. I inspected the O-rings on the OLD part and they had "flat-topped" (were no longer round, but flat) where they had been in contact with the inside of the housing. At that point I decided to swap the NEW O-rings onto the OLD pilot-bushing. That fit readily into the housing with only a small bit of resistance since the O-rings were thicker. Oh happy day!
That white marking is an alignment-marking I made with a paint-marker before I removed this plug the 1st time. You should do this also on both this part & the pilot bushing so that you'll know the exact orientation to insert them back in.
Here I have backed-up the camera to give you the 'lay of the land'. Notice that these plastic parts and electric wires are very close to a catalytic converter.
And thus here you see I've put the metal heat-shield back in place! 👍
That ends the pilot-bushing segment of tonight's performance. I hope you enjoyed the show. Don't spend hours like I did trying to make a part fit that just doesn't want to. There is more fun ahead kiddies, as remember, this troublesome pilot bushing is not even a part of the normal oil-change procedure!!! So people, let us not say goodbye, but instead, au revoir (until we meet again).
Electrical cable routing & clips. Some shots I took because memories sometimes fail us.
The 8mm bolt with a 13mm head in the photo above (the only non-Torx fastener you'll deal with on this entire job) that goes through the hole in the bracket I'm pointing to below held a nasty surprise. When I backed it out about 15 thin aluminum shards 2-3mm long dropped down. If my eyes had been directly below that would not have been pleasant!!!
No, these are not the nasty looking brown droplets you'll see on most online pictures of an ATF service. This is after 41K miles even after 17 years!
This is the new ATF filter in place.
Notice the "grinding marks" in a couple of places. That's because where the filter touched the inside of the cardboard box it had resided inside it had rusted. It was just surface rust but still, it indicated that the box had become water-logged at some point during storage. Thanks Mercedes! A wire-wheel was harsher than I wished to use even though it would have been effective. I used an abrasive-wheel designed to remove old gasket residue to get rid of the rust. But that explains the grinding-marks on this ATF filter. I told you, I really won the lottery in quality parts on that purchase from an authorized Mercedes-Benz dealership!
I "prettied-up" the electrical-connector heat-shield before reinstalling it. The kind of satisfaction I get from taking the time to do stuff like this is one thing that makes doing my own maintenance pleasurable.
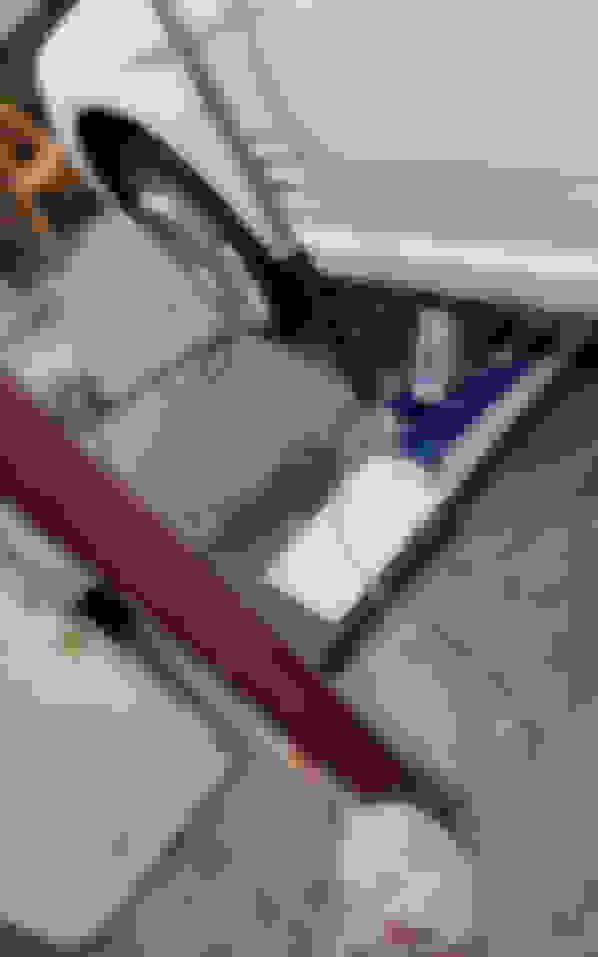
This post is about the tubing you'll need to drain the ATF fluid. I just cobbled together, MacGyver-style, bits & pieces of stuff I had lying around until it was enough to get the job done. So before you criticize my 90-degree bends or whatever design-constraints I was forced into just remember... it worked!!! No, it's not pretty and if I lived in California and could walk out of a Home Depot without paying one red cent I would have done a nicer job. But it is what it is.
Where do you connect the tubing to? In this 1st photo the front of the car is to the left and the tubing is connected to the outlet-pipe of the transmission-cooler.
What size tubing do you need?You need 5/8"ID. I used 1/2"ID as that's what I had. That's why my 1st piece is a short one, so I could keep turning it against the threaded connector and force it to work itself on. Take into account that when you turn on the car's engine the ATF pump will force the fluid out at fairly high pressure, so don't take any chances that your tubing will pop off and make a mess. Make your connections such that you are 100% sure your little engineering masterpiece won't self-destruct!
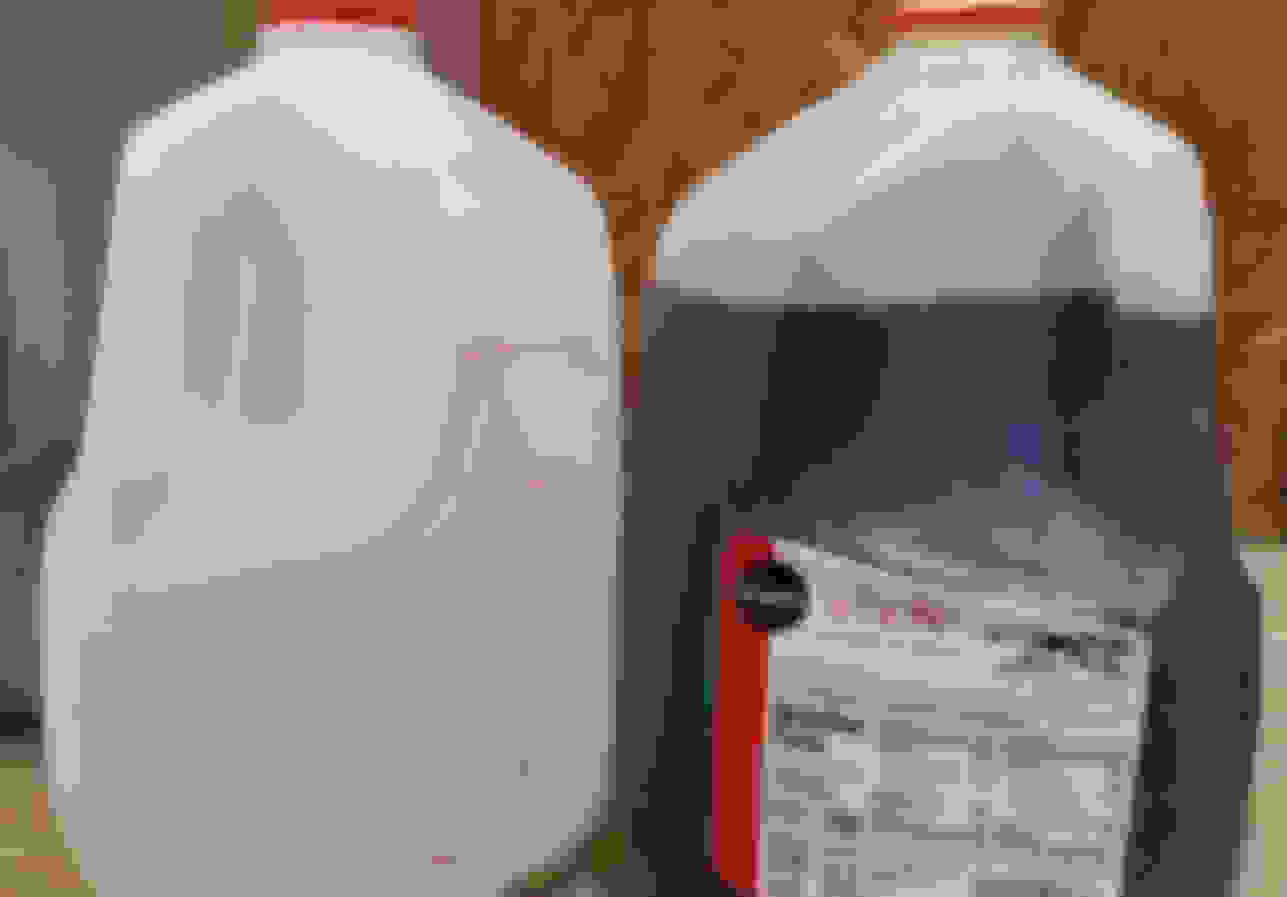
I ran the tubing underneath the car so I could see the milk gallon jug receptacle the fluid was being pumped into. Remember, you're sitting in the driver's seat, so be sure you can manage the entire operation from right there without running all over the place, as 3 liters of fluid only takes about 10 seconds to pump!
I forgot to mention that I used a disposable "turkey pan" receptacle to drain the initial 5 liters of fluid out of the ATF pan.
What else is worth mentioning? The red locking-pin that is inserted into the black "cap" on top of the ATF fill-tube is a huge waste of time. Even though I have 5 spares I did not insert a new one. The black ATF cap has a 0% chance of coming off without your complete pre-meditated intension to remove it. It is just a psychological impediment to plebes like us doing their own maintenance. When you snap the top off of this red plastic "lock" for the very first time you'll next need to use a standard screwdriver blade to force the bit that's left lodged in the black cap downwards until it comes out the bottom. You needn't have any concerns at all that it will drop down inside the fill-tube as that's impossible. Even if you don't catch it it will just fall to the ground.
As I mentioned in a post way above this one, don't forget to put 3 liters of fluid in after your final flush. In my case once the fluid was at full operating temperature the fluid resided right at the fill mark perfectly where it needed to be. You can't tell me that was just happenstance! Yes, I think this drain & fill procedure has a little "designed-in success" that leads me to believe I did the right thing.