Valve cover leak...


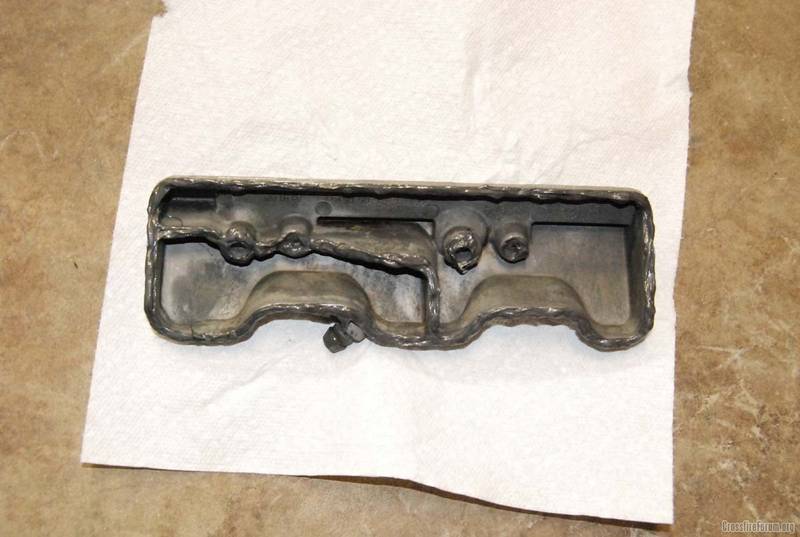
Here are the pics of the covers with the new RTV gasket goo in place.

And here they are all installed and buttoned up.


I will give it about 24 hours to cure good before I fire it up. Sometime next week I'll know if I did it good enough.
NOTE: Permatex RTV gasket says, 'dries in 1 hour, fully cured in 24 hours'.
And here they are all installed and buttoned up.
I will give it about 24 hours to cure good before I fire it up. Sometime next week I'll know if I did it good enough.
NOTE: Permatex RTV gasket says, 'dries in 1 hour, fully cured in 24 hours'.
Administrator
Join Date: Jun 2009
Location: Fort Worth, Texas
Age: 64
Posts: 13,466
Received 887 Likes
on
691 Posts

Administrator
Join Date: Jun 2009
Location: Fort Worth, Texas
Age: 64
Posts: 13,466
Received 887 Likes
on
691 Posts
I've got to get to bed, but here is essentially what I did:
Remove the gas supply line to the fuel rail (driver side towards back of engine), have rags ready to catch the gasoline that will pour out - about 3 ounces or so.
Remove all large bolts, that is, the ones that hold the entire assembly onto the engine (both driver and passenger side), and remove the assemblies from the engine.
Once you get them off, take the small bolts off that hold the little breather covers to the valve covers.
Separate the breather covers from the valve covers - I found that just a small amount of force was needed - I think I cut into the RTV seal, carefully, around the perimeter of the breather covers and they came apart rather easily.
Pick away at the old RTV seal, and get as much off both halves as you can. I then moved to a toothbrush dipped in gasoline to melt away the remaining RTV.
I then cleaned all four pieces with "Purple Power" I got at the auto parts store. I then washed all four parts in warm water - and left things to dry overnight in front of a fan (so the passages in the breathers all dry out).
Next day, I applied RTV to the channels as shown in early posts in this thread. I put the breathers on the vavle covers and tightened the bolts finger tight and waited 1/2 hour. I then tightened the bolts to 7 ft-pounds. I left the complete assemblies to dry overnight (actually all week as I left for a business trip).
THEN, I took the old valve cover gaskets off the car and threw them away. I cleaned the area under the gasket with a shop rag and put on the new gaskets.
(If you have a LOT of miles on the car, now is the time to change plugs! )
)
Finally, I put the completed assemblies on the engine, tightening the large bolts to 10 ft-pounds.
Reconnect the gas line, start car, watch for gas leaks at the coupling you just put back together !!
My car only sees daylight a few days a month. If yours is a daily driver, you can just yank the breathers off and do a quickie fix, leaving the valve covers in place and not bothering with new gaskets - just put new RTV on between the breathers and valve covers. Just be warned that doing this quickly and then driving the car will probalby mean leaks coming back. Also, it is easy to get shreds of old RTV in the engine doing this if you are not REALLY careful.
But reallly, this was my first repair to a car engine other than changing an alternator or plugs - and I had no problem doing it. It's been months and about 750 miles since I did the fix and I have no leak at all.
Remove the gas supply line to the fuel rail (driver side towards back of engine), have rags ready to catch the gasoline that will pour out - about 3 ounces or so.
Remove all large bolts, that is, the ones that hold the entire assembly onto the engine (both driver and passenger side), and remove the assemblies from the engine.
Once you get them off, take the small bolts off that hold the little breather covers to the valve covers.
Separate the breather covers from the valve covers - I found that just a small amount of force was needed - I think I cut into the RTV seal, carefully, around the perimeter of the breather covers and they came apart rather easily.
Pick away at the old RTV seal, and get as much off both halves as you can. I then moved to a toothbrush dipped in gasoline to melt away the remaining RTV.
I then cleaned all four pieces with "Purple Power" I got at the auto parts store. I then washed all four parts in warm water - and left things to dry overnight in front of a fan (so the passages in the breathers all dry out).
Next day, I applied RTV to the channels as shown in early posts in this thread. I put the breathers on the vavle covers and tightened the bolts finger tight and waited 1/2 hour. I then tightened the bolts to 7 ft-pounds. I left the complete assemblies to dry overnight (actually all week as I left for a business trip).
THEN, I took the old valve cover gaskets off the car and threw them away. I cleaned the area under the gasket with a shop rag and put on the new gaskets.
(If you have a LOT of miles on the car, now is the time to change plugs!
Finally, I put the completed assemblies on the engine, tightening the large bolts to 10 ft-pounds.
Reconnect the gas line, start car, watch for gas leaks at the coupling you just put back together !!
My car only sees daylight a few days a month. If yours is a daily driver, you can just yank the breathers off and do a quickie fix, leaving the valve covers in place and not bothering with new gaskets - just put new RTV on between the breathers and valve covers. Just be warned that doing this quickly and then driving the car will probalby mean leaks coming back. Also, it is easy to get shreds of old RTV in the engine doing this if you are not REALLY careful.
But reallly, this was my first repair to a car engine other than changing an alternator or plugs - and I had no problem doing it. It's been months and about 750 miles since I did the fix and I have no leak at all.
I've got to get to bed, but here is essentially what I did:
Remove the gas supply line to the fuel rail (driver side towards back of engine), have rags ready to catch the gasoline that will pour out - about 3 ounces or so.
Remove all large bolts, that is, the ones that hold the entire assembly onto the engine (both driver and passenger side), and remove the assemblies from the engine.
Once you get them off, take the small bolts off that hold the little breather covers to the valve covers.
Separate the breather covers from the valve covers - I found that just a small amount of force was needed - I think I cut into the RTV seal, carefully, around the perimeter of the breather covers and they came apart rather easily.
Pick away at the old RTV seal, and get as much off both halves as you can. I then moved to a toothbrush dipped in gasoline to melt away the remaining RTV.
I then cleaned all four pieces with "Purple Power" I got at the auto parts store. I then washed all four parts in warm water - and left things to dry overnight in front of a fan (so the passages in the breathers all dry out).
Next day, I applied RTV to the channels as shown in early posts in this thread. I put the breathers on the vavle covers and tightened the bolts finger tight and waited 1/2 hour. I then tightened the bolts to 7 ft-pounds. I left the complete assemblies to dry overnight (actually all week as I left for a business trip).
THEN, I took the old valve cover gaskets off the car and threw them away. I cleaned the area under the gasket with a shop rag and put on the new gaskets.
(If you have a LOT of miles on the car, now is the time to change plugs! )
Finally, I put the completed assemblies on the engine, tightening the large bolts to 10 ft-pounds.
Reconnect the gas line, start car, watch for gas leaks at the coupling you just put back together !!
My car only sees daylight a few days a month. If yours is a daily driver, you can just yank the breathers off and do a quickie fix, leaving the valve covers in place and not bothering with new gaskets - just put new RTV on between the breathers and valve covers. Just be warned that doing this quickly and then driving the car will probalby mean leaks coming back. Also, it is easy to get shreds of old RTV in the engine doing this if you are not REALLY careful.
But reallly, this was my first repair to a car engine other than changing an alternator or plugs - and I had no problem doing it. It's been months and about 750 miles since I did the fix and I have no leak at all.
Remove the gas supply line to the fuel rail (driver side towards back of engine), have rags ready to catch the gasoline that will pour out - about 3 ounces or so.
Remove all large bolts, that is, the ones that hold the entire assembly onto the engine (both driver and passenger side), and remove the assemblies from the engine.
Once you get them off, take the small bolts off that hold the little breather covers to the valve covers.
Separate the breather covers from the valve covers - I found that just a small amount of force was needed - I think I cut into the RTV seal, carefully, around the perimeter of the breather covers and they came apart rather easily.
Pick away at the old RTV seal, and get as much off both halves as you can. I then moved to a toothbrush dipped in gasoline to melt away the remaining RTV.
I then cleaned all four pieces with "Purple Power" I got at the auto parts store. I then washed all four parts in warm water - and left things to dry overnight in front of a fan (so the passages in the breathers all dry out).
Next day, I applied RTV to the channels as shown in early posts in this thread. I put the breathers on the vavle covers and tightened the bolts finger tight and waited 1/2 hour. I then tightened the bolts to 7 ft-pounds. I left the complete assemblies to dry overnight (actually all week as I left for a business trip).
THEN, I took the old valve cover gaskets off the car and threw them away. I cleaned the area under the gasket with a shop rag and put on the new gaskets.
(If you have a LOT of miles on the car, now is the time to change plugs!
Finally, I put the completed assemblies on the engine, tightening the large bolts to 10 ft-pounds.
Reconnect the gas line, start car, watch for gas leaks at the coupling you just put back together !!
My car only sees daylight a few days a month. If yours is a daily driver, you can just yank the breathers off and do a quickie fix, leaving the valve covers in place and not bothering with new gaskets - just put new RTV on between the breathers and valve covers. Just be warned that doing this quickly and then driving the car will probalby mean leaks coming back. Also, it is easy to get shreds of old RTV in the engine doing this if you are not REALLY careful.
But reallly, this was my first repair to a car engine other than changing an alternator or plugs - and I had no problem doing it. It's been months and about 750 miles since I did the fix and I have no leak at all.
For me, before I started the cranckcase breather cover repair, I went around the valve covers on both sides & re-torqued the star screws (to the proper value of 10 N-m) that only hold the valve covers on the head. And I found nearly all of them "loose" in that they all turned a little to reach the correct torque spec. And I personally think this is a factor why the valve covers on my 2007 Coupe haven't leaked at this point.
You may want to see if re-torqueing the star screws will stop your leak. I'll bet the screws are no longer tensioned to the proper pre-load of 10 N-m (approx. 7.5 Ft-lb).
Note: In pizzaguy's post above, I disagree with the torque values he stated. My investigation earlier found that the values were 5-6 N-m (4 Ft-lb) on the small aluminum screws and 10 N-m (7.4 Ft-lb) on the larger star screws. Applying 7 Ft-lbs (9.5 N-m) to the small aluminum bolts might result in shearing the head off. These small screws only need to be slightly tighter then finger-tight. pizzaguy says it worked, and his advice is typically "rock solid". But I wouldn't do it on the small aluminum screws.
Good luck with your repair. Later,
Last edited by dedwards0323; 07-07-2016 at 08:48 AM.
The issue is to remove the valve cover, you'll have to remove a few star screws that serve 2 purposes - 1) secure the breather cover to the valve cover; 2) secure the valve cover to the engine. So when these specific star screws are removed, some of the holding force between the crankcase breather cover & the valve cover will be removed. This sealed joint is only an RTV gasket, and could result in a leak later after you replace the valve cover gasket. I don't have any 1st hand experience on this, so others can better provide guidance.
For me, before I started the cranckcase breather cover repair, I went around the valve covers on both sides & re-torqued the star screws (to the proper value of 10 N-m) that only hold the valve covers on the head. And I found nearly all of them "loose" in that they all turned a little to reach the correct torque spec. And I personally think this is a factor why the valve covers on my 2007 Coupe haven't leaked at this point.
You may want to see if re-torqueing the star screws will stop your leak. I'll bet the screws are no longer tensioned to the proper pre-load of 10 N-m (approx. 7.5 Ft-lb).
Note: In pizzaguy's post above, I disagree with the torque values he stated. My investigation earlier found that the values were 5-6 N-m (4 Ft-lb) on the small aluminum screws and 10 N-m (7.4 Ft-lb) on the larger star screws. Applying 7 Ft-lbs (9.5 N-m) to the small aluminum bolts might result in shearing the head off. These small screws only need to be slightly tighter then finger-tight. pizzaguy says it worked, and his advice is typically "rock solid". But I wouldn't do it on the small aluminum screws.
Good luck with your repair. Later,
When I reinstalled the new covers, I creeped up to 7 ft lbs., starting at 5, to 6, and then 7 ft lbs., working center out, top to bottom at each foot pound. I likely recheck them soon, after a few miles.
Another important factor to consider - The M5-.80x16 aluminum screws with the Torx socket head are "throw-away" fasteners. Since these are made of aluminum, their ability to withstand multiple fastenings is a "no go". Mercedes-Benz clearly states these are 1x use only and have to be replaced if ever removed.
There is considerable discussion in this thread on the subject.
There is considerable discussion in this thread on the subject.
Last edited by dedwards0323; 07-07-2016 at 03:55 PM.
Senior Member
Note: In pizzaguy's post above, I disagree with the torque values he stated. My investigation earlier found that the values were 5-6 N-m (4 Ft-lb) on the small aluminum screws and 10 N-m (7.4 Ft-lb) on the larger star screws. Applying 7 Ft-lbs (9.5 N-m) to the small aluminum bolts might result in shearing the head off. These small screws only need to be slightly tighter then finger-tight. pizzaguy says it worked, and his advice is typically "rock solid". But I wouldn't do it on the small aluminum screws.
Good luck with your repair. Later,
It should be stated that the correct torque should not be used on one screw at a time then working around the screw pattern but rather build up to the full torque incrementally on each screw until the final torque value is achieved.
Administrator
Join Date: Jun 2009
Location: Fort Worth, Texas
Age: 64
Posts: 13,466
Received 887 Likes
on
691 Posts
It is possible that Pizza Guys screws are steel, in which case that may be a torque that is usable, too high for aluminum screws though.
It should be stated that the correct torque should not be used on one screw at a time then working around the screw pattern but rather build up to the full torque incrementally on each screw until the final torque value is achieved.
It should be stated that the correct torque should not be used on one screw at a time then working around the screw pattern but rather build up to the full torque incrementally on each screw until the final torque value is achieved.
And for SURE I used a cross-pattern in slowly tightening my bolts - but I do that with everything, lug bolts, valve cover bolts, even when tightening the hardware on a tower-mounted microwave radio.
Administrator
Join Date: Jun 2009
Location: Fort Worth, Texas
Age: 64
Posts: 13,466
Received 887 Likes
on
691 Posts
It is possible that Pizza Guys screws are steel, in which case that may be a torque that is usable, too high for aluminum screws though.
It should be stated that the correct torque should not be used on one screw at a time then working around the screw pattern but rather build up to the full torque incrementally on each screw until the final torque value is achieved.
It should be stated that the correct torque should not be used on one screw at a time then working around the screw pattern but rather build up to the full torque incrementally on each screw until the final torque value is achieved.
Good point & a best practice, too.
Last edited by dedwards0323; 07-08-2016 at 06:09 AM.
Administrator
Join Date: Jun 2009
Location: Fort Worth, Texas
Age: 64
Posts: 13,466
Received 887 Likes
on
691 Posts
Administrator
Join Date: Jun 2009
Location: Fort Worth, Texas
Age: 64
Posts: 13,466
Received 887 Likes
on
691 Posts

Join Date: May 2016
Location: Motorhouse 18
Age: 66
Posts: 9
Likes: 0
Received 0 Likes
on
0 Posts
Hi all,
The Pesky leak that is so common is so simple to fix as directed above. I did my 04 car yesterday, a couple of hours start to end. Suggested method if I may would be remove both breather covers drop them in soak. Clean all the old sealant of the cam covers and all other residue. By now you need a brake from being hunched over the engine.
At this point pull up a chair and a coffee then clean the breather covers..... Completely !! RTV / instant gasket products stick to clean surfaces so clean then go round again and clean till there is nothing to clean.
The next bit is the quick bit place the sealer in the groves in the cover one by one then fit each cover one by one. Have another coffee then a BBQ then out with you friends do things that stop you starting that car event for a moment !!! Some sealers start to cure in 30 mins but the set time may well be 12 to 24 hours so give it 24 hours. Then start up and run for as long as it takes to clear residue off the exhausts. I just did 40 miles and it was bliss not a hint of oil on the exhaust. RHS side four bolts (2 cam cover 2 little retainers) plus a hose drop the coils off the cover out of the way. LHS has a couple more fixings as it also has the oil filler. This side has two hoses the bigger one may be simpler to remove at the air flow meter end.
It's so nice to not have the oil burning smell..... I'm going to the South of France from UK in a few weeks in the Crossfire the tour will see me clock a couple of thousand miles.
D
Administrator
Join Date: Jun 2009
Location: Fort Worth, Texas
Age: 64
Posts: 13,466
Received 887 Likes
on
691 Posts
I did the "long version" of the fix and so far, (maybe only 1500 miles - and just over 5 months) I am still leak free - but given how rarely my car is driven, I won't consider it "FIXED" for at least another year. I just keep saying, "so far, so good..."
Senior Member
It will be interesting to see if your leak comes back. I know of two guys who breezed thru it like you did, who ended up with a leak in a few months.
I did the "long version" of the fix and so far, (maybe only 1500 miles - and just over 5 months) I am still leak free - but given how rarely my car is driven, I won't consider it "FIXED" for at least another year. I just keep saying, "so far, so good..."
I did the "long version" of the fix and so far, (maybe only 1500 miles - and just over 5 months) I am still leak free - but given how rarely my car is driven, I won't consider it "FIXED" for at least another year. I just keep saying, "so far, so good..."
Separate the parts, clean the joint area, apply the correct sealant and secure back in place. What am I missing?
Not just any old RTV can be used, people may err there and come to regret it in a few miles. It should be applied in a smooth stream, not all jerky and of varying depths. The instructions on the sealant should be followed, not neccessarily doing what is mentioned here.
Thankfully mine show no signs of leakage and I am truly glad about that.