
DIY: Window Tint Install

Thread Starter
|
Senior Member
Joined: Mar 2008
Posts: 4,535
Likes: 3
From: Houston in my blood, and under my tires...

Ok guys and gals, I decided that I wanted to install some tint on my SRT, so I looked at a couple different places doing it, but couldn't find a place that I felt I could trust in my area, so I decided to do the install myself. I got everything together I would need to do the install and will try to do a half decent write up of the process and things needed.
So first off lets start with the supplies you will need:

Two empty spray bottles, and some distilled/purified water
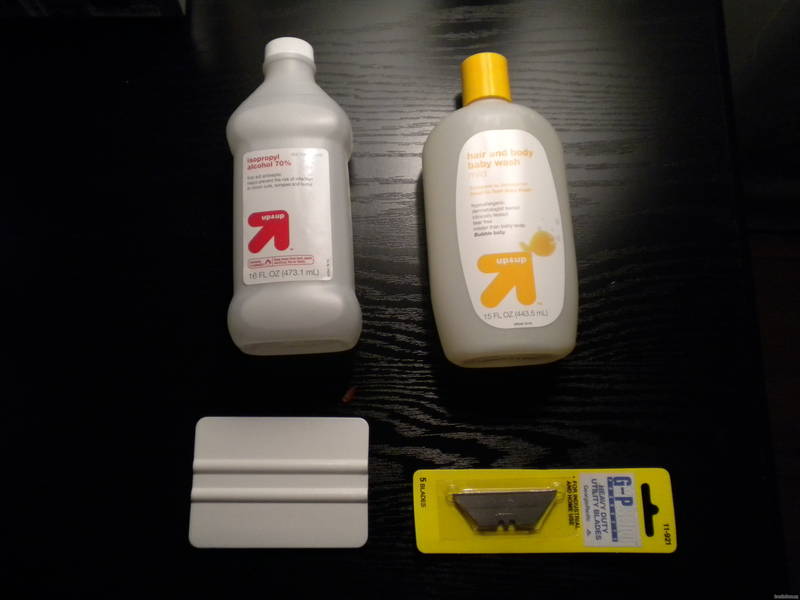
Isopropyl (rubbing) alcohol, Baby Shampoo, Razor Blades, and a tint squeegee.
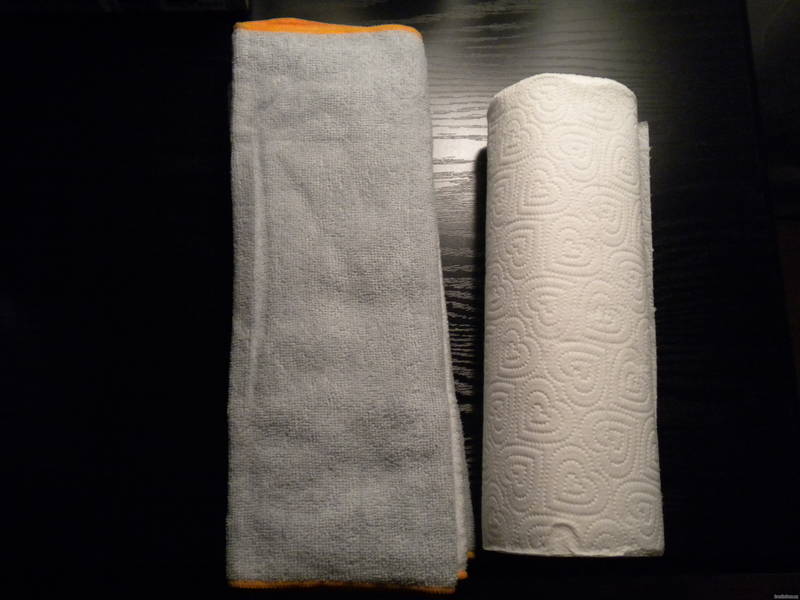
Microfiber towels, and paper towels.
Don't forget you will also need tint. I was recommended a place online to buy window tint: www.rvinyl.com. I was lucky and it turned out they had pre-cut window tint for the Crossfire Coupe.
link to pre-cut: Chrysler Crossfire 2004 - 2008 Convertible Window Tint Kits - Precut
They also have some toold you can choose to buy or buy elsewhere, I would suggest at least getting the tint squeegee, everything else I felt was optional.
So first off lets start with the supplies you will need:
Two empty spray bottles, and some distilled/purified water
Isopropyl (rubbing) alcohol, Baby Shampoo, Razor Blades, and a tint squeegee.
Microfiber towels, and paper towels.
Don't forget you will also need tint. I was recommended a place online to buy window tint: www.rvinyl.com. I was lucky and it turned out they had pre-cut window tint for the Crossfire Coupe.
link to pre-cut: Chrysler Crossfire 2004 - 2008 Convertible Window Tint Kits - Precut
They also have some toold you can choose to buy or buy elsewhere, I would suggest at least getting the tint squeegee, everything else I felt was optional.
Thread Starter
|
Senior Member
Joined: Mar 2008
Posts: 4,535
Likes: 3
From: Houston in my blood, and under my tires...
I chose to go with 35% tint, which for most is standard. However, rvinyl.com does have 50%, 20%, and 5% also. One thing I liked was that I could actually choose what shade I wanted for each windows, front, back, and rear.
Preparation:
Before I go out to do the install I need to prep some things to help prep the windows which will hopefully make the install easier. At least everyone I have talked to says it will.
First thing that is needed is to clean the windows. For this you will need to prep a water/alcohol solution to help strip any grime off the window. Use a 2-to-1 Water to Alcohol mixture.
Also, during installation you will need a soapy water mixture. It is recommended to use a baby shampoo as it is mild and you are using this mixture to keep the tint from prematurely sticking not as a cleaning substance. So the mild baby shampoo works great. You shouldn't need much shampoo, maybe a couple ounces at most for a 32oz spray bottle.
It is 12:30a on Sunday so I will be doing the install tomorrow morning and will try to take as many pictures as possible during the install. If you look on rvinyl.com there are multiple install videos that can also help, and if you choose you can also purchase an installation DVD from them.
Hopefully for those who haven't already installed tint but want to, this will help almost as much as maxicichon's HID install write up
NOTE: I have no connection with rvinyl.com and will give you my honest opinion about their product right after installation and a few weeks later to see how its holding up and so on...
Last edited by ZAHANMA; Sep 20, 2009 at 12:40 AM.

Uhm. Sorry.. this is a dumb idea.
By the time you buy everything you need you're close to getting your windows tinted professionally with higher grade film then what you buy off of eBay.
I was with you, I thought I could do it. It looks easy. No matter how many videos you see, it all looks the same. Looks to be a 10 minute job.
You'll spend hours trying to perfect it and you'll still have bubbles. Window tinting is something you learn by experience, and you have to have done a lot of them for it to come out good.
I went through about 3 kits, my 3rd one was the best but it still wasn't perfect. I spent about $100 on the kits/materials, and I paid $150 to get them done professionally with 3M film and they look perfect.
Forum Regular
Joined: Sep 2008
Posts: 792
Likes: 2
From: elmira, ny
After having your rear defroster getting all cut up from the tint shop it wont be such a dumb idea. That happened to my first crossfire they had to take tint off because i wanted it darker and they ended up cutting right through the defrosters. They also wouldn't pay for a new window.
Thread Starter
|
Senior Member
Joined: Mar 2008
Posts: 4,535
Likes: 3
From: Houston in my blood, and under my tires...
Originally Posted by nox1s
Uhm. Sorry.. this is a dumb idea.
By the time you buy everything you need you're close to getting your windows tinted professionally with higher grade film then what you buy off of eBay.
I was with you, I thought I could do it. It looks easy. No matter how many videos you see, it all looks the same. Looks to be a 10 minute job.
You'll spend hours trying to perfect it and you'll still have bubbles. Window tinting is something you learn by experience, and you have to have done a lot of them for it to come out good.
One reason I didn't want to go to anywhere near me, is because they all said it could only be done by scrapping over the defrosting lines...which I won't do. This is why I don't trust any places near me...
I will be the first to admit that tinting and vinyl work definitely takes some experience. The only way anyone can ever get experience is by doing. I've done some previous body vinyl work and now am going to try my hand at window tinting.
I am hoping that this write-up will not only help others to learn to tint, but also help others who do this to keep from making my mistakes. I know there is a good chances of a whoopsies, that is why I paid the extra $8.99 for the insurance. If a panel, or all of them gets messed up...They will replace it as long as I have pictures of it messed up...Fair enough.
Its now 9a and I'm planning on getting going at about 10a and am hoping that by 2p I will be done. I will try to have the write-up done tonight with pictures.
Senior Member
Joined: Sep 2007
Posts: 8,015
Likes: 14
From: MOFN, AL, 70 miles from George

Originally Posted by ZAHANMA
I never said this was for the faint of heart, or that it would be a 10minute job. I've learned over the years that expecting 10minute jobs never leads to anything productive.
One reason I didn't want to go to anywhere near me, is because they all said it could only be done by scrapping over the defrosting lines...which I won't do. This is why I don't trust any places near me...
I will be the first to admit that tinting and vinyl work definitely takes some experience. The only way anyone can ever get experience is by doing. I've done some previous body vinyl work and now am going to try my hand at window tinting.
I am hoping that this write-up will not only help others to learn to tint, but also help others who do this to keep from making my mistakes. I know there is a good chances of a whoopsies, that is why I paid the extra $8.99 for the insurance. If a panel, or all of them gets messed up...They will replace it as long as I have pictures of it messed up...Fair enough.
Its now 9a and I'm planning on getting going at about 10a and am hoping that by 2p I will be done. I will try to have the write-up done tonight with pictures.
Senior Member
Joined: Aug 2008
Posts: 5,741
Likes: 98
From: Sierra Vista, Arizona
Originally Posted by nox1s
Uhm. Sorry.. this is a dumb idea.
I did my windows on both of my XFs. Looks great.
I have to admit though, everytime I set off to tint windows I'm all into it so I can save a few $$$.
But once I'm actually in the process of tinting I wish I had just paid the pros to do it. I hate tinting but the prices the shops charge make it worth it to DIY.
Thread Starter
|
Senior Member
Joined: Mar 2008
Posts: 4,535
Likes: 3
From: Houston in my blood, and under my tires...
Originally Posted by tighed1
I have to admit though, everytime I set off to tint windows I'm all into it so I can save a few $$$.
But once I'm actually in the process of tinting I wish I had just paid the pros to do it. I hate tinting but the prices the shops charge make it worth it to DIY.
But once I'm actually in the process of tinting I wish I had just paid the pros to do it. I hate tinting but the prices the shops charge make it worth it to DIY.
EDIT: I DID NOT start at 10a like I wanted to. I started after 11a and finished right at 12:30. I have no doubt it took me longer than professional could have done it, but I am fairly pleased with the results though do admit there is room for improvement.
Thread Starter
|
Senior Member
Joined: Mar 2008
Posts: 4,535
Likes: 3
From: Houston in my blood, and under my tires...
So here we go:
1: So the first step in the process to install the window tint was to thoroughly clean the inside of the window as to remove all dirt, dust, and debris. I first used my soap/water mixture and sprayed it over the window liberally. Then I used my hard card wrapped with a paper towel to remove thhe preliminary dirt and dust.

2: After cleaning with the soap/water solution, I then moved on to the alcohol/water solution to strip any remaining dirt and dust from the window. This is why I needed two different spray bottles for this install. Spray on the alcohol/water mixture then take a razor blade (SINGLE EDGED RAZOR BLADE RECOMMENDED) on an angle and clean off the window of your mixture. Make sure you scrap the window with the razor blade at about a 45-60 degree angle. It removes the risk of scratching the window if you were to use it perpendicular to the window. USE VERY LIGHT PRESSURE IF USING A DOUBLE SIDED RAZOR BLADE

3: After completing this step use a microfiber or other lint-free cloth to finish drying off any remaining water.

Now the window is clean and ready to install the tint.
1: So the first step in the process to install the window tint was to thoroughly clean the inside of the window as to remove all dirt, dust, and debris. I first used my soap/water mixture and sprayed it over the window liberally. Then I used my hard card wrapped with a paper towel to remove thhe preliminary dirt and dust.
2: After cleaning with the soap/water solution, I then moved on to the alcohol/water solution to strip any remaining dirt and dust from the window. This is why I needed two different spray bottles for this install. Spray on the alcohol/water mixture then take a razor blade (SINGLE EDGED RAZOR BLADE RECOMMENDED) on an angle and clean off the window of your mixture. Make sure you scrap the window with the razor blade at about a 45-60 degree angle. It removes the risk of scratching the window if you were to use it perpendicular to the window. USE VERY LIGHT PRESSURE IF USING A DOUBLE SIDED RAZOR BLADE
3: After completing this step use a microfiber or other lint-free cloth to finish drying off any remaining water.
Now the window is clean and ready to install the tint.
Last edited by ZAHANMA; Sep 20, 2009 at 03:26 PM.
Thread Starter
|
Senior Member
Joined: Mar 2008
Posts: 4,535
Likes: 3
From: Houston in my blood, and under my tires...
After the window is clean it is time to begin the install of the window tint. Keep your soap/water solution close by as it will be very handy to help make install easier.
I started by spraying the outside of the window with the soap/water solution. I do this to use place the tint with cover fil on the outside of the window as I get ready to install. This allows you to place the tint against the window and peel back the protective film.
As you peel back the protective film, liberally spray the soap/water solution on the tint to keep off any dust as you get ready for installation.
Now that you have the protective film off the tint, and the sticky side of the tint very soapy. Carefully pick up the tint and begin to place it on the inside of the window.
Since the tint is soapy it will allow you to move the tint into place fairly easily. Position the tint so that it is rorughly in place.
You will want the final result to have the tint close to the edge of the window but not over it. If it is placed over the edge of the window it has a tendency to peel.
Thread Starter
|
Senior Member
Joined: Mar 2008
Posts: 4,535
Likes: 3
From: Houston in my blood, and under my tires...
Now comes the harder part of the install...removing all the air bubbles and getting the soapy solution out from under the tint.
Something of note is when making your soapy solution you should note that the more baby shampoo you put into your mixture the longer time you will have to maneuver the tint, but it also take a lot more time to get all the solutiono out from behind the tint. I personally believe that I used too much soap in my solution as it took a while and a lot of work to get the solution out from underneath the tint.
5: Now that your tint is in place, take your hard card and wrap it in a paper towel. This will help to soak up a lot of the solution that comes out at first. It is a good way to start the squeegee process. After one pass around with the paper towel wrapped hard card remove the paper towel and continue with the hard card by itself.

Start in the center of the window and create that as an anchor point for the window. You will need to hold a corner of the tint as at this point it is still fairly slippery and has a tendency to move. You still have time to re-position the tint.
Air bubbles and bubles with solution under them are not uncommon and this is what the hard card is for.
Work your way from the inside out, beginning with a side to side motion in the middle then middle to top and middle to bottom.
One thing you must be careful with is getting the tint underneath the rubber seal of the door jam. Use your hard card and slide it inside the seal and slowly move along the window to get all the tint under the seal.
Once you get the tint under the rubber seal, it takes a good bit more time and attention to detail to get all the bubbles out. just work around the window always using the center as a starting point and working to the outside of the window.
Once you think you have gotten most of the bubbles out of the tint, use a littel soap solution and a clean microfiber and clean off the outside of the window to help see where imperfections may still be, you can do this same process for the inside of the window.
As said before it takes some time to get all the bubbles and soap solution out from under the tint, but set some time aside and pay attention to detail and you can have a successful install.
Something of note is when making your soapy solution you should note that the more baby shampoo you put into your mixture the longer time you will have to maneuver the tint, but it also take a lot more time to get all the solutiono out from behind the tint. I personally believe that I used too much soap in my solution as it took a while and a lot of work to get the solution out from underneath the tint.
5: Now that your tint is in place, take your hard card and wrap it in a paper towel. This will help to soak up a lot of the solution that comes out at first. It is a good way to start the squeegee process. After one pass around with the paper towel wrapped hard card remove the paper towel and continue with the hard card by itself.
Start in the center of the window and create that as an anchor point for the window. You will need to hold a corner of the tint as at this point it is still fairly slippery and has a tendency to move. You still have time to re-position the tint.
Air bubbles and bubles with solution under them are not uncommon and this is what the hard card is for.
Work your way from the inside out, beginning with a side to side motion in the middle then middle to top and middle to bottom.
One thing you must be careful with is getting the tint underneath the rubber seal of the door jam. Use your hard card and slide it inside the seal and slowly move along the window to get all the tint under the seal.
Once you get the tint under the rubber seal, it takes a good bit more time and attention to detail to get all the bubbles out. just work around the window always using the center as a starting point and working to the outside of the window.
Once you think you have gotten most of the bubbles out of the tint, use a littel soap solution and a clean microfiber and clean off the outside of the window to help see where imperfections may still be, you can do this same process for the inside of the window.
As said before it takes some time to get all the bubbles and soap solution out from under the tint, but set some time aside and pay attention to detail and you can have a successful install.
Senior Member
Joined: Feb 2008
Posts: 4,508
Likes: 34
From: VA
NO no no. Unha NO I gotta say woah on this one. THe photo of the razor blade is WRONG. NEVER use this type of blade, it is hardened carbon steel and can scratch the glass.
Use a single edge razor blade to prevent the damage to the glass. You just cant fix a scratch and 45 degree or not that is not the right blade to put to you car.
I do tinting and it is hard to make it clean, cause when you do it youll see that piece of lint stuck for ever. If they goof it up you have a warranty, just my two cents.........
Woody
Thread Starter
|
Senior Member
Joined: Mar 2008
Posts: 4,535
Likes: 3
From: Houston in my blood, and under my tires...
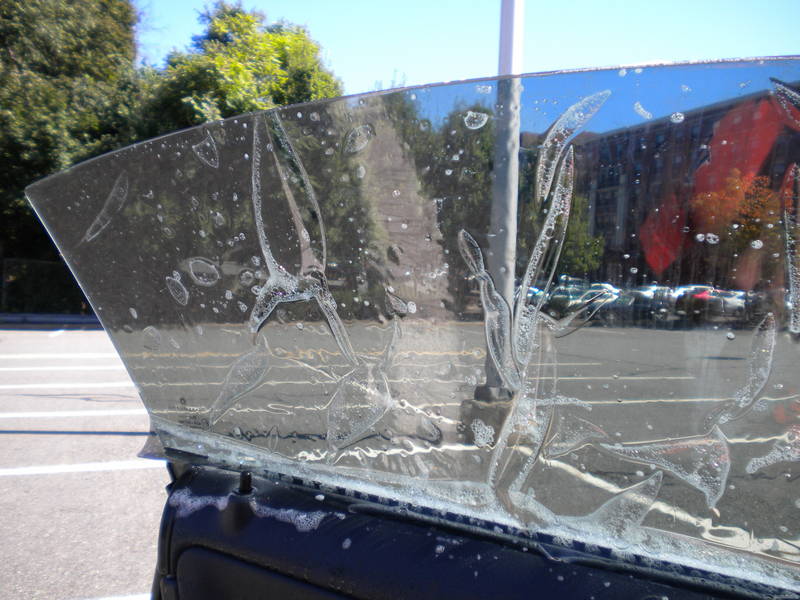
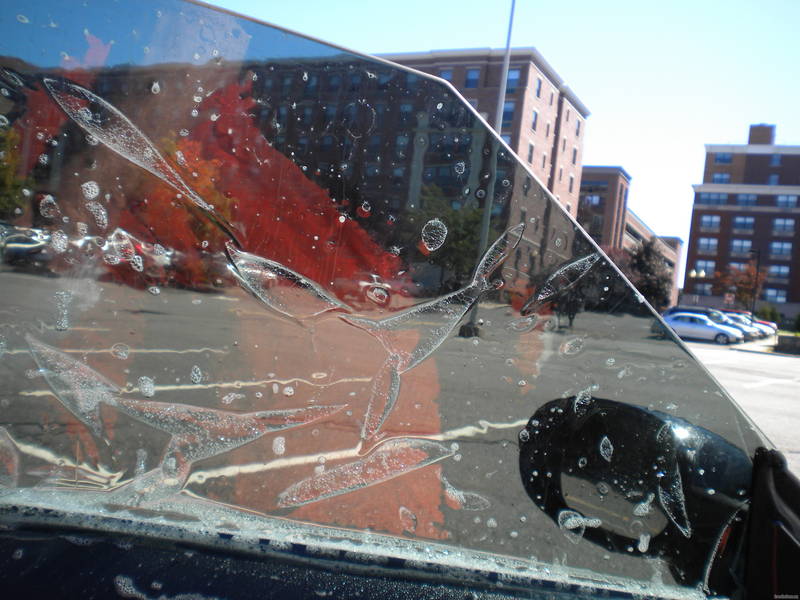
Here are a few pictures after I was done with the install on the front windows.
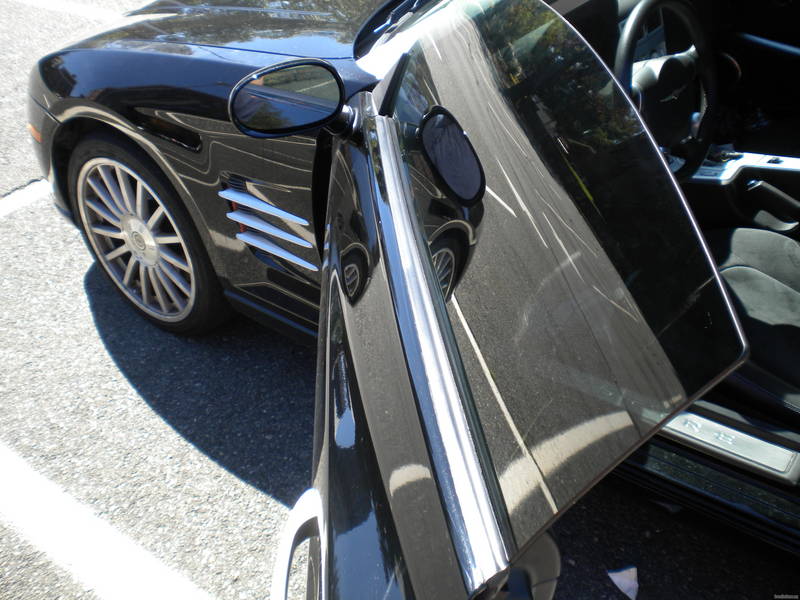
Passenger side front window complete.

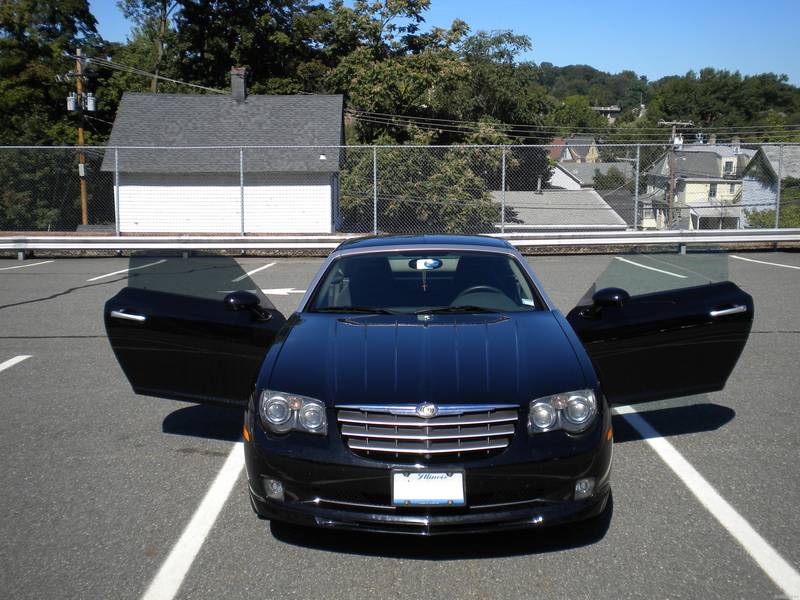
Both front windows complete.
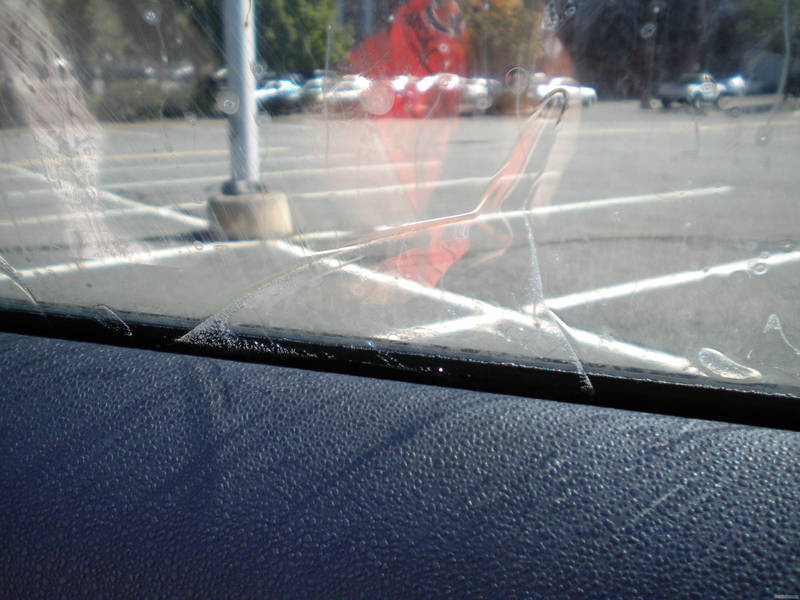
Finished drivers side front window (no those are not creases, they are reflection of the parking lot...see the arrows)
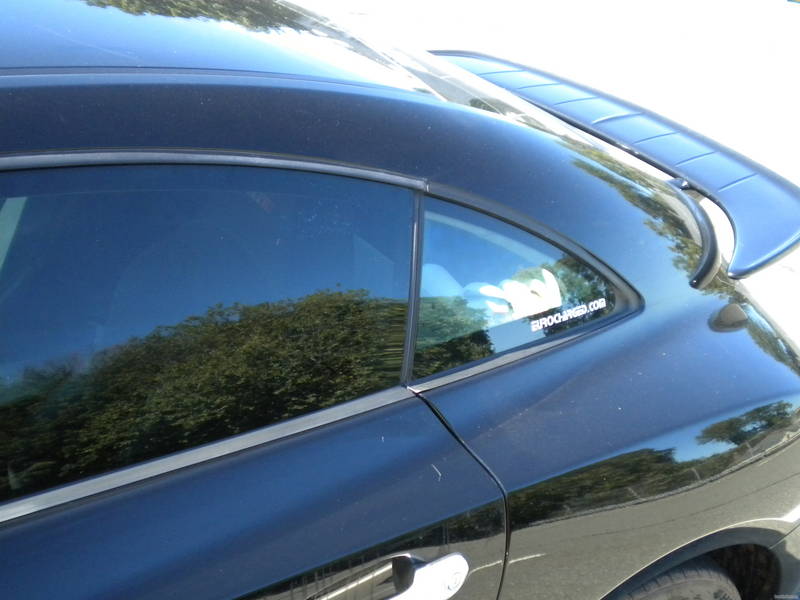
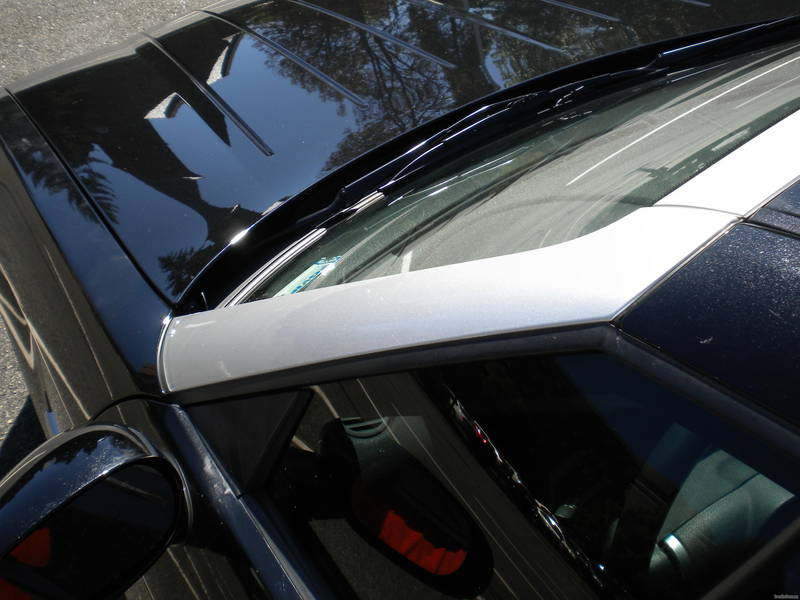
A couple of comparison shots from the tinted front window to the back window and the windshield.
As another point of note: if you choose to do this install, I would recommend doing it in a garage or somewhere that is unaffected by wind. During my passenger side front window install, there was some wind gusts that gave me a hassle as I was getting ready...once I had it on the inside of the window it wasn't much of an issue.
Passenger side front window complete.
Both front windows complete.
Finished drivers side front window (no those are not creases, they are reflection of the parking lot...see the arrows)
A couple of comparison shots from the tinted front window to the back window and the windshield.
As another point of note: if you choose to do this install, I would recommend doing it in a garage or somewhere that is unaffected by wind. During my passenger side front window install, there was some wind gusts that gave me a hassle as I was getting ready...once I had it on the inside of the window it wasn't much of an issue.
Thread Starter
|
Senior Member
Joined: Mar 2008
Posts: 4,535
Likes: 3
From: Houston in my blood, and under my tires...
I am planning on doing the other installs later today...hopefully.
Woody, you are absolutely right, a single sided blade is the way to go... However, I went to a half a dozen places and could only find double sided razor blades. Using it on an angle REDUCES the risk of scratching, but it definitely DOES NOT ELIMINATE IT. I used very little pressure and finished off with a microfiber towel.
Man, if I knew you did tinting I would have expected to see a write-up.") I always look forward to reading your write-ups.
I always look forward to reading your write-ups.
EDIT: OP edited to reflect the recommended use of a single edged razor instead of the more common double edged.
Originally Posted by waldig
NO no no. Unha NO I gotta say woah on this one. THe photo of the razor blade is WRONG. NEVER use this type of blade, it is hardened carbon steel and can scratch the glass.
Use a single edge razor blade to prevent the damage to the glass. You just cant fix a scratch and 45 degree or not that is not the right blade to put to you car.
I do tinting and it is hard to make it clean, cause when you do it youll see that piece of lint stuck for ever. If they goof it up you have a warranty, just my two cents.........
Woody
Use a single edge razor blade to prevent the damage to the glass. You just cant fix a scratch and 45 degree or not that is not the right blade to put to you car.
I do tinting and it is hard to make it clean, cause when you do it youll see that piece of lint stuck for ever. If they goof it up you have a warranty, just my two cents.........
Woody
Man, if I knew you did tinting I would have expected to see a write-up.
I always look forward to reading your write-ups.EDIT: OP edited to reflect the recommended use of a single edged razor instead of the more common double edged.
Last edited by ZAHANMA; Sep 20, 2009 at 03:36 PM.
Thread Starter
|
Senior Member
Joined: Mar 2008
Posts: 4,535
Likes: 3
From: Houston in my blood, and under my tires...
Originally Posted by GDrag
So how long did it take you Zahanma?
Senior Member
Joined: Jan 2009
Posts: 6,285
Likes: 5
From: Carmel, In.
Originally Posted by ZAHANMA
About an 1hr15min to 1hr30min to do the install, plus about 5min to mix up the different solutions. That was for just the two front windows though. I will be putting on the back side windows tonight and maybe the rear hatch windows as well depending on time. The rear hatch will be an adventure with the defroster lines in it... So we will see how that goes.
Just my lowly opinion, take the info for what its worth....
Thread Starter
|
Senior Member
Joined: Mar 2008
Posts: 4,535
Likes: 3
From: Houston in my blood, and under my tires...
Originally Posted by BoilerUpXFire
Matt, you have done a great job, but maybe I can offer a few suggestions to other members (as well as one for your defroster issues). I worked in a tint shop for a few years and have seen damn near anything pertaining to tinting windows (flat glass, commercial, and automotive). I will be very surprised if you do not have some slight (to moderate) imperfections in the tint from dirt, dust, etc getting between the tint and the glass because of the outside install. When we did auto tint, we did it in damn near a clean room b/c of this issue. Also, I am surprised you got such good results without using any heat - I do not think you will be that forunate on the defroster panel. On my rear glass, the only thing that made it lay down correctly was the right amount of heat - both direct and from the other side of the glass being heated to the right temperature....
Just my lowly opinion, take the info for what its worth....
Just my lowly opinion, take the info for what its worth....
I was lucky that there aren't any dirt particles that I can see in the windows, but then again it may just be too small to see. I definitely agree as I stated in my OP, doing this in a garage will make things much easier. I just didn't currently have that luxury and until today did not know i was going to have that luxury. Luckily I found a new apartment with my won garage.
Through all of this please know that I admit zero expertise in the field of tinting, but enjoy learning everything I can, even if it is by trial and error. I am open to hearing all questions, comments, and criticisms as well as any suggestions that anyone may have. I did this to help those moving forward who wanted to do their own tint.
Senior Member
Joined: Jan 2009
Posts: 6,285
Likes: 5
From: Carmel, In.
Originally Posted by ZAHANMA
Your opinion is not lowly at all. While I think the results were decent, some heat could definitely be used in the front windows just to tighten everything up. I won't be opening my windows for most of the week to let it get as much sun as possible. However, I am debating waiting until this weekend when I move into my new place and will have my own garage. I knew going in that doing it outside with the elements working against me would not be the ideal situation. I am probably going to go buy a low heat hair dryer tonight with a flat attachment and probably take a bit of heat to the front windows tonight and see if the few minor imprefections improve.
I was lucky that there aren't any dirt particles that I can see in the windows, but then again it may just be too small to see. I definitely agree as I stated in my OP, doing this in a garage will make things much easier. I just didn't currently have that luxury and until today did not know i was going to have that luxury. Luckily I found a new apartment with my won garage.
Through all of this please know that I admit zero expertise in the field of tinting, but enjoy learning everything I can, even if it is by trial and error. I am open to hearing all questions, comments, and criticisms as well as any suggestions that anyone may have. I did this to help those moving forward who wanted to do their own tint.
I would suggest not trying the heat at this point as more of the glue has adhered to the glass and you could mess the film up pretty badly. Heat should only be applied when still the film is still wet and moveable. The only thing I could suggest is if you have some small bubbles that will not go away (after several weeks of the car getting warm out in the sun) I would make a TINY hole in the bubble (with a pin) and apply some heat. Usually this method works well for an after the fact fix, should lay right down....
Thread Starter
|
Senior Member
Joined: Mar 2008
Posts: 4,535
Likes: 3
From: Houston in my blood, and under my tires...
Originally Posted by BoilerUpXFire
Great job for first attempt, great job for sure. While I am usually the first to say, take it to a professional, if you can not find a professional around you that you trust, better to go through $30 of tint trying than to pay serveral hundred and have a 'professional' screw up something on your ride.
I would suggest not trying the heat at this point as more of the glue has adhered to the glass and you could mess the film up pretty badly. Heat should only be applied when still the film is still wet and moveable. The only thing I could suggest is if you have some small bubbles that will not go away (after several weeks of the car getting warm out in the sun) I would make a TINY hole in the bubble (with a pin) and apply some heat. Usually this method works well for an after the fact fix, should lay right down....
I would suggest not trying the heat at this point as more of the glue has adhered to the glass and you could mess the film up pretty badly. Heat should only be applied when still the film is still wet and moveable. The only thing I could suggest is if you have some small bubbles that will not go away (after several weeks of the car getting warm out in the sun) I would make a TINY hole in the bubble (with a pin) and apply some heat. Usually this method works well for an after the fact fix, should lay right down....