
Auto Dimming Mirror - it's not just for '04s anymore!

Senior Member
Joined: Apr 2006
Posts: 25,432
Likes: 647
From: Ontario
Originally Posted by alaxfire
The sensor toward the windshield is the daylight sensor.
The sensor toward the rear ( mirror side ) is the dimming sensor.
I too have the green light on my 2002 Concorde Limited mirror, wish there WAS one on the XF autodimmer, but noooooooo .....
1. cover the windshield side sensor ( make it think it is night time )
2. shine a flashlight on the mirror side sensor, the mirror should dim down.
Senior Member
Joined: Sep 2011
Posts: 9,595
Likes: 26
From: Kellyville, Ok
Originally Posted by maxcichon
Are you thinking of tapping the hole 1/4-20 in place? I would recommend you remove the mirror to do it.
1) you only get ~ 25% thread. Into pot metal (cast zinc). It is not a #7 hole. You'll want to make a stud assembly using a very thin nut inside and outside and a 3/4" long stud or set screw, or use a Button Head screw from the inside, and a coupling nut on the outside. Anything larger (read: taller) seems to interfere with the mounting hardware inside when you twist the thing back into place.
2) If you do try to tap it in place, there is ~ 5/16" space inside the shell before you hit the mounting hardware. Use a bottoming or plug tap.
Best of luck, though. It's one of the things I plan on doing one of these days too. I bought one of the Auto Dimmers from Alaxfire too. Nice feature they decided "der Americaners" didn't really need...")
1) you only get ~ 25% thread. Into pot metal (cast zinc). It is not a #7 hole. You'll want to make a stud assembly using a very thin nut inside and outside and a 3/4" long stud or set screw, or use a Button Head screw from the inside, and a coupling nut on the outside. Anything larger (read: taller) seems to interfere with the mounting hardware inside when you twist the thing back into place.
2) If you do try to tap it in place, there is ~ 5/16" space inside the shell before you hit the mounting hardware. Use a bottoming or plug tap.
Best of luck, though. It's one of the things I plan on doing one of these days too. I bought one of the Auto Dimmers from Alaxfire too. Nice feature they decided "der Americaners" didn't really need...
Senior Member
Joined: Sep 2007
Posts: 8,015
Likes: 14
From: MOFN, AL, 70 miles from George

Originally Posted by Mrmiata
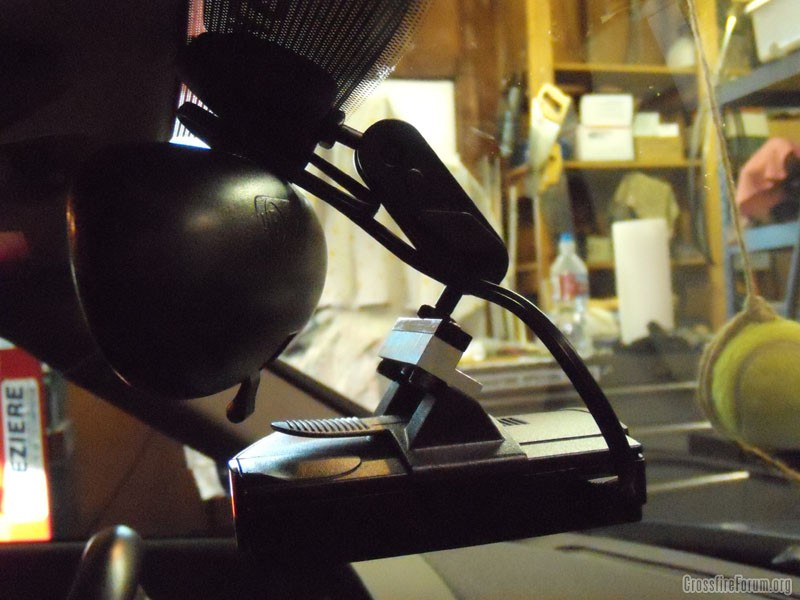
Got it loose and tapped easy enough, screwed the ball stud into it, and actually put blue locktite on it and just tightend down against the base. Had to custom contour on one side of my CCTV mini bracket radius as it wanted to lay against the windshield. Raised the mirror higher than my normal viewing pleasure, tightend the bracket down and moved the radar detector into position and adjust the mirror down to my proper angle, which snugged it against the detector.. should prevent any bounce rattle that way.
Pictures!
Senior Member
Joined: Sep 2011
Posts: 9,595
Likes: 26
From: Kellyville, Ok
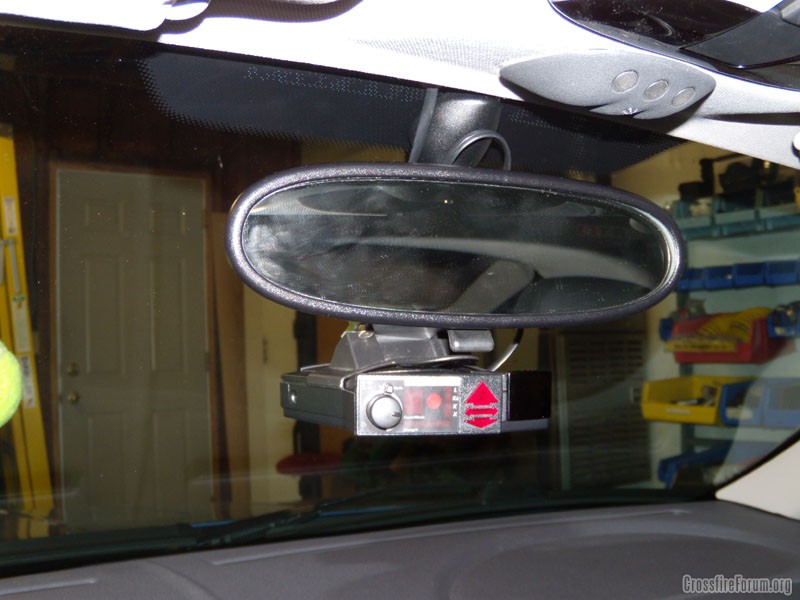
I like it better than suction cup mounted.. Think I'll have to paint it black or a grey though.

Edit for future references - $4.00 Mini CCTV camera mount from ebay
Edit for future references - $4.00 Mini CCTV camera mount from ebay
Last edited by Mrmiata; Mar 9, 2012 at 12:25 PM.

Senior Member
Joined: Oct 2007
Posts: 1,271
Likes: 1
From: Great Falls, Montana ( Big Sky Country)
Did you have to increase your fuse size?
I have wired mine just as you but blow the fuse the instant it's powered.
I know it should drag that much but just wondering.
Good job,
Mike
I have wired mine just as you but blow the fuse the instant it's powered.
I know it should drag that much but just wondering.
Good job,
Mike
Joined: Dec 2010
Posts: 103
Likes: 0
From: Virginia Beach
BTW I just saw a 2004 auto dim mirror on eBay, if anyone is still looking for he. I over mine, and with these install instructions, you can't go wrong.

Forum Regular
Joined: Aug 2012
Posts: 307
Likes: 0
From: Londonderry, N.H.

This write up was a big help as I just picked up a near mint mirror from a salvage yard for $30.00 with only the mirror harness.
The # 6 yellow wire for reverse light input - has anyone hooked this up? When I replaced my headliner I ran a wire from the dome light to the rear tail lights. Would the # 6 wire work if I tied into the one of the reverse socket wires and if so which wire?
 Just for any of you out there installing this mirror and only have the harness that comes with the mirror, it is a 6 pin connector and you need to use pin #'s 6,4, and 3, #6 is a yellow wire and would be for the reverse light input, # 4 is a violet wire and is used to connect to switched 12 volts, and the # 3 is a black wire and is used for ground. The #'s are inside where the pins come out and are numbered 6.5.4.3.2. and 1 (when looking at the inside of the connector) hope this helps some one in the future. Although I have not done anything for the reverse light, I'm just going to live with it working all the time.
I will say this, this option should of came with all the Xfires it is really a neat addition
And thanks to OCR-XFR for the great write up
The # 6 yellow wire for reverse light input - has anyone hooked this up? When I replaced my headliner I ran a wire from the dome light to the rear tail lights. Would the # 6 wire work if I tied into the one of the reverse socket wires and if so which wire?
I will say this, this option should of came with all the Xfires it is really a neat addition
And thanks to OCR-XFR for the great write up
Last edited by csteve0355; Nov 25, 2015 at 12:02 PM. Reason: spelling

Thread
Thread Starter
Forum
Replies
Last Post
Valk
Parts/Accessories for sale - Archive
0
Sep 17, 2015 11:43 AM
Currently Active Users Viewing This Thread: 1 (0 members and 1 guests)