
Seat Heaters in Racing Seats using Factory Switch How-To

Thread Starter
Joined: Apr 2014
Posts: 51
Likes: 0
From: Hampton, VA
I have done a little write up of installing seat heaters into aftermarket racing seats using the factory switches and wiring. I wanted racing seats for a while now but the wife WILL NOT go without seat heaters, not saying I don't enjoy them too. Considering my drivers side heater stopped working about a month ago I figured it was a good time for the swap. Hope this helps someone else out considering I have gained an abundance of info from this site.

First you need to pick up some hog ring pliers and a bag of hog rings. They are available at most large upholstery supply stores or online. I have also bought a set at Lowes before but they were poor quality and hard to use.
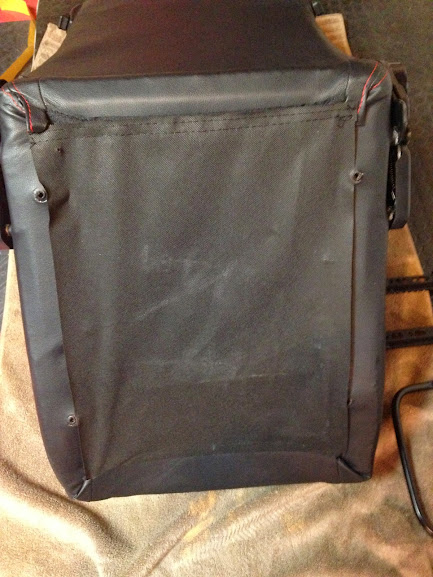
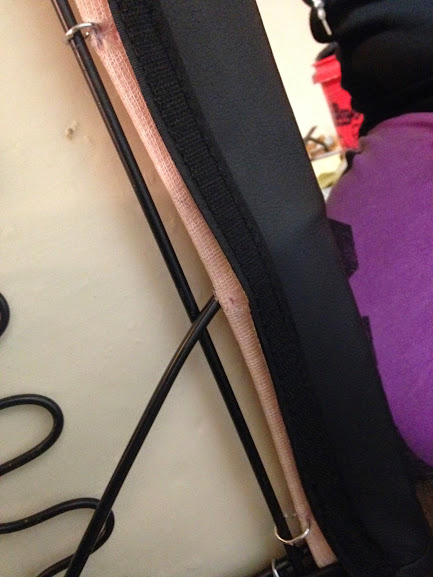
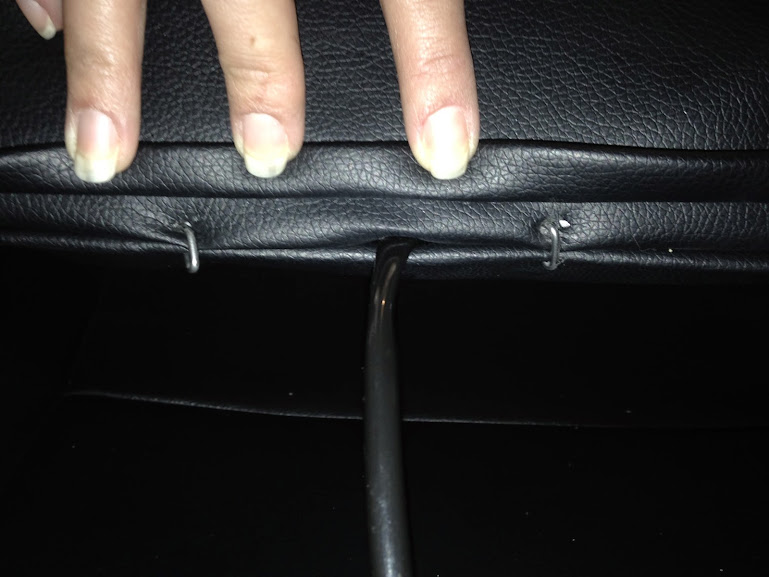
Here is a view of the bottom of the racing seat.

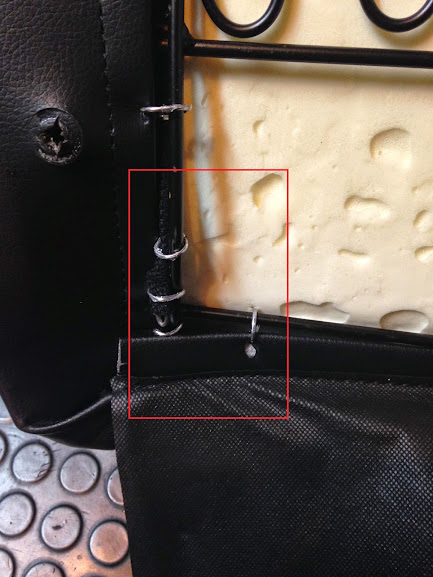
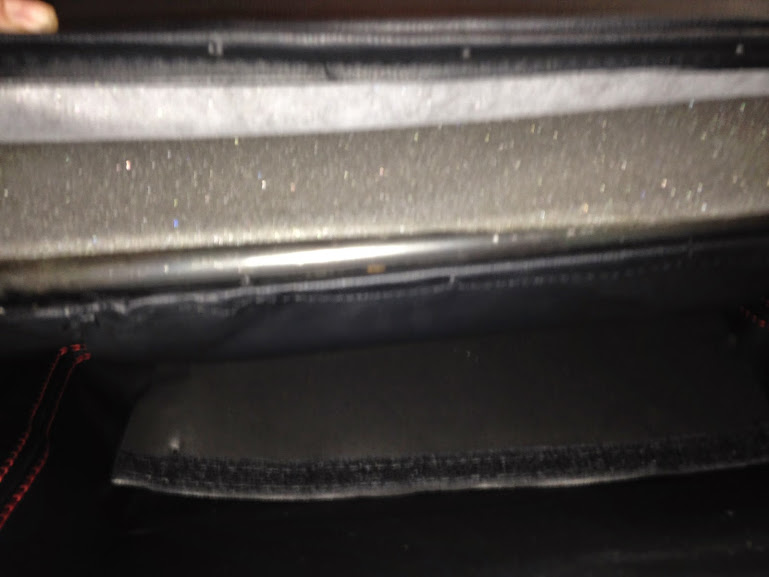
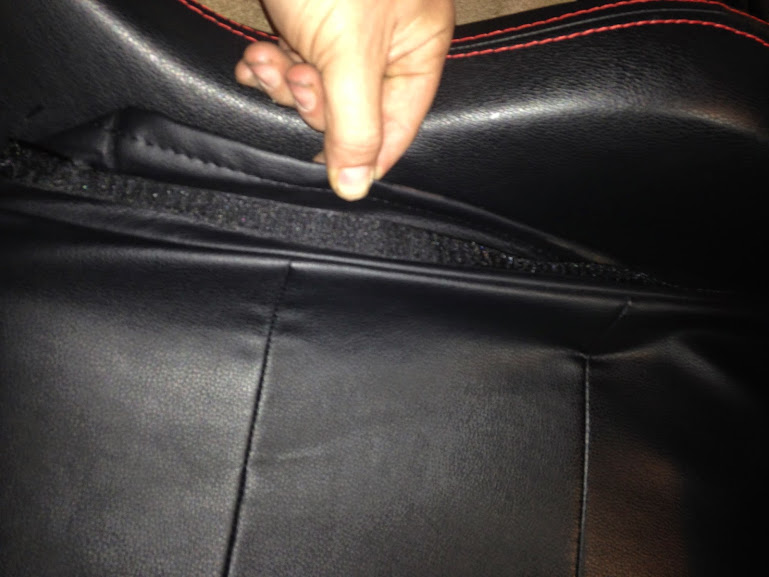
Here is what you will see after you peel back the velcro fabric piece.
You will need to cut all the factory hog rings holding the front and sides of the seat bottom, enough for you to pull the material (fabric, leather, vinyl, ect.) off the foam
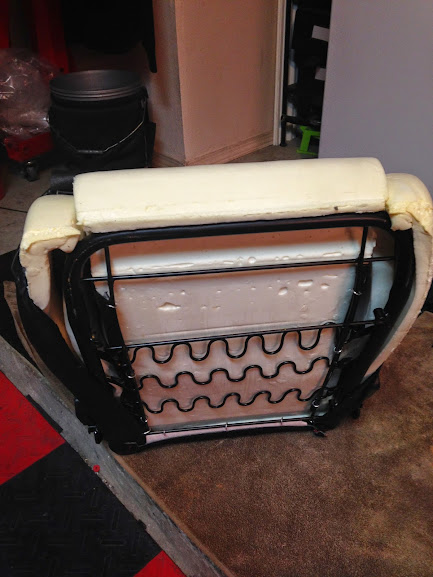

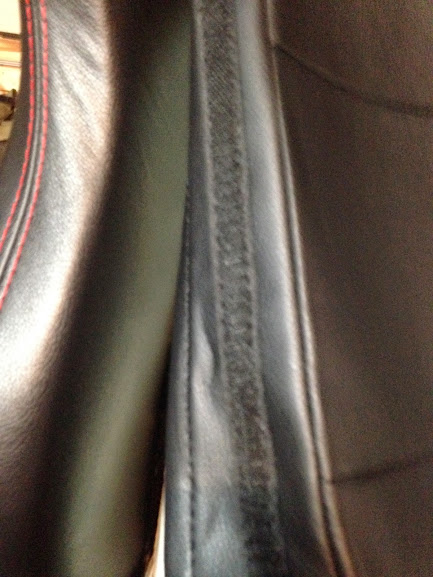
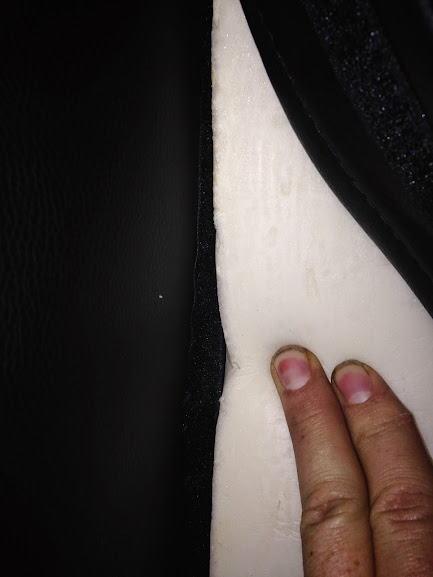
Here is what you should see after cutting the hog rings and pulling the fabric back from the seat bottom.
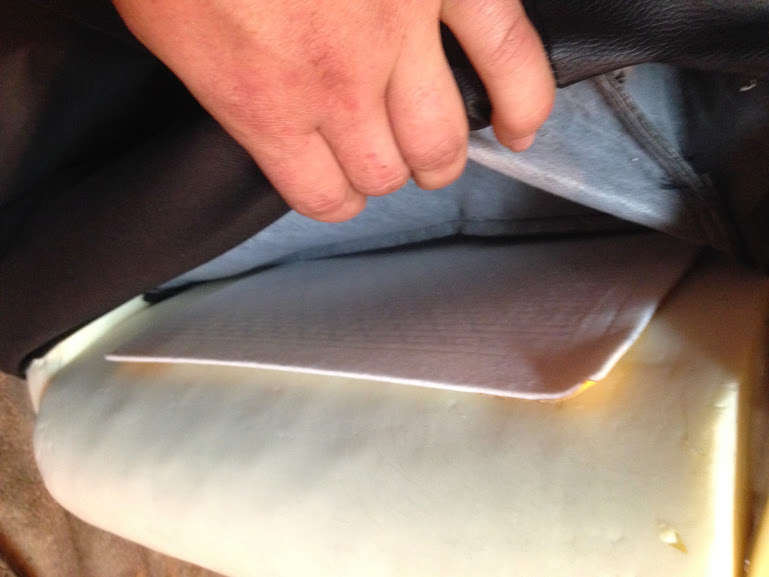
Now you will feed one of the seat heater elements into the seat bottom feeding the wiring out the back. Pull the material back down over the foam and re-install the hog rings you cut off previously.
Now you can begin the seat back, the hog rings are located between the seat back and the seat bottom. If you fold the seat back forward or adjust the seat back all the way forward you can usually access these hog rings. Cut the hog rings to seperate the two pieces of material apart.
First you need to pick up some hog ring pliers and a bag of hog rings. They are available at most large upholstery supply stores or online. I have also bought a set at Lowes before but they were poor quality and hard to use.
Here is a view of the bottom of the racing seat.
Here is what you will see after you peel back the velcro fabric piece.
You will need to cut all the factory hog rings holding the front and sides of the seat bottom, enough for you to pull the material (fabric, leather, vinyl, ect.) off the foam
Here is what you should see after cutting the hog rings and pulling the fabric back from the seat bottom.
Now you will feed one of the seat heater elements into the seat bottom feeding the wiring out the back. Pull the material back down over the foam and re-install the hog rings you cut off previously.
Now you can begin the seat back, the hog rings are located between the seat back and the seat bottom. If you fold the seat back forward or adjust the seat back all the way forward you can usually access these hog rings. Cut the hog rings to seperate the two pieces of material apart.
Thread Starter
Joined: Apr 2014
Posts: 51
Likes: 0
From: Hampton, VA
Now that you separated the material, you can pull the material through the front. This seat had velcro holding the material in the crack making for a very easy installation. If your seats don't you will have to feed the other heater element inside the seat back like you did in the seat bottom.


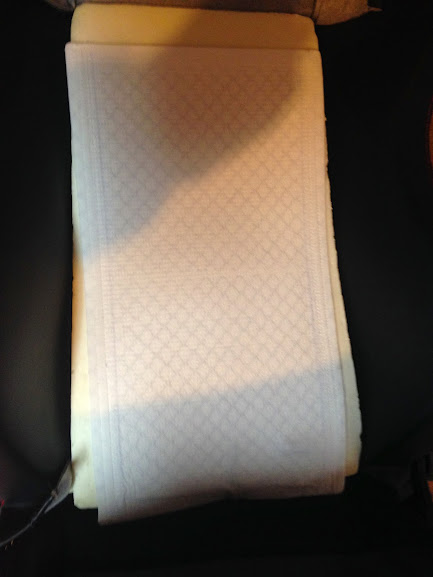
This is what you will have after pulling the seat back material off. Pull the protective paper off the tape on the seat heater element and install on foam pushing the wiring through the crack between the seat bottom and the seat back.

Make sure the wire is fed the right way and re-install the hog rings.

Now push the fabric with velcro back into the cracks on each side until the seat back looks like it did before you even started
Thread Starter
Joined: Apr 2014
Posts: 51
Likes: 0
From: Hampton, VA
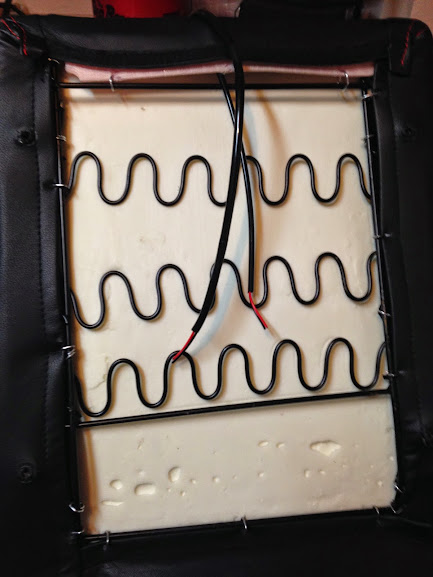
This is what the bottom of the seat should look like with both element wiring harness'.

This is with the velcro fabric piece stuck back down.
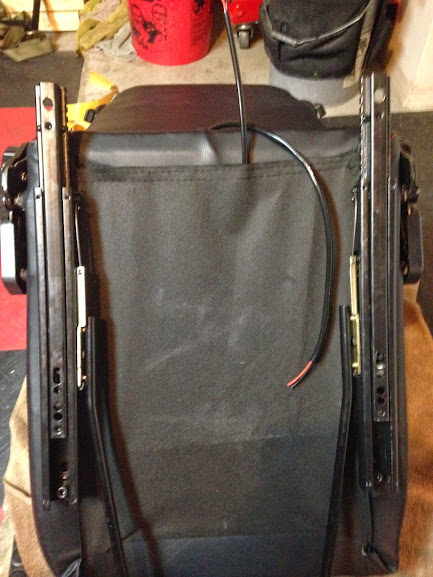
This is with the seat sliders re-installed.
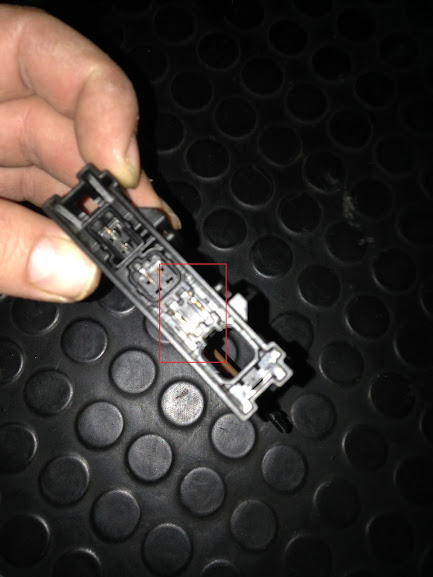
Now to the wiring, this is the factory module from the bottom of the seat. There are 3 plugs that go into this module. The 2 thick wires one red and one brown go to the seat adjustment switch, I cut those wires and taped them up. Four more wires go to the seat belt buckle, they are easy to determine by the long wire harness from the buckle to the plug. There are 4 other wires, these are the seat heater wires, 2 brown and 2 blue, brown are negative and blue are positive. The pictures above show red boxes, that is where the seat heater elements plug into.
These are the seat heater wires and plugs you need to cut from the bottom of the factory seats

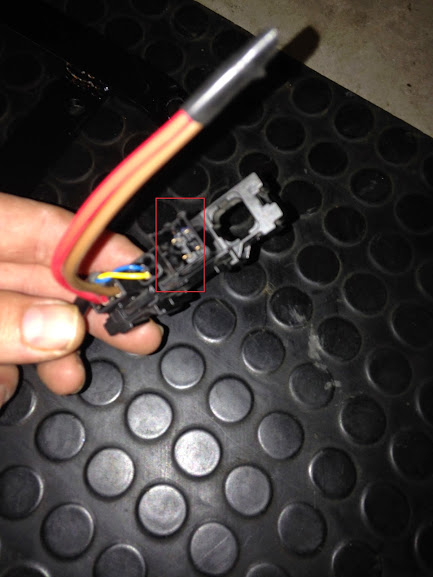
Now splice those connector to the seat heater elements, remember blue is positive and brown is negative.


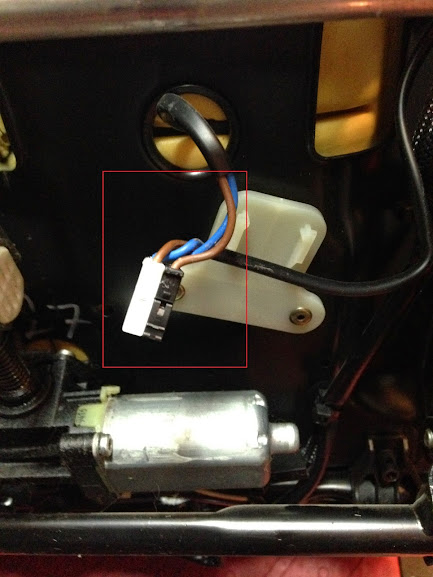
These pics are showing how the white and black connector snap back together and then plug into the factory module. The plug can only go in one way, it has a notch on it so don't worry about getting it in wrong.

This is a pic of the factory plug coming out of the carpet that you will plug back into the factory seat module.
Thread Starter
Joined: Apr 2014
Posts: 51
Likes: 0
From: Hampton, VA
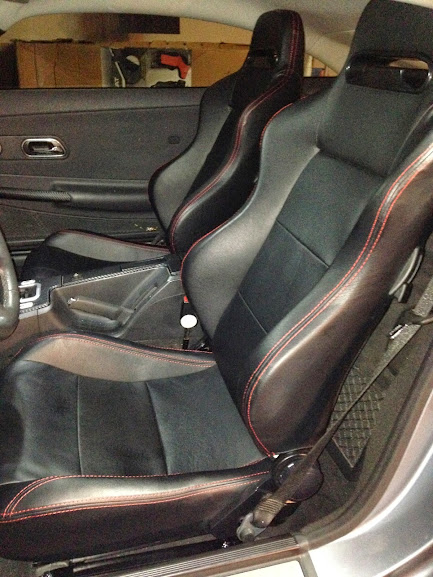
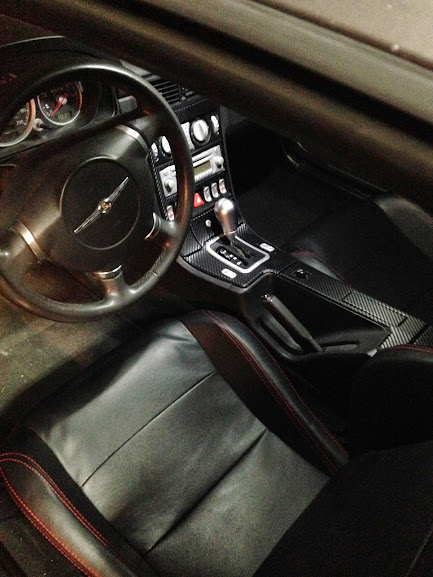
Here are the seats re-installed and seat heaters on. I finished this so late I haven't had time to drive the car with the seat heaters on to get their full effect but I did turn them on and they work great. I will report back after having them in the car and using them for a while.
A couple other things I wanted to note on, I try to make everything I do reversible and I feel this way was the best, all the wires I cut on the factory seats can be spliced back together. I also liked the fact I didn't have to cut any wires going to the seat belt buckle. You also don't have to remove the seat heater white and black plugs from the module if you are doing the seats and heaters at the same time, you can just leave it plugged in and cut the 2 blue and 2 brown wires. I did it this way because I had installed the seats in the car about 2 weeks before the heaters and I needed the seat belt buckle back then.
When you are shopping for seat heater elements try to find a set that just has a red and a black wire coming out of the elements. I ordered a set that had the seat bottom plug into the seat back and the seat back element had all kinds of wires running to it. I am guessing because of the adjustable temperature switch. So with figuring out the wiring on the first seat, removing both seats, tearing them down, taking pictures and putting it all back together took me about 2 hours.
The factory seat heater switch has a low and high setting. The way the switch is feeds a different voltage to the seat heater elements and that is how they get 2 different settings. Low setting is about 8 volts and high is about 12 volts. The more voltage you feed to the heater elements the hotter they get. If I missed something or if you have any questions please feel free to ask.
The factory seats weighed D/S 52.2 LBS P/S 47.4 LBS
The racing seats with slider, brackets and heaters weighed
D/S 37.4 LBS P/S 38.4 LBS
Total Weight Savings 23.8 LBS
Last edited by TexasSRT; Jan 3, 2015 at 01:24 PM.
Senior Member
Joined: Apr 2006
Posts: 25,432
Likes: 650
From: Ontario
With the permission of TexasSRT I have made his post into a PDF.
Click Here
Click Here
Last edited by onehundred80; Jan 4, 2015 at 01:33 PM.

Senior Member
Joined: Aug 2008
Posts: 1,203
Likes: 3
From: Elburn, IL
Works for me.
~edit~ I see the link was updated after noon today...so it may have been fixed between when you tried, and now.
Question for the OP. What sliders and brackets did you use? Do these seats sit higher or lower than factory?
~edit~ I see the link was updated after noon today...so it may have been fixed between when you tried, and now.
Question for the OP. What sliders and brackets did you use? Do these seats sit higher or lower than factory?
Last edited by ImportLabSRT; Jan 4, 2015 at 05:10 PM.
Thread Starter
Joined: Apr 2014
Posts: 51
Likes: 0
From: Hampton, VA
I used the sliders that came with the seats, the brackets I built myself. I was going to do a write up on the brackets but I figured anyone with a welder and a torch could probably figure it out. And to tell you the truth, for the money I spent on materials it wasn't much cheaper than what Needswings sells the brackets for. They state they are for Recaro or Sparco seats but most racing seats mount in a similar location and the slider usually have a few different holes front to rear for different mounting brackets. The only issue would be side to side mount but it would still be easier to start with the Needswings brackets and work off a good starting base.
Height wise I would estimate about an inch more head clearance, 1-2 inches of leg room and 100% more comfort from the new seats. After about an hour of driving with the old seats my right leg would start bothering me, after driving back home 7 hrs it would be killing me the whole weekend. After driving it these last couple weeks with the new seats I haven't had any problems.
Senior Member
Joined: Aug 2008
Posts: 1,203
Likes: 3
From: Elburn, IL
I used the sliders that came with the seats, the brackets I built myself. I was going to do a write up on the brackets but I figured anyone with a welder and a torch could probably figure it out. And to tell you the truth, for the money I spent on materials it wasn't much cheaper than what Needswings sells the brackets for. They state they are for Recaro or Sparco seats but most racing seats mount in a similar location and the slider usually have a few different holes front to rear for different mounting brackets. The only issue would be side to side mount but it would still be easier to start with the Needswings brackets and work off a good starting base.
Height wise I would estimate about an inch more head clearance, 1-2 inches of leg room and 100% more comfort from the new seats. After about an hour of driving with the old seats my right leg would start bothering me, after driving back home 7 hrs it would be killing me the whole weekend. After driving it these last couple weeks with the new seats I haven't had any problems.
Height wise I would estimate about an inch more head clearance, 1-2 inches of leg room and 100% more comfort from the new seats. After about an hour of driving with the old seats my right leg would start bothering me, after driving back home 7 hrs it would be killing me the whole weekend. After driving it these last couple weeks with the new seats I haven't had any problems.

Thread
Thread Starter
Forum
Replies
Last Post
usprb1976
TSBs and How-To Articles
5
Apr 4, 2024 04:57 PM
Currently Active Users Viewing This Thread: 1 (0 members and 1 guests)